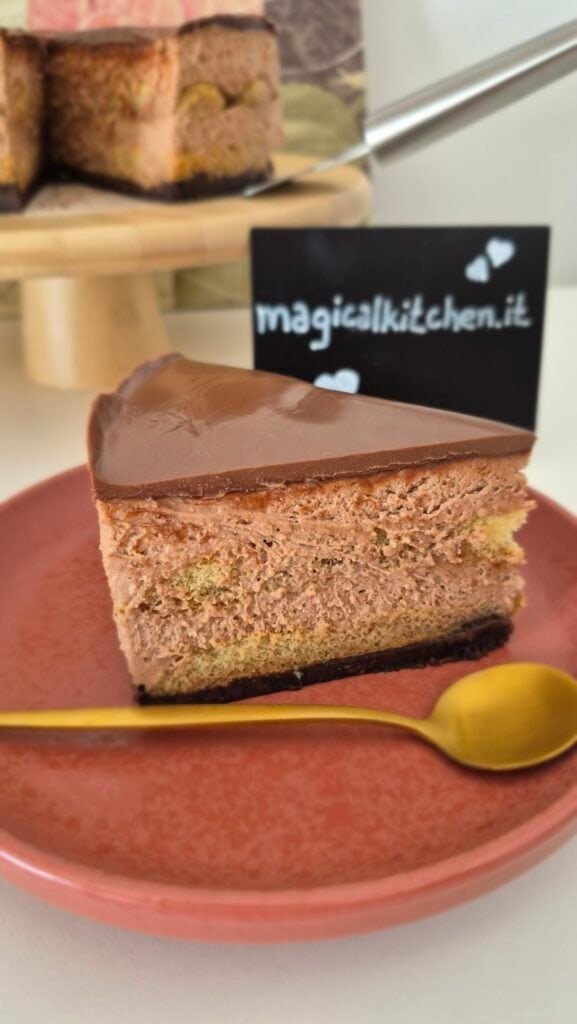
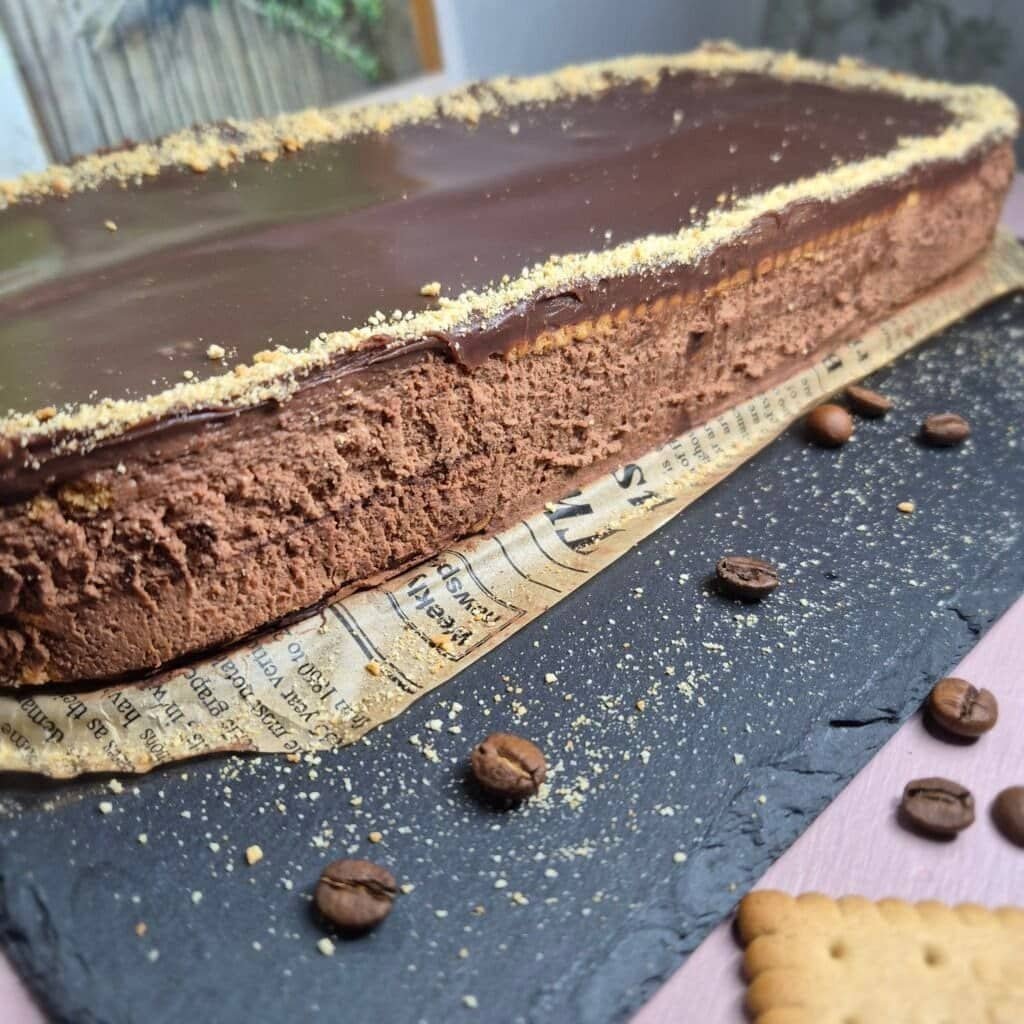
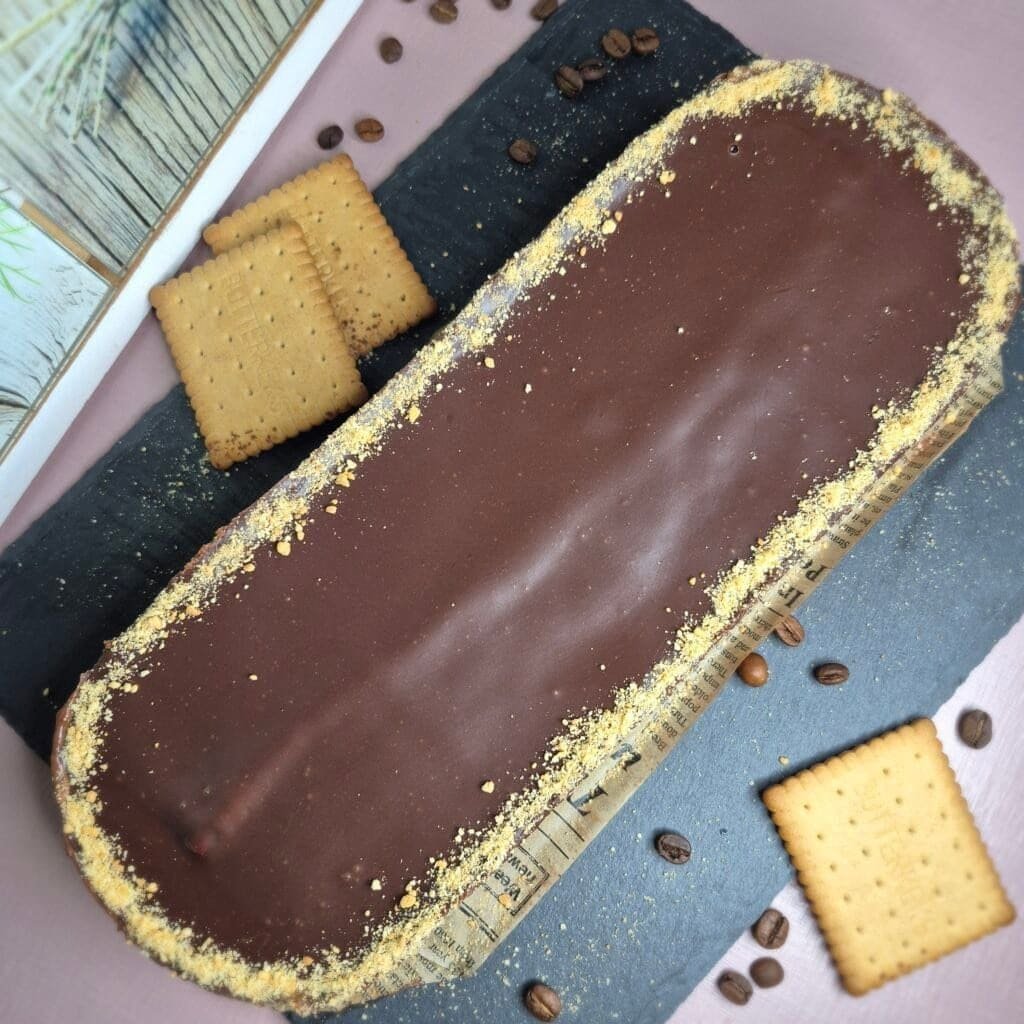
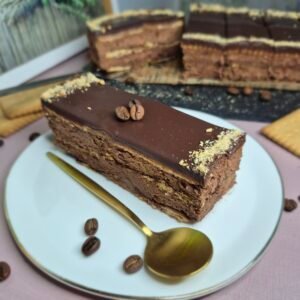
Some cakes look good in photos but are not that enjoyable to eat. This one is the opposite. It is simple, cold from the fridge, easy to slice, and the texture is what makes it worth making again. The biscuits soften just enough, the filling stays light, and the top sets into a smooth chocolate layer that finishes everything properly.
I make this as a chilled biscuit cake, not as a baked sponge cake. It is practical, clean to layer, and easy to prepare ahead. Once it sits in the fridge for a few hours, the layers hold together nicely and each slice looks neat without much effort.
What I like most here is the balance. The biscuit layers give structure. The filling is chocolatey without feeling too heavy. The topping adds one more layer of flavor and helps seal the cake so it stays moist.
It is also the kind of cake that tastes better after resting. Right after assembling, it is still soft and loose. After chilling, everything comes together and the flavor is much better.
Why this cake works
This cake works because each part has a job.
The biscuits build the structure. They replace sponge layers, but without baking, cooling, or trimming. Once they absorb a little moisture, they soften into clean cake-like layers.
The filling is not just whipped cream mixed with chocolate all at once. It is made more carefully. The chocolate is melted first, mixed with cocoa powder, then cooled slightly. After that, the cream is added little by little. That step matters because it keeps the mixture smooth and even.
The top layer is a quick chocolate ganache. It is not there only for looks. It adds another soft layer and keeps the surface from drying out in the fridge.
This is also a useful recipe when I want a cake that can be made in stages. I can prepare it, chill it, then decorate it later with whatever I have on hand.
Ingredient breakdown
Petit biscuits
I use petit biscuits because they layer neatly and soften well without turning mushy too fast. They also have a mild flavor, which lets the filling stand out.
If you use a different type of biscuit, choose one that is plain, dry, and sturdy. Very buttery cookies can fall apart too fast once soaked.
Milk or coffee for soaking
The original base uses milk, and that keeps the flavor softer and more neutral. If I want a slightly deeper taste, I sometimes use coffee instead. Both work.
The important part is not the liquid itself. It is the amount. The biscuits should be moistened lightly, not soaked through.
Cocoa powder
There is cocoa powder in the base and in the filling. It gives the cake a more direct chocolate taste and fills in the gaps where melted chocolate alone can sometimes taste flat.
Use unsweetened cocoa powder here. It blends best and keeps the flavor clean.
Dark chocolate
The filling depends on dark chocolate, so use one that melts smoothly and tastes good on its own. Since the ingredient list is short, the chocolate quality really comes through.
I usually avoid anything overly bitter for this kind of cake. A balanced dark chocolate works best.
Whipping cream
Cold whipping cream is what gives the filling its light texture. This is not a buttercream and not a dense ganache filling. It should feel airy, smooth, and easy to spread.
Cream with a good fat percentage is important because it whips more reliably and gives the cake a better set after chilling.
Powdered sugar
There is only a small amount in the filling, and that is enough. The chocolate already brings sweetness, so the powdered sugar is there mostly to round things out.
This cake should not taste aggressively sweet.
Chocolate topping
The topping is very simple: hot cream poured over chopped chocolate. Once mixed, it becomes glossy and pourable.
It spreads easily over the top layer and gives the finished cake a cleaner look with very little work.
How I make this cake
1. Start with the filling
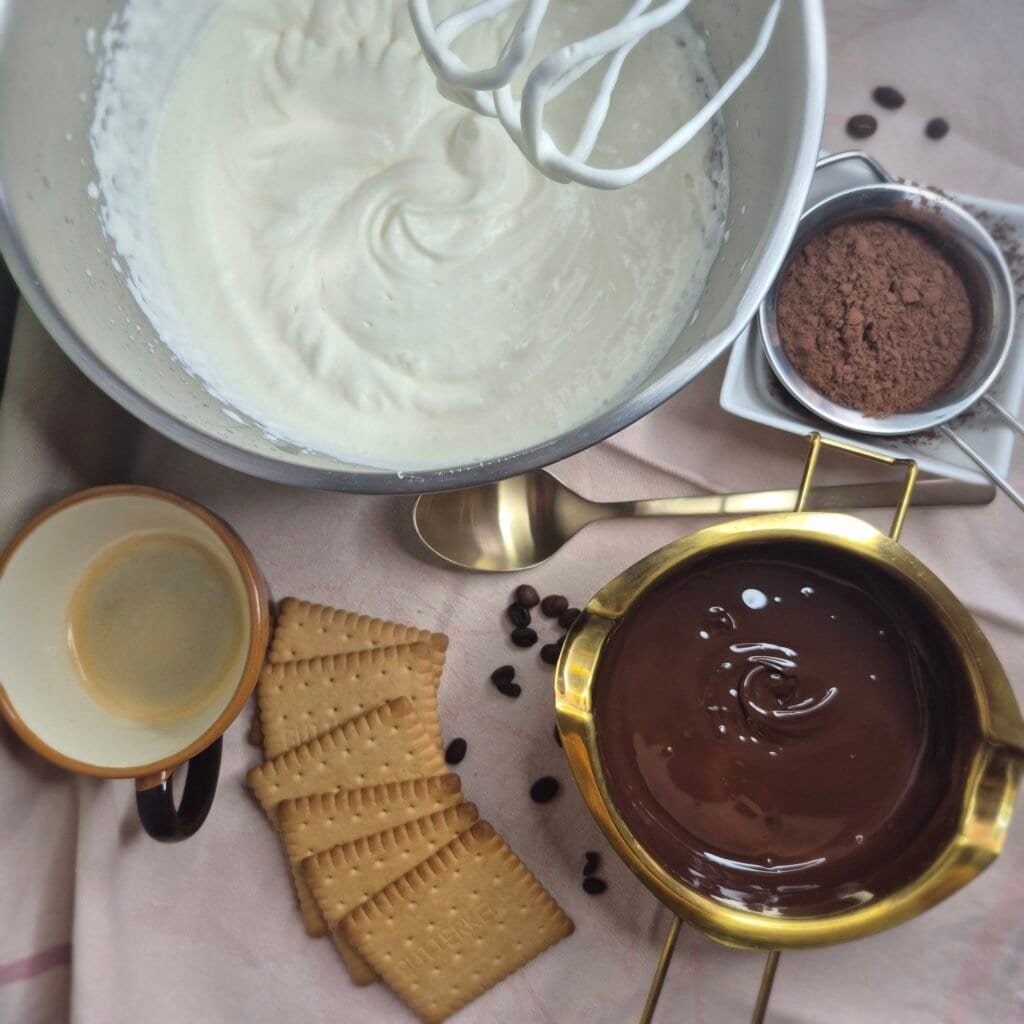
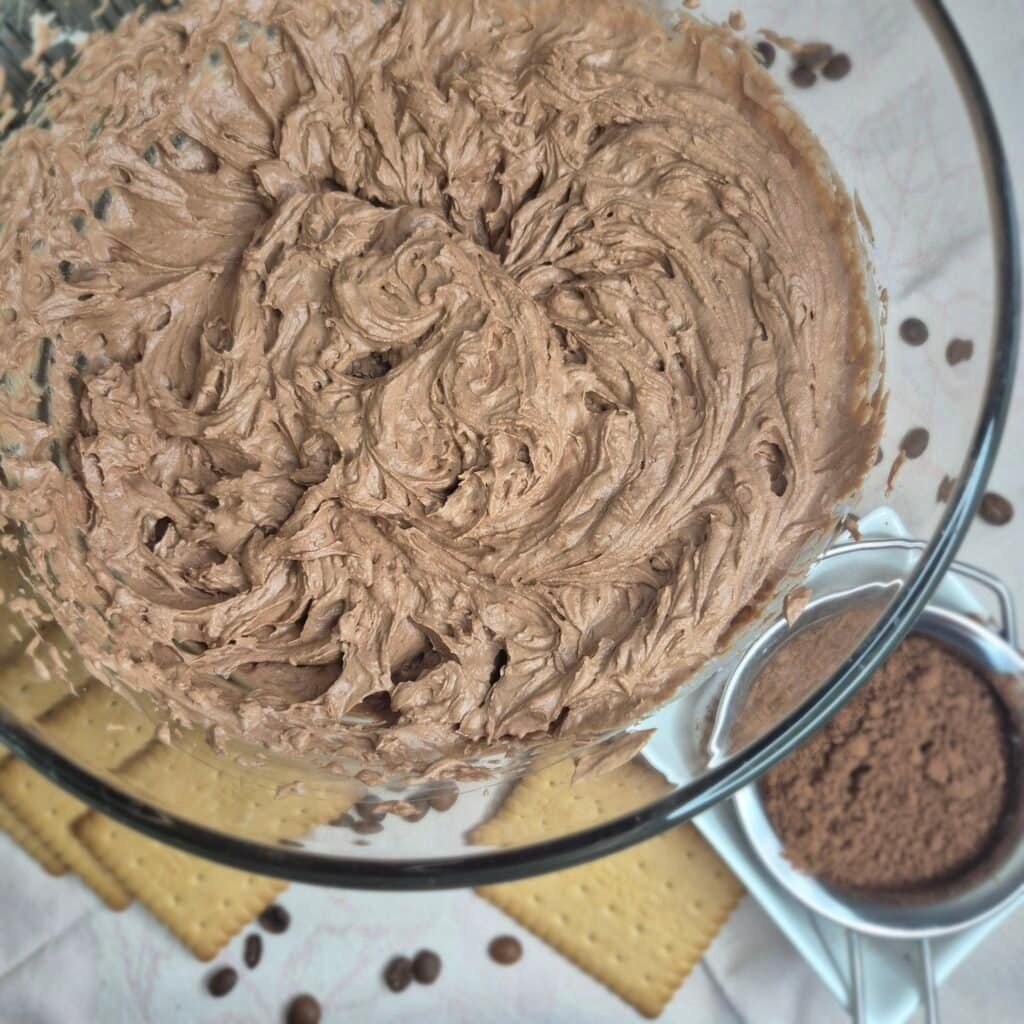
I melt the chocolate first, either over a double boiler or in short bursts in the microwave. Once it is fully melted, I stir in the cocoa powder and mix until the mixture is smooth.
This step should not be rushed. Cocoa powder can leave small lumps if it is added carelessly, so I mix until everything looks even and glossy.
Then I leave it aside to cool slightly. It should not be hot when the cream goes in. Lukewarm is the right point.
2. Whip the cream only to a half-whipped stage
The cream should be cold straight from the fridge. I add the powdered sugar and whip just until it thickens.
I do not whip it to stiff peaks.
That softer, half-whipped texture makes it easier to combine with the chocolate and helps keep the filling smooth. If the cream is whipped too much, the filling can become grainy or heavy.
3. Combine the cream with the chocolate slowly
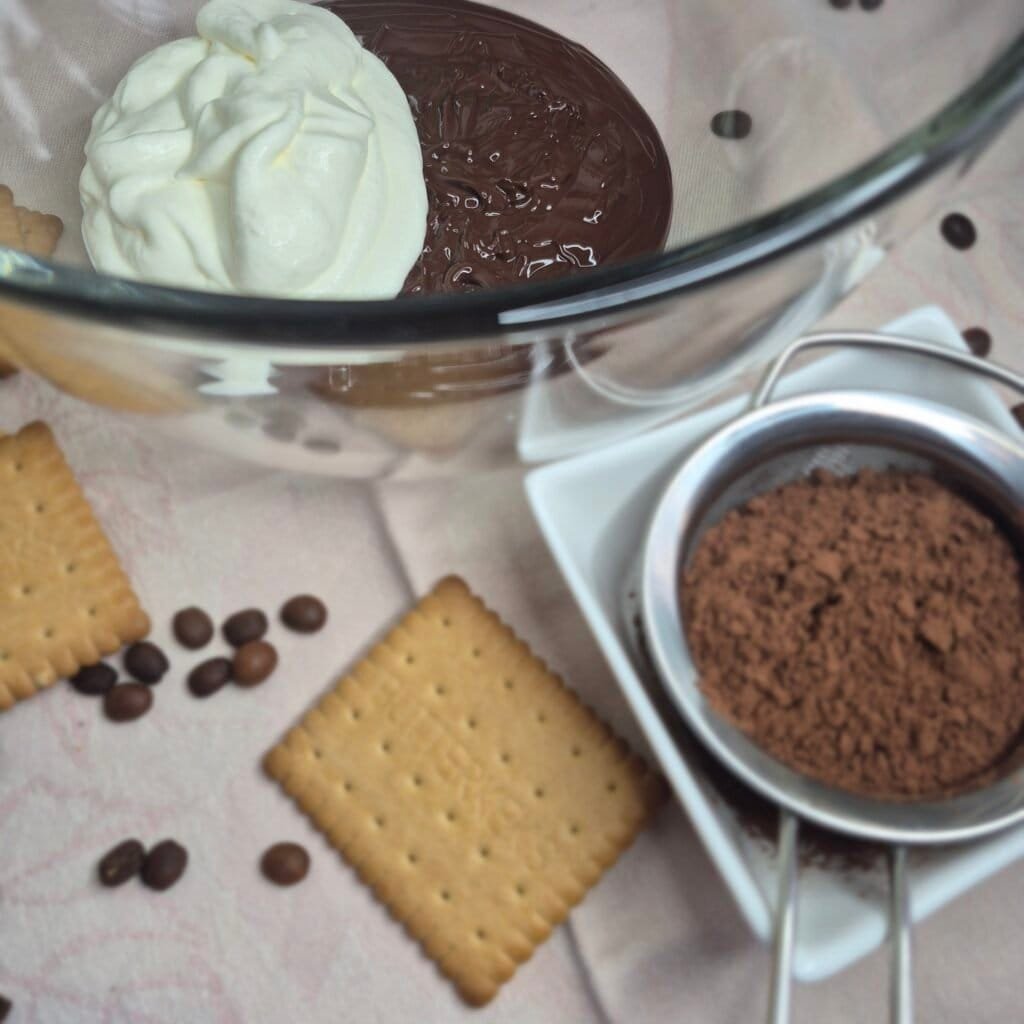
This is the part that makes the filling work.
I add the whipped cream to the chocolate one spoon at a time, mixing after each addition. At first the mixture looks tighter and denser, which is normal. As more cream is added, it loosens and turns into a smooth filling.
Adding it gradually helps the two mixtures come together evenly. If everything is dumped in at once, it is much easier to lose the texture.
Once the filling is ready, I divide it into two equal parts.
4. Build the first layer
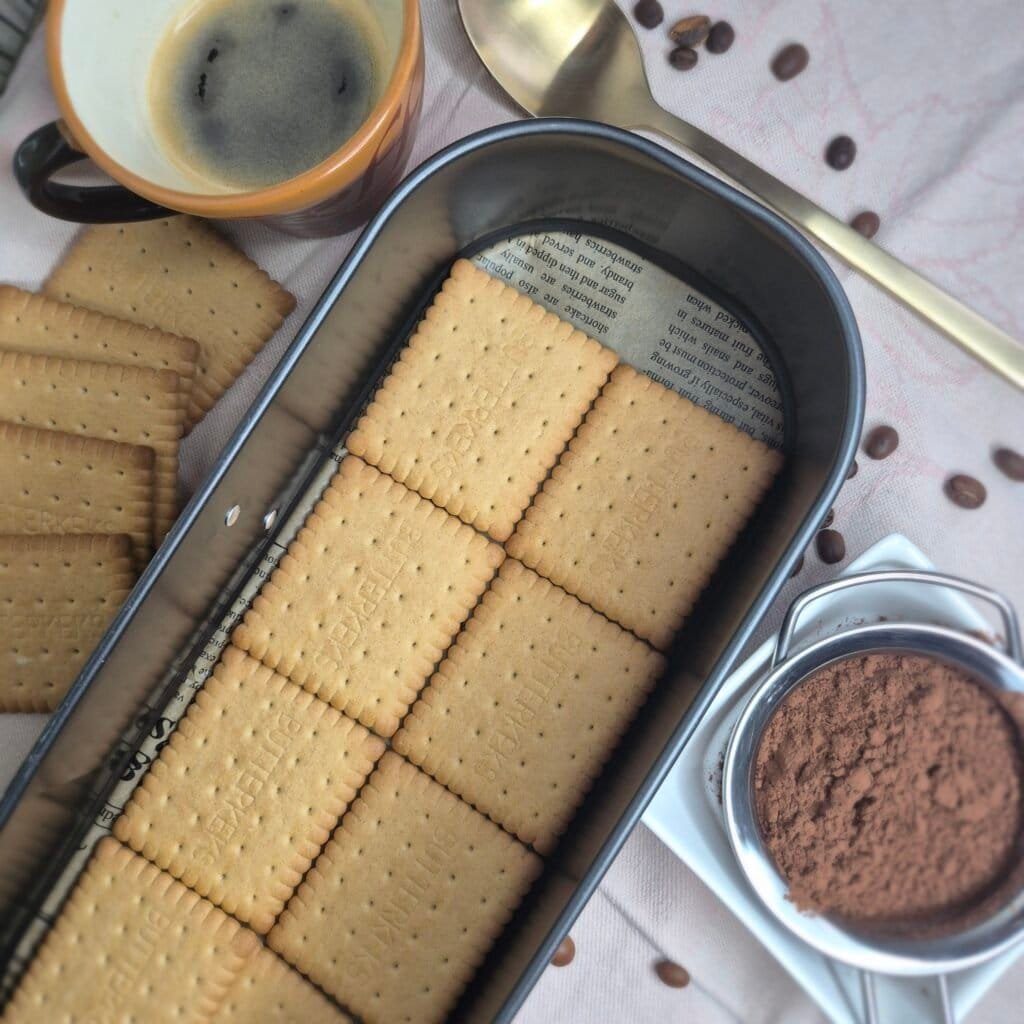
I arrange a layer of biscuits in the tray.
Then I lightly moisten them with the soaking liquid. This part needs a light hand. Too much liquid will make the biscuits collapse and the cake will lose its shape later.
After that, I dust a little cocoa powder over the biscuit layer and spread the first half of the filling on top.
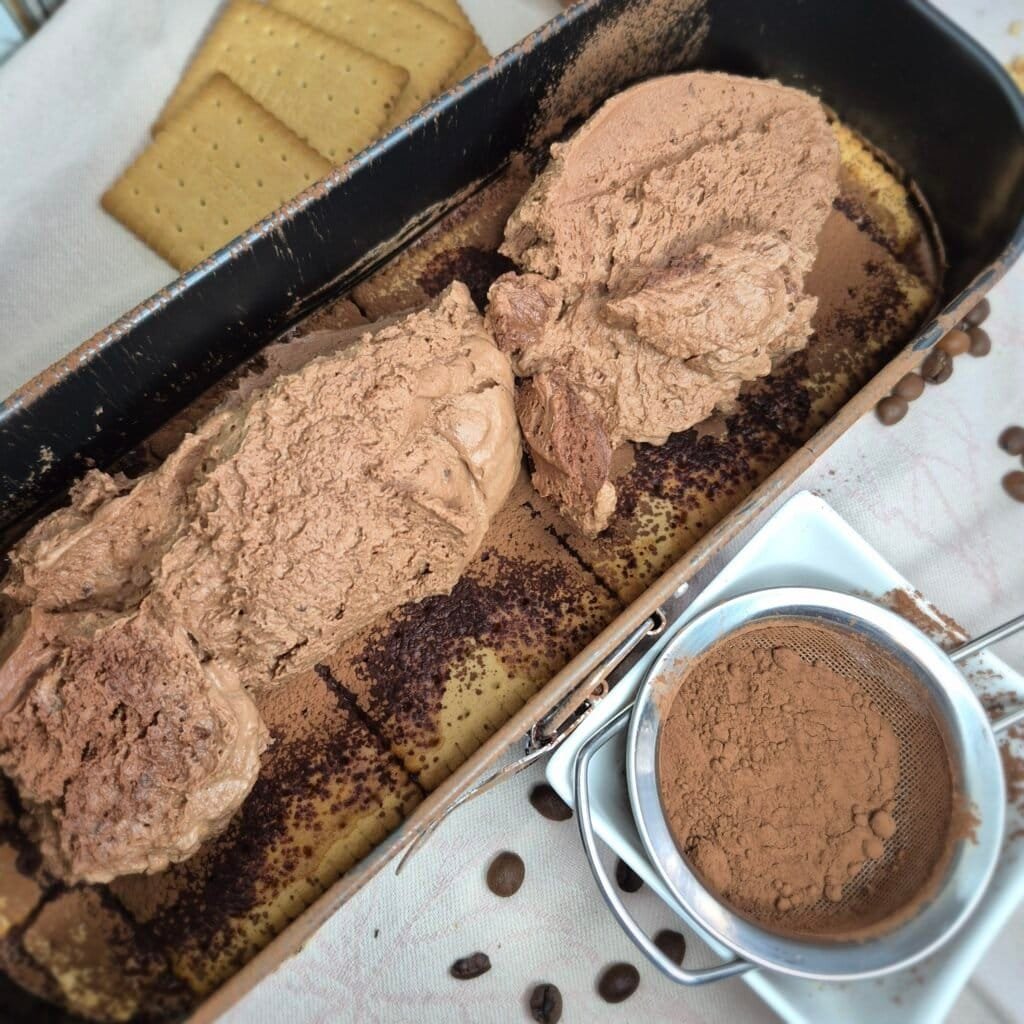
I smooth it gently with the back of a spoon or a small spatula.
5. Add the second layer
I repeat the same process for the second layer.
Another layer of biscuits.
Another light drizzle of soaking liquid.
Another light dusting of cocoa powder.
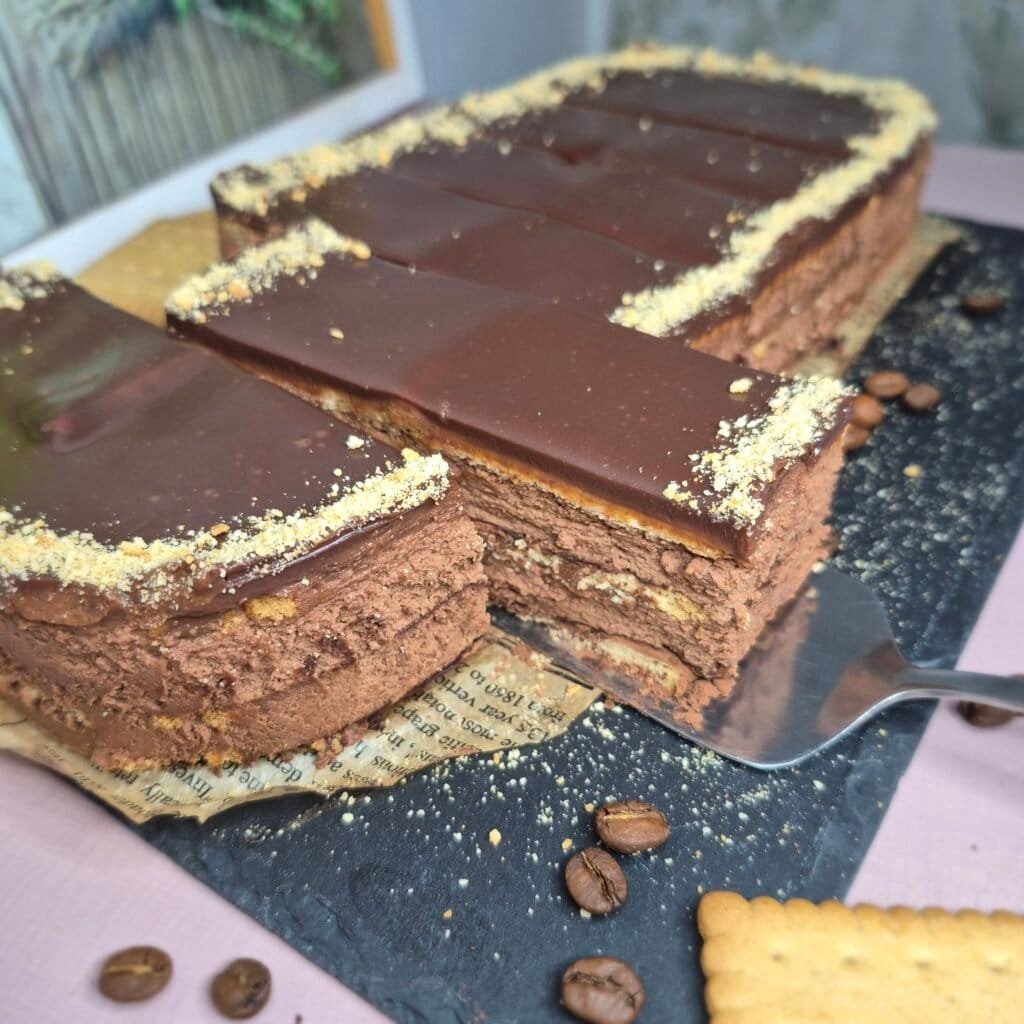
Then the second half of the filling goes on top. I spread it evenly all the way to the edges so the slice looks neat later.
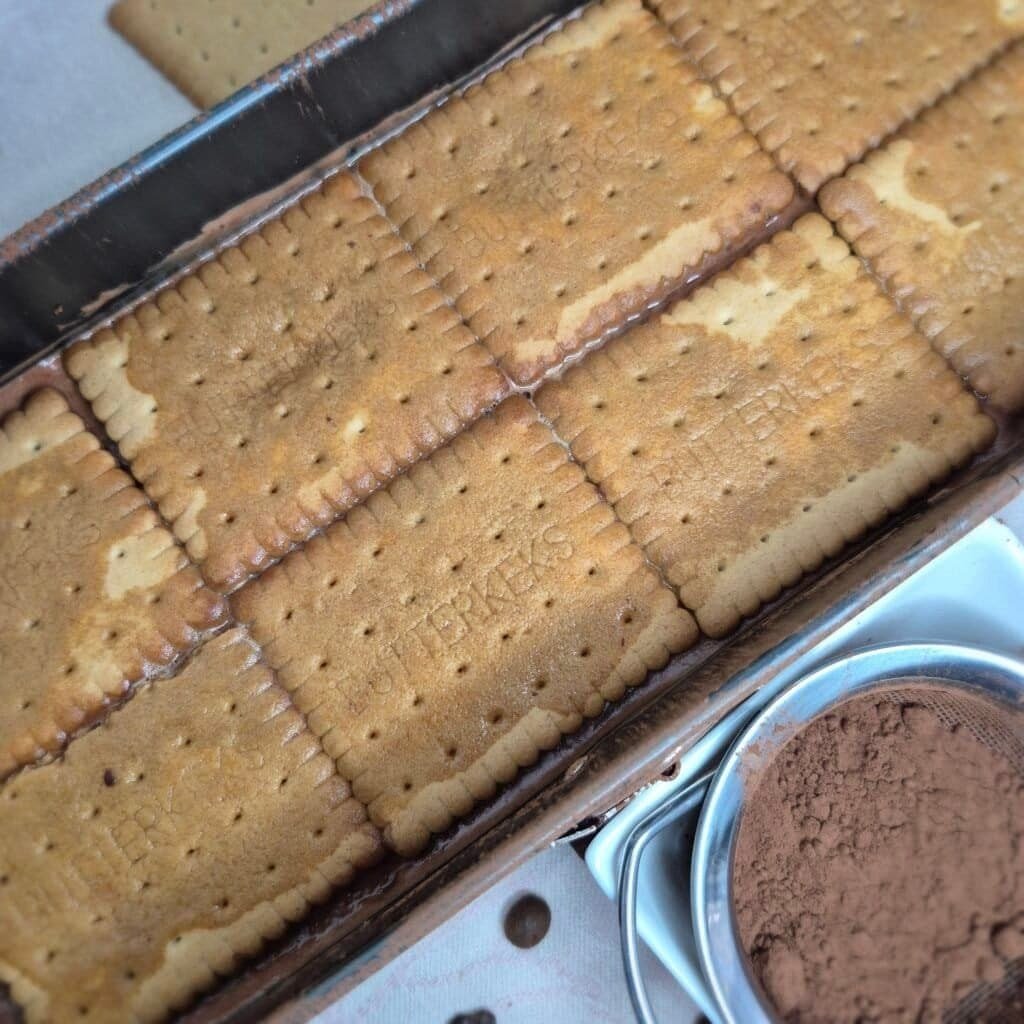
6. Finish with the top biscuit layer
The third layer is just biscuits again, lightly moistened.
I keep this top layer level because the chocolate topping will show every bump. Even a quick adjustment here makes the final cake look better once chilled.
7. Make the topping
For the topping, I heat the cream just until it is close to boiling. Then I pour it over the chopped chocolate and let it sit briefly.
After that, I stir until the mixture is smooth.
Once the chocolate has melted fully, I pour it over the top biscuit layer and spread it gently so it covers the whole surface.
At this point the cake is done, unless I want to add decoration.
8. Decorate and chill
This cake does not need much decoration. Ground biscuits, a few piped swirls of whipped cream, chopped hazelnuts, or a light dusting of cocoa all work well.
Then it goes into the fridge for at least a few hours.
That chilling time is not optional. It is what turns the layers into an actual cake instead of a soft dessert in a tray.
Tips that Help
Use cold cream for the filling. Warm cream will not whip properly and the filling will not hold as well.
Let the melted chocolate cool before mixing. If it is too hot, it can flatten the cream and make the mixture too loose.
Do not over-soak the biscuits. This is the easiest way to ruin the texture. A light drizzle is enough.
Mix the filling gradually. It takes a little more time, but the texture is much better.
Smooth each layer as you go. It helps the cake set evenly and makes slicing cleaner later.
Chill the cake long enough. Two to three hours works, but overnight is even better if you have the time.
Slice with a thin sharp knife. I like to wipe the knife between slices for cleaner edges.
Storage and make-ahead
This cake keeps well in the fridge for a couple of days, which is one reason I like making it ahead.
The texture is usually best on the day it fully sets and the day after that. After longer storage, the biscuits continue to soften, so the cake becomes more tender and less defined.
Keep it covered so the top does not dry out and so it does not absorb other fridge smells.
A few helpful questions
Can I use coffee instead of milk?
Yes. Coffee gives the cake a deeper flavor and works especially well with dark chocolate. If you prefer a milder taste, stick with milk.
Can I make it the day before?
Yes, and I actually recommend it. The layers settle better and the slices come out cleaner the next day.
Can I decorate it in different ways?
Yes. This cake is flexible. Ground biscuits, chopped hazelnuts, whipped cream, chocolate shavings, or a little cocoa powder all fit well here.
Chocolate Biscuit Cake with Creamy Chocolate Filling
Ingredients
For the biscuit layers:
- 200 g petit biscuits
- 100 ml milk
- 1 tablespoon cocoa powder
For the filling:
- 200 g dark chocolate
- 1 tablespoon cocoa powder
- 400 ml whipping cream 35%, cold
- 1 tablespoon powdered sugar
For the topping:
- 100 g chocolate
- 100 ml whipping cream
Optional decoration:
- Ground biscuits
- Whipped cream
- Chopped hazelnuts
- Cocoa powder
Instructions
- Melt the dark chocolate using a double boiler or in the microwave in short intervals.
- Add 1 tablespoon cocoa powder to the melted chocolate and mix until smooth and lump-free. Let it cool until lukewarm.
- In a separate bowl, whip the cold whipping cream with the powdered sugar until it reaches a half-whipped consistency.
- Add the whipped cream to the cooled chocolate, 1 tablespoon at a time, mixing well after each addition until the filling is smooth.
- Divide the filling into 2 equal parts.
- Arrange a layer of petit biscuits in a tray.
- Lightly drizzle the biscuits with milk. Do not soak them too much.
- Lightly sprinkle cocoa powder over the biscuits.
- Spread the first half of the filling evenly over the biscuit layer.
- Add a second layer of biscuits, drizzle lightly with milk, sprinkle with cocoa powder, and spread over the second half of the filling.
- Add a third layer of biscuits on top and lightly drizzle with milk.
- For the topping, heat the whipping cream until just before boiling.
- Pour the hot cream over the chocolate and let it sit briefly, then stir until smooth.
- Pour the topping over the top layer of biscuits and spread evenly.
- Decorate as desired with ground biscuits, whipped cream, hazelnuts, or cocoa powder.
- Refrigerate for 2 to 3 hours, or until fully set.
- Slice and serve chilled.
Notes
- You can use coffee instead of milk for soaking the biscuits if you want a stronger flavor.
- Do not over-soak the biscuits or the cake may become too soft.
- The melted chocolate should be lukewarm, not hot, before adding the whipped cream.
- This cake is even better after resting in the fridge overnight.
- Store covered in the refrigerator.