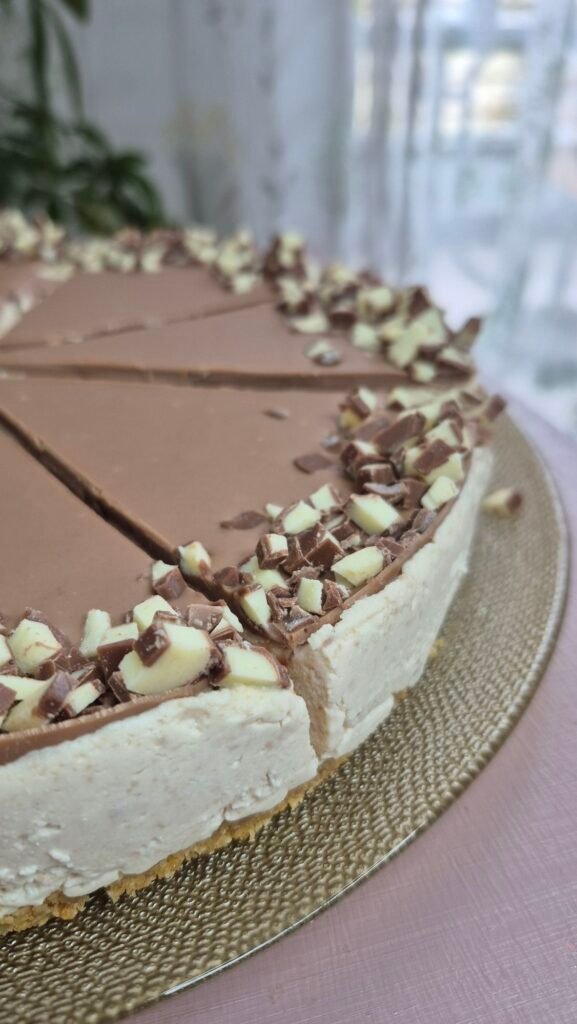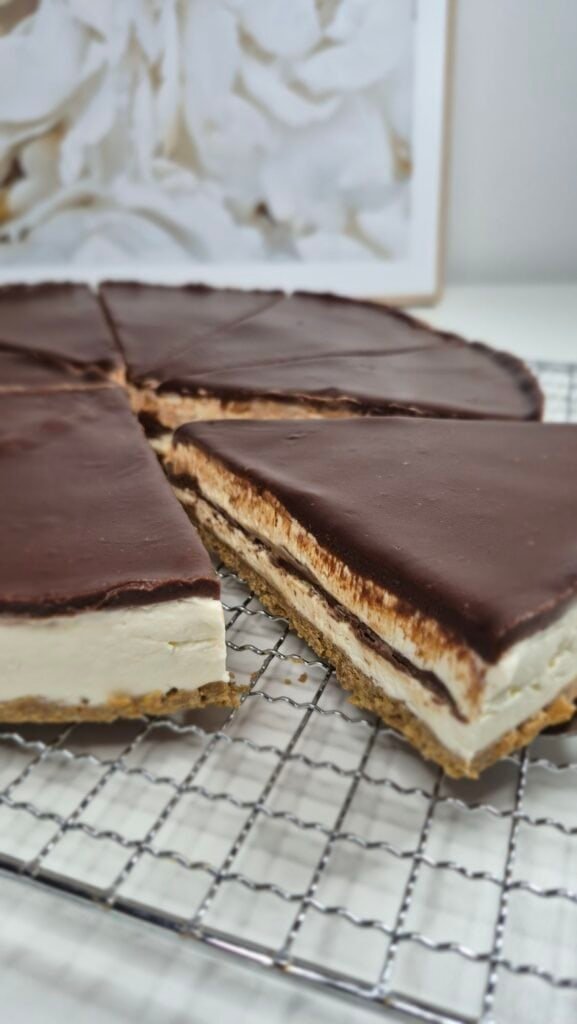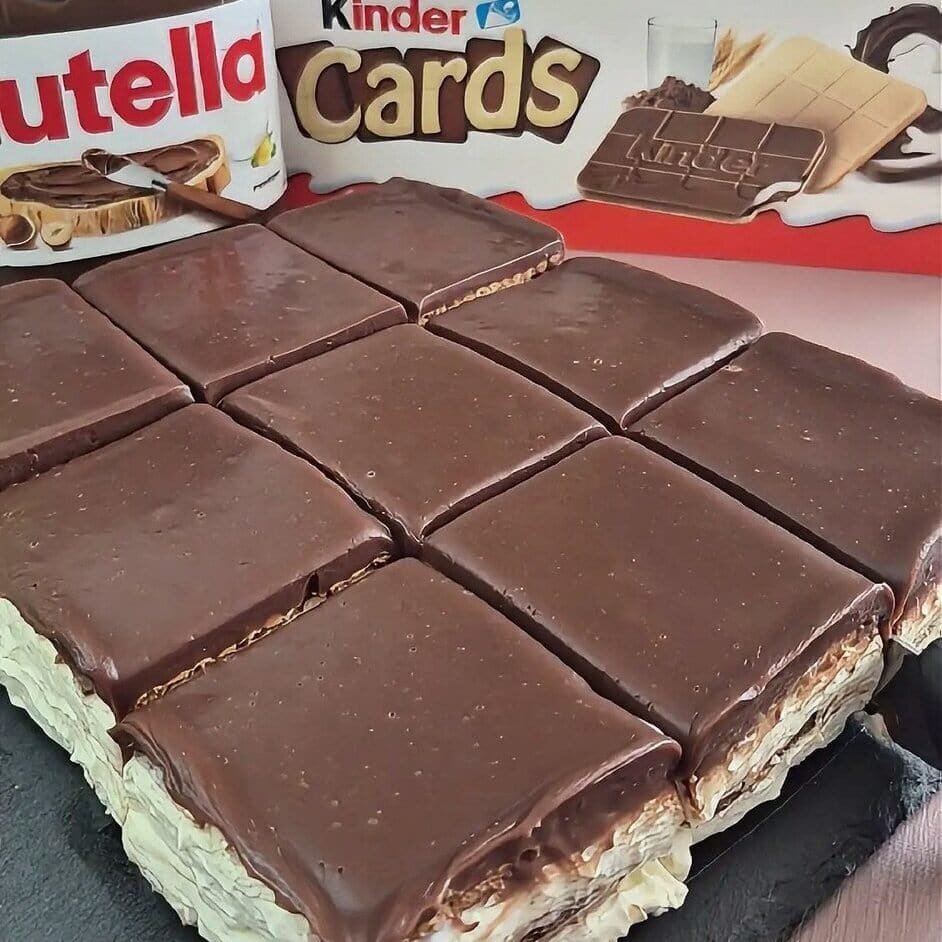
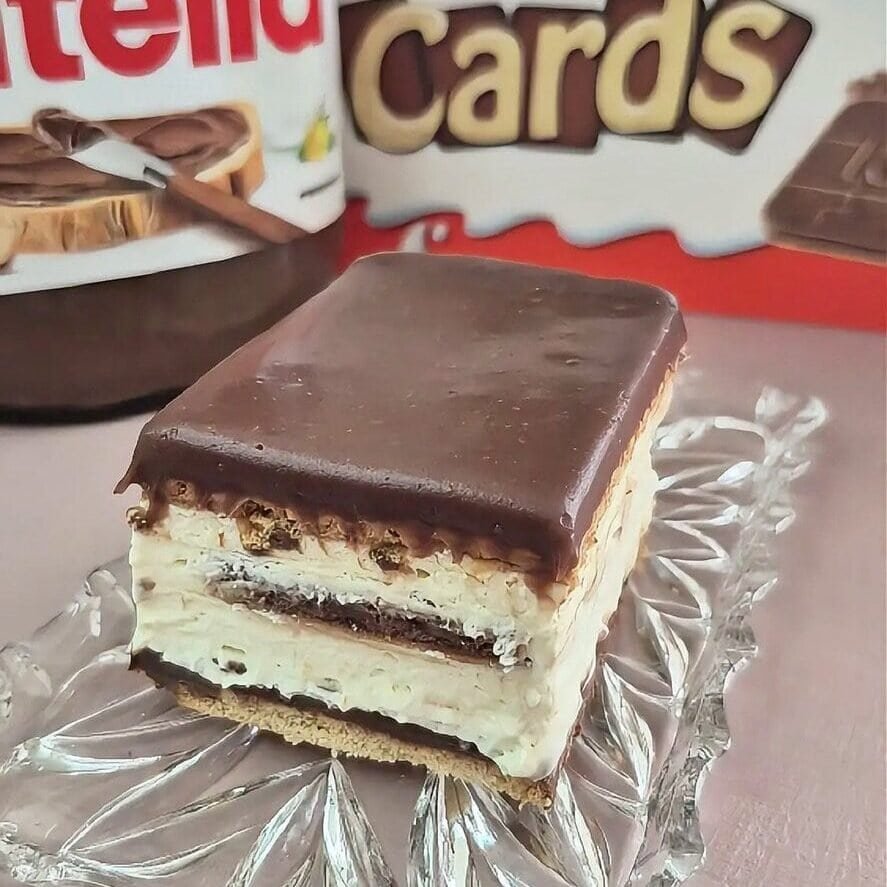
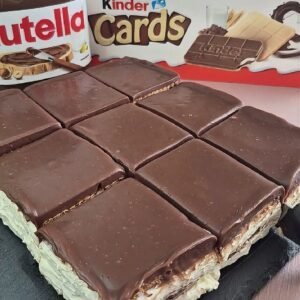
This Kinder Cards Cake is built in layers that actually stay distinct once chilled, which is a big part of why I like it. You get a soft biscuit base, a thin Nutella layer, a light mascarpone cream, Kinder Cards through the middle, another layer of cream, a second biscuit layer on top, and then a smooth chocolate ganache to finish it.
That extra biscuit layer under the ganache makes a real difference. Instead of going straight from cream to chocolate, the cake has a bit more structure, and the top feels more balanced once sliced. It also gives the finished dessert a cleaner look inside, with each layer having a clear place rather than blending into the next.
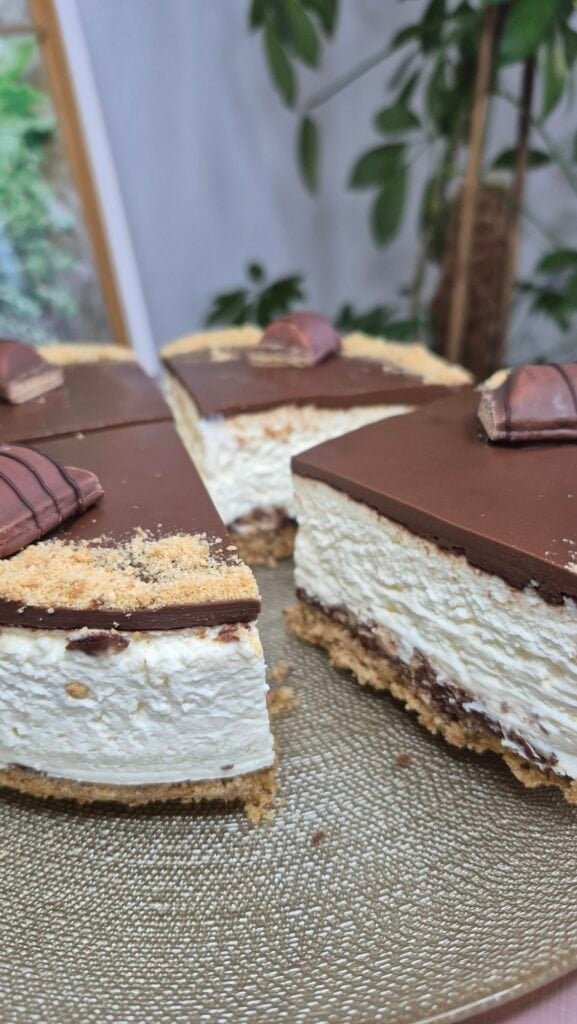
It is still a simple no-bake cake, but it has more shape and contrast than the usual biscuit-and-cream fridge desserts. Once properly chilled, it cuts neatly, holds together well, and has a good mix of soft, creamy, and slightly crisp textures.
What sets this Kinder Cards Cake apart
The first thing is the layer order.
Starting with biscuits on the bottom gives the cake a stable base. The Nutella over that base adds flavour, but it also acts like a thin barrier between the biscuits and the cream, which helps the layers stay more defined.
The mascarpone filling keeps the middle light. Since it is folded with whipped cream, it does not sit heavy on the biscuit base.
The Kinder Cards in the centre are what give the cake its character. Without them, it would still be a good no-bake cake, but it would taste much more familiar. That middle layer changes the texture and gives each slice something a little different.
Then there is the second biscuit layer.
I think this is the part that improves the cake the most. It gives the top half more structure, keeps the ganache from sitting directly on soft cream, and makes the slices look more finished. The top biscuit layer softens in the fridge, but it still gives the cake a more complete shape.
The ganache on top pulls everything together. It sets into a smooth top layer that looks tidy and makes the cake feel finished without needing decoration.
Ingredient breakdown
Ingredient breakdown
Butter biscuits
These are used for both the base and the second biscuit layer near the top.
They soften just enough after a quick dip in warm milk and some time in the fridge. That is what gives the cake its structure without making it hard to cut.
The key is not to soak them. A fast dip is enough.
Warm milk
The milk is only there to soften the biscuits slightly.
You do not want wet biscuits here. Too much milk can make both biscuit layers overly soft, especially after several hours in the fridge.
Nutella
This sits directly over the first biscuit layer.
It adds a clear chocolate-hazelnut note and gives the bottom of the cake a bit more flavour. Since it firms up after chilling, it also helps separate the base from the cream layer above it.
A thin, even layer works best. Too much makes the bottom overly rich and harder to balance with the rest of the cake.
Mascarpone
Mascarpone gives the filling body and that smooth, slightly rich texture that works well in chilled cakes.
It helps the filling stay stable without needing gelatin.
Whipping cream
The whipped cream lightens the mascarpone so the filling does not feel dense.
When folded in properly, it gives the cake that soft, airy middle layer that contrasts nicely with the biscuits and the ganache.
Powdered sugar
Just a small amount is enough here.
The cake already gets sweetness from the Nutella, Kinder Cards, and chocolate topping, so the filling does not need much.
Kinder Cards
This is the layer that gives the cake its identity.
They add a light wafer texture in the middle and stop the cake from feeling too soft from top to bottom. Even after chilling, they still keep enough texture to stand out in each slice.
Chocolate and cream for the ganache
This topping is simple but important.
The ganache gives the top of the cake a clean finish and makes the final dessert look more polished. Once chilled, it becomes smooth and sliceable without turning hard.
How to make Kinder Cards Cake
1. Start with the first biscuit layer

Briefly dip the biscuits in warm milk and arrange them in a single, even layer in your pan.
This first layer should cover the bottom neatly. Try not to leave too many gaps, because that makes the base more stable once chilled.
After that, melt the Nutella until smooth and easy to spread.
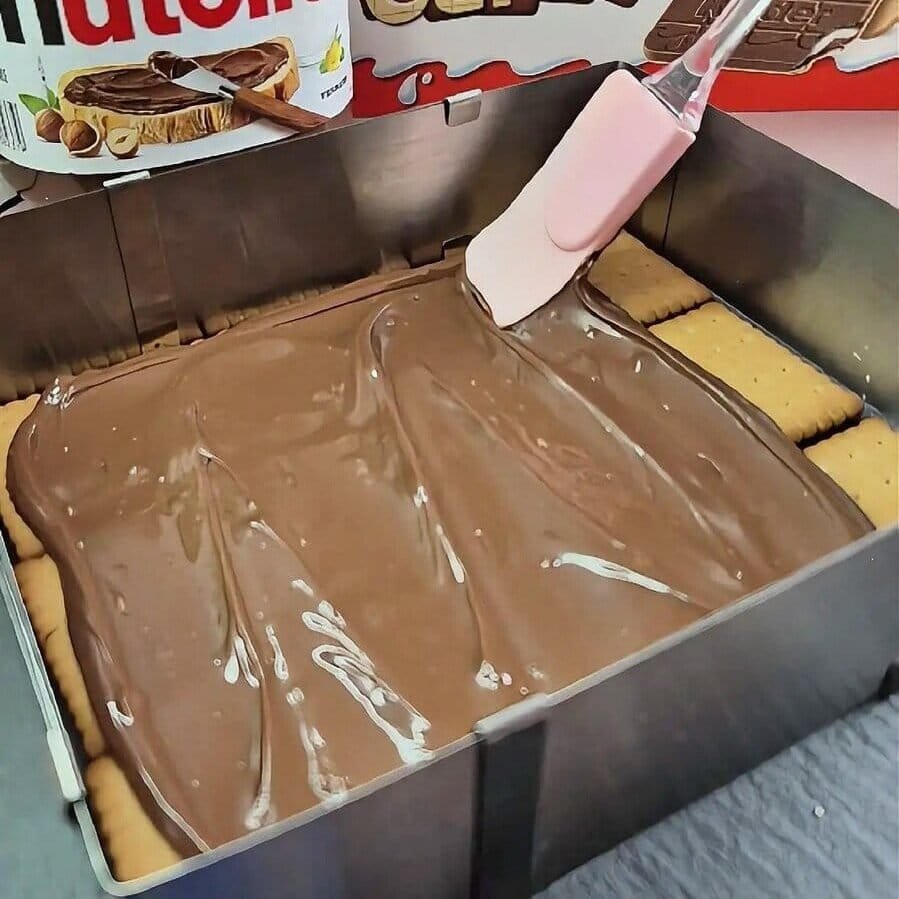
Spread it over the biscuit layer in a thin, even coat, then chill the pan until the Nutella firms up. This makes the next layer much easier to add without dragging chocolate into the filling.
2. Make the cream filling
Beat the mascarpone with the powdered sugar just until smooth.
In a separate bowl, whip the cold cream until soft peaks form.
Fold the whipped cream into the mascarpone gently, using a spatula rather than a mixer. The goal is a smooth filling that stays light.
Once the filling is ready, divide it into two equal parts so the layers stay balanced during assembly.
3. Add the first cream layer
Take the chilled biscuit and Nutella base out of the fridge.
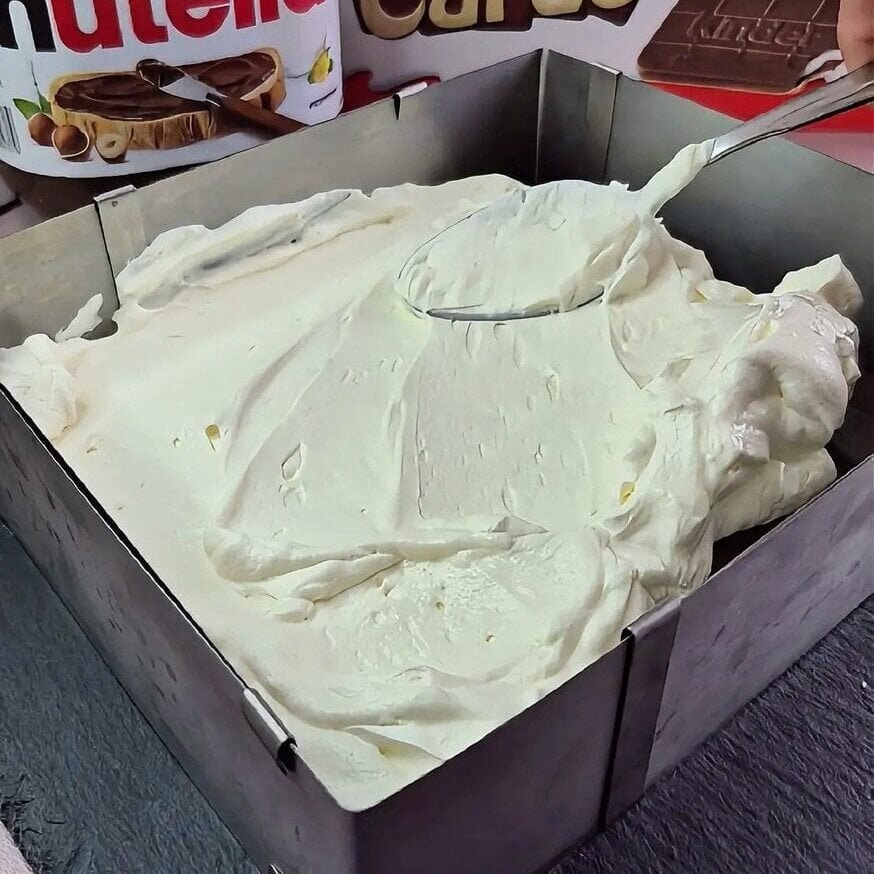
Spread half of the filling over the Nutella layer and smooth it out carefully.
This layer does not need to be thick, but it should fully cover the Nutella and create an even base for the Kinder Cards.
4. Add the Kinder Cards layer
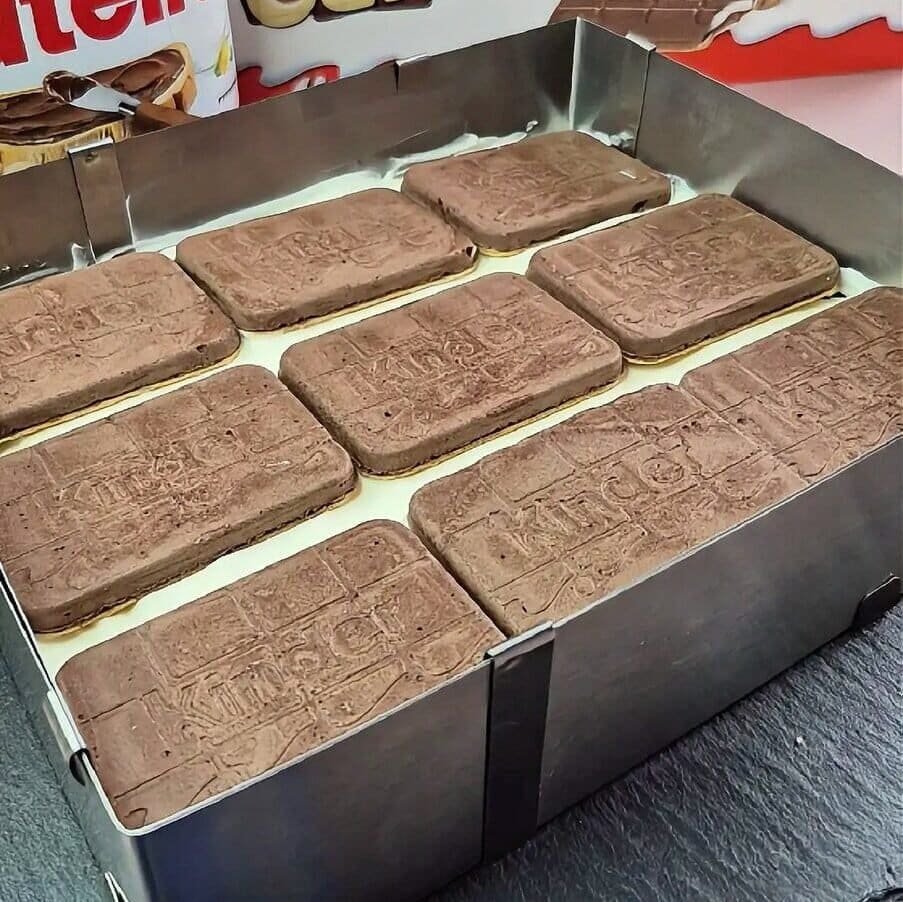
Arrange the Kinder Cards in a single layer over the cream.
Try to place them evenly so each slice gets a good section of that middle layer. They should sit flat and cover the surface as neatly as possible.
This is the layer that gives the cake a different texture, so it is worth taking a minute to place them properly.
5. Add the second cream layer
Spread the remaining cream filling over the Kinder Cards.
Use a light hand here so the Kinder Cards stay in place.
Once the top is smooth, you are ready for the second biscuit layer.
6. Finish with another biscuit layer
Dip the remaining biscuits briefly in warm milk and place them over the cream in a second even layer.
This top biscuit layer should sit gently over the filling without being pressed down too hard.
This part is important because it changes the final structure of the cake. Once chilled, the biscuits soften just enough and create a better base for the ganache than cream alone would.
Chill the cake again before adding the ganache so the top layer firms up properly.
7. Make the ganache
Heat the cream until it is just about to boil, then pour it over the chopped chocolate.
Leave it for a couple of minutes, then stir until smooth and glossy.
Let it cool slightly before pouring it over the cake. It should still be fluid, but not hot. If it is too warm, it can soften the biscuit layer underneath and make the top less tidy.
8. Pour, smooth, and chill

Pour the ganache over the chilled cake and spread it evenly across the top.
At this point, the cake needs a final long chill so all the layers settle properly.
A few hours will do the job, but overnight is better. By the next day, the biscuit layers soften nicely, the cream holds its shape, and the ganache sets into a clean top layer that slices well.
9. Slice and serve cold
This cake is best served straight from the fridge.
Use a sharp knife and wipe it between slices for a cleaner cut. Since the cake has several distinct layers, that small step makes a noticeable difference when serving.
Small details that help
Dip the biscuits quickly.
This is probably the most important detail in the whole recipe. A long soak will make the layers too soft, especially the top biscuit layer under the ganache.
Use cold cream and cold mascarpone.
That helps the filling stay stable and makes it much easier to work with.
Do not overbeat the mascarpone.
Mix it only until smooth. Overmixing can loosen it too much.
Chill between stages.
This cake benefits from resting in the fridge after the Nutella layer, again after assembly, and again after the ganache. Those pauses help the layers stay clean.
Cool the ganache slightly before pouring.
Warm is fine. Hot is not.
Do not press the top biscuit layer into the cream.
Just place it gently and let the chilling time do the rest.
Before you slice it
I would keep this recipe for the texture alone.
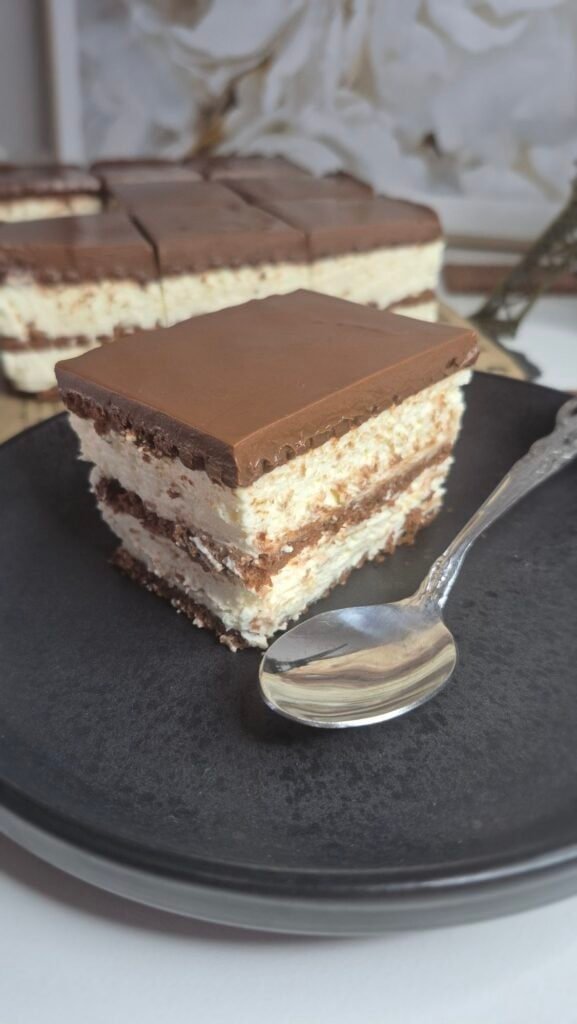
The layers do not all feel the same, and that is what makes the cake worth repeating. You get soft biscuits, a smooth cream layer, the lighter crunch of Kinder Cards in the middle, then that second biscuit layer on top that gives the ganache a better base and makes the whole slice look more complete.
It is still straightforward to make, which is another reason I like it. There is no baking, no gelatin, and no complicated decorating to deal with.
Once fully chilled, it looks tidy, cuts cleanly, and tastes even better the next day. For a fridge cake made with simple ingredients, that is exactly what I want.
No-Bake Kinder Cards Cake
Ingredients
Biscuit layers
- 150 g butter biscuits
- 50 ml warm milk
Nutella layer
- 3 tablespoons Nutella
Cream filling
- 250 ml whipping cream cold
- 250 g mascarpone
- 1 tablespoon powdered sugar
- 1 box Kinder Cards
Chocolate ganache
- 150 g chocolate chopped
- 150 ml whipping cream
Instructions
- Briefly dip some of the butter biscuits in the warm milk, one by one, and arrange them in an even layer in the bottom of your cake pan.
- Melt the Nutella until smooth and spread it evenly over the biscuit layer. Refrigerate for 30 minutes so the Nutella firms up.
- In a bowl, beat the mascarpone with the powdered sugar until smooth.
- In a separate bowl, whip the cold whipping cream until soft peaks form.
- Gently fold the whipped cream into the mascarpone mixture until smooth and airy. Divide the filling into 2 equal parts.
- Remove the chilled base from the fridge and spread half of the cream filling over the Nutella layer.
- Arrange the Kinder Cards in a single even layer over the cream.
- Spread the remaining cream filling over the Kinder Cards and smooth the top.
- Briefly dip the remaining butter biscuits in the warm milk and arrange them in an even layer over the cream filling. Refrigerate the cake for at least 2 hours.
- To make the ganache, heat the whipping cream until just about to boil. Pour it over the chopped chocolate and let it sit for 2 to 3 minutes. Stir until smooth and glossy, then let it cool slightly.
- Pour the ganache over the chilled cake and spread it evenly over the top.
- Refrigerate again for 3 to 4 hours, or overnight for the best texture.
- Slice and serve cold.
Notes
- Dip the biscuits very quickly so they soften without turning soggy.
- Use part of the biscuits for the base and the rest for the top layer. The exact number will depend on the size of your pan and biscuits.
- Make sure the whipping cream is cold before whipping.
- Let the ganache cool slightly before pouring it over the top biscuit layer.