If you’re anything like me, you probably have a weakness for desserts that look impressive, taste heavenly, and don’t require you to spend all day in the kitchen. That’s exactly why this Caramel Mascarpone Ladyfinger Cake has become one of my all-time favorite creations. It’s a no-bake dream dessert that comes together so smoothly you’ll feel like a dessert magician — and the taste? Pure caramel cloud bliss in every spoonful.
This cake is creamy, soft, delicately sweet, and full of layers that melt right into each other. Whether you’re preparing it for a celebration, a casual family treat, or those moments when your sweet cravings simply refuse to wait, this dessert delivers elegance with zero stress.
And the best part? You don’t need complicated equipment, professional baking skills, or rare ingredients. Everything here is simple, straightforward, and unbelievably rewarding.
In this post, I’ll share exactly how I make it, the tips that guarantee perfect texture every time, how to store it, how to customize it, and why this recipe deserves a permanent spot in your dessert rotation. So grab a cup of coffee, get comfy, and let’s dive into this caramel masterpiece!
Why This Caramel Mascarpone Ladyfinger Cake Works Every Single Time
Before we get to the detailed step-by-step instructions, it’s worth taking a moment to appreciate why this dessert is such a huge hit — even for people who don’t usually make desserts.
Here’s what makes it practically foolproof:
No baking required
All you need is a fridge. The ladyfingers soften perfectly once layered with the creamy filling, giving you a cake-like texture without touching your oven.
Minimal ingredients, maximum flavor
This recipe uses simple, accessible ingredients: mascarpone, heavy cream, caramel cream, and ladyfingers. Nothing fancy, nothing complicated.
A filling so smooth, it’s addictive
Whipped heavy cream combined with mascarpone and caramel cream turns into an airy cloud with the perfect balance of sweetness.
Comes together in minutes
Honestly, the most time-consuming part of this recipe is waiting for it to chill. Everything else happens in just a few easy steps.
Flexible and customizable
You can add nuts, chocolate drizzle, sea salt, cocoa powder, fruit — the possibilities are endless.
A show-stopper without the effort
The glossy caramel topping alone makes people think you bought it from a pâtisserie.
Now let’s get into the ingredients, steps, and the exact process I follow to make this creamy, dreamy dessert.
Ingredients You’ll Need
You only need a handful of ingredients, which is one of the reasons this dessert is such a winner.
For the cake layers:
- 200 g ladyfingers
- 150 ml coffee with milk (or plain milk if you prefer)
- 250 ml heavy cream
- 250 g mascarpone cheese
- 2 tablespoons caramel cream
For the topping:
- 3 tablespoons caramel cream
Yes, that’s all! Just five main ingredients, and you’re already halfway to dessert heaven.
How I Make This Caramel Mascarpone Ladyfinger Cake (Step by Step)
I’m going to walk you through the process exactly as I do it in my kitchen — smooth, simple, and satisfying.
Prepare the First Layer of Ladyfingers
Start by mixing your coffee with milk. I love using lightly sweetened, warm coffee with milk because it gives the ladyfingers a soft, comforting flavor. But if you prefer your cake purely milky, plain milk works beautifully too.
Now it’s time to build the foundation of your cake:
Take your 20×20 cm pan.
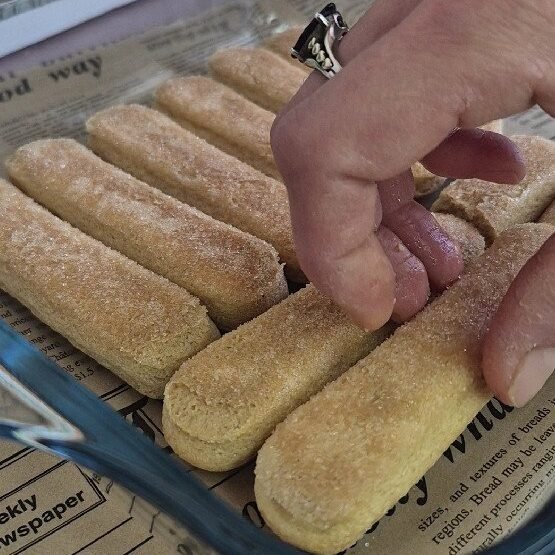
Dip each ladyfinger quickly in the coffee mixture — not too long, just enough to moisten the surface.
Arrange them neatly in a single layer.
This first layer sets the stage for the creamy filling, so make sure the ladyfingers cover the entire bottom of the pan.
Make the Creamy Mascarpone-Caramel Filling (The Star of the Recipe!)
This filling is what makes people close their eyes and say, “WOW.”
It’s that good.
Here’s how I prepare it:
Step 1: Whip the cream
Pour your heavy cream into a mixing bowl and whip it until it’s halfway whipped — meaning soft peaks, not fully firm.
Step 2: Add mascarpone + caramel
Add the mascarpone cheese and caramel cream directly into the bowl.
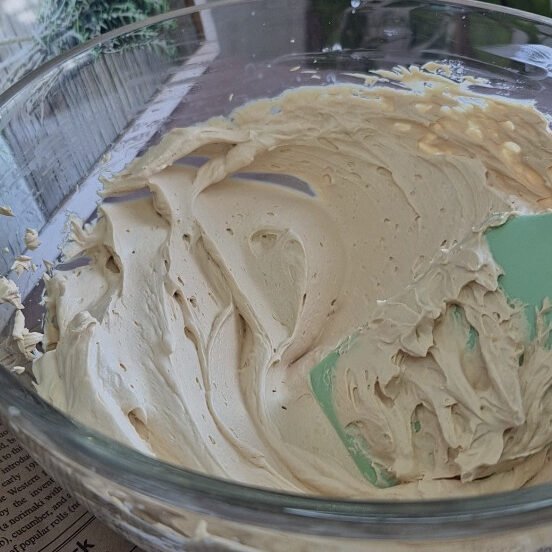
Step 3: Mix until semi-firm
Continue mixing until the mixture becomes semi-firm and beautifully creamy.
Don’t overmix — you’re aiming for a soft, fluffy texture, not stiff frosting.
Step 4: Divide into two parts
Because we’re building two creamy layers, divide your filling evenly into two bowls.
This filling spreads like silk and tastes like caramel heaven.
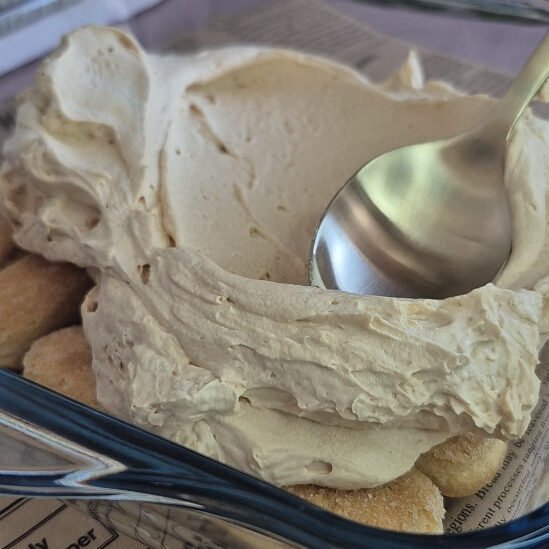
Spread the First Half of the Filling
Take one bowl of the filling and gently spread it over the first layer of ladyfingers.
Use a spatula and smooth it out evenly so every bite gets that perfect balance of cream and cookie.
Your cake is already starting to look irresistible.
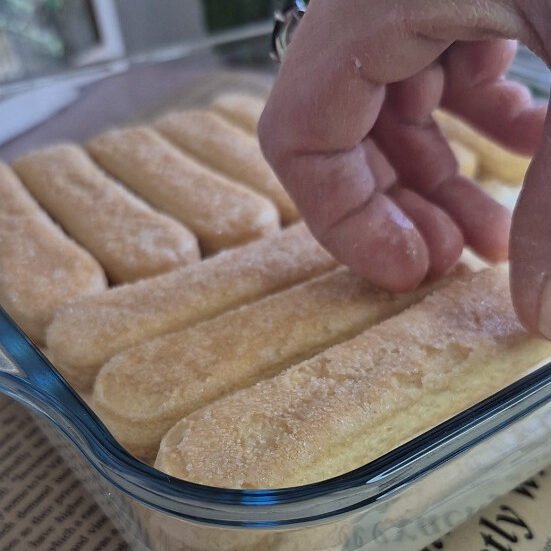
Add the Second Layer of Ladyfingers
Dip the remaining ladyfingers in the coffee mixture just like before, then arrange them on top of the cream layer.
Two layers of soft ladyfingers + two layers of creamy filling = magic.
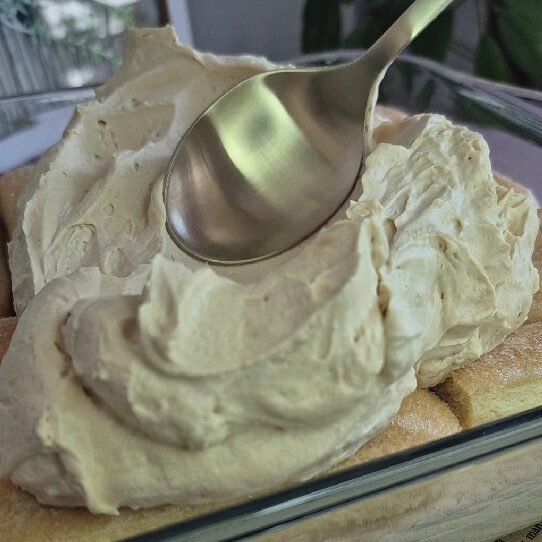
Add the Remaining Filling
Now take the second portion of mascarpone filling and spread it over the ladyfingers.
Smooth the surface nicely — this is the base for your caramel topping.
Your cake is now fully assembled except for its final, glossy crown.
Chill the Cake
Pop your cake into the refrigerator and let it chill for 1 hour.
This step is essential because:
- The ladyfingers soften perfectly
- The filling stabilizes
- The flavors blend beautifully
Resist the urge to cut into it early — the wait is worth it!
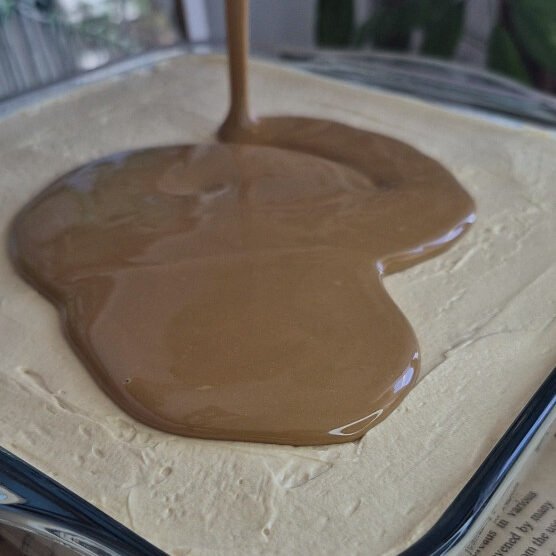
Prepare the Caramel Topping
For the topping, heat your caramel cream gently using steam (double boiler method).
If it’s too thick, add a splash of milk to adjust the consistency.
Once melted and smooth, let it cool slightly — it should be warm and pourable but not hot.
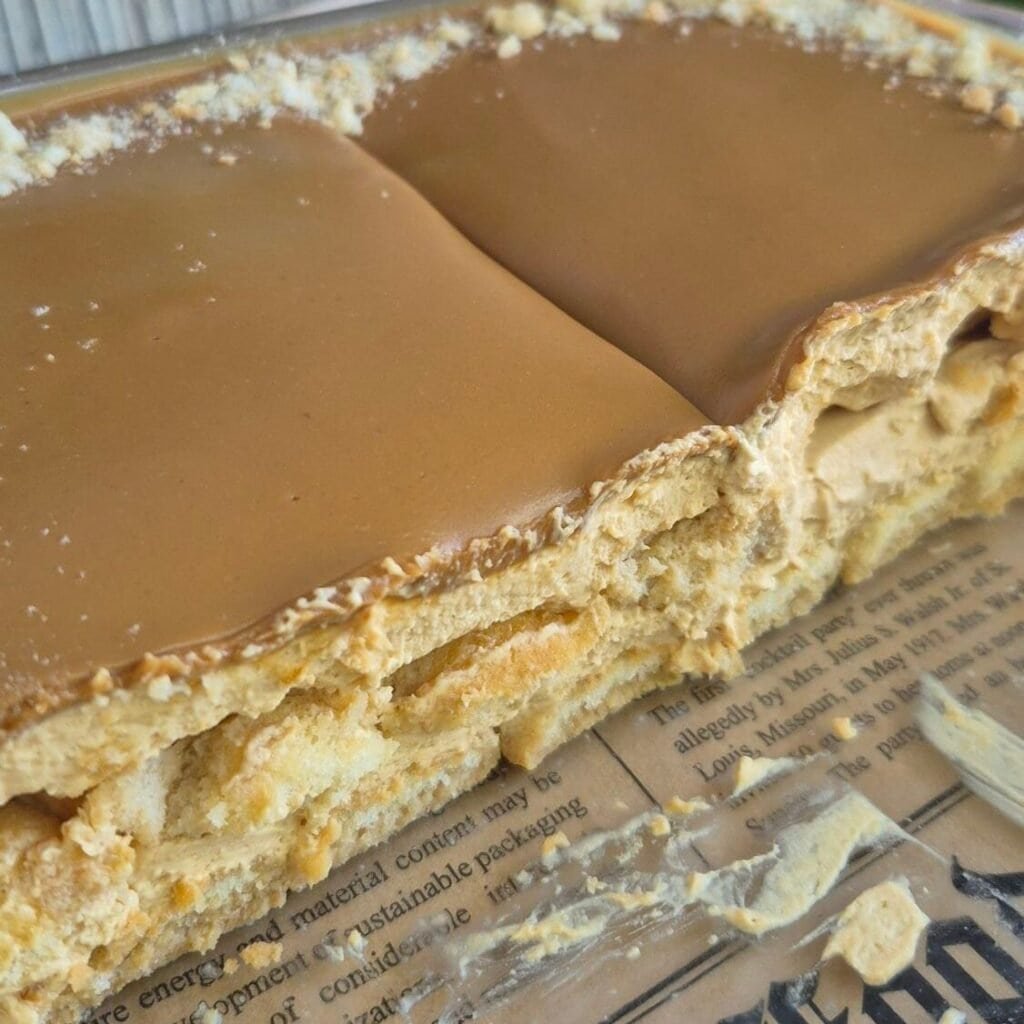
Now pour it over your chilled cream layer and let it coat the top beautifully.
You can decorate with:
- Whipped cream
- Caramel drizzle
- Crushed nuts
- Chocolate shavings
- Sea salt flakes
- Mini caramel candies
Or simply leave it as is — glossy caramel needs no help.
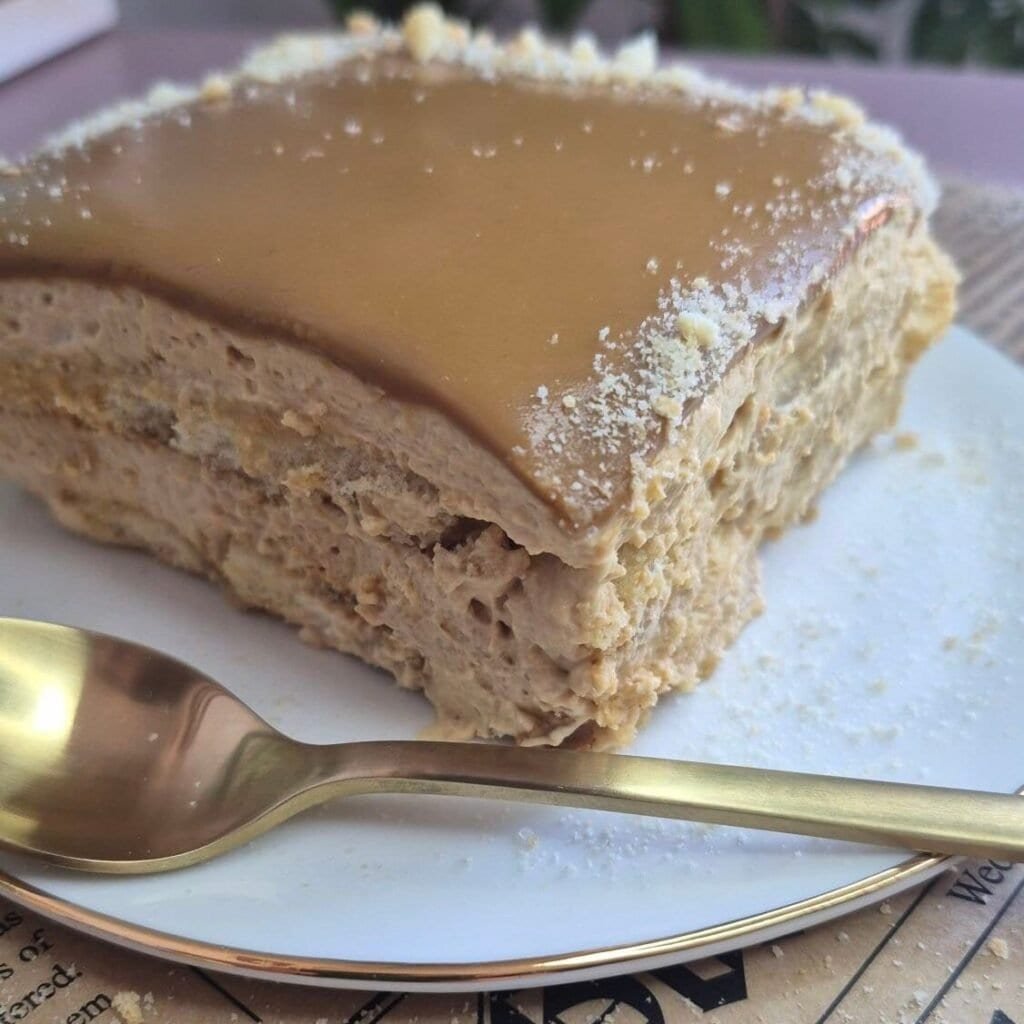
And Just Like That… Your Caramel Mascarpone Ladyfinger Cake Is Ready!
One hour of patience + a few simple steps = a dessert that looks like it came straight out of a bakery window.
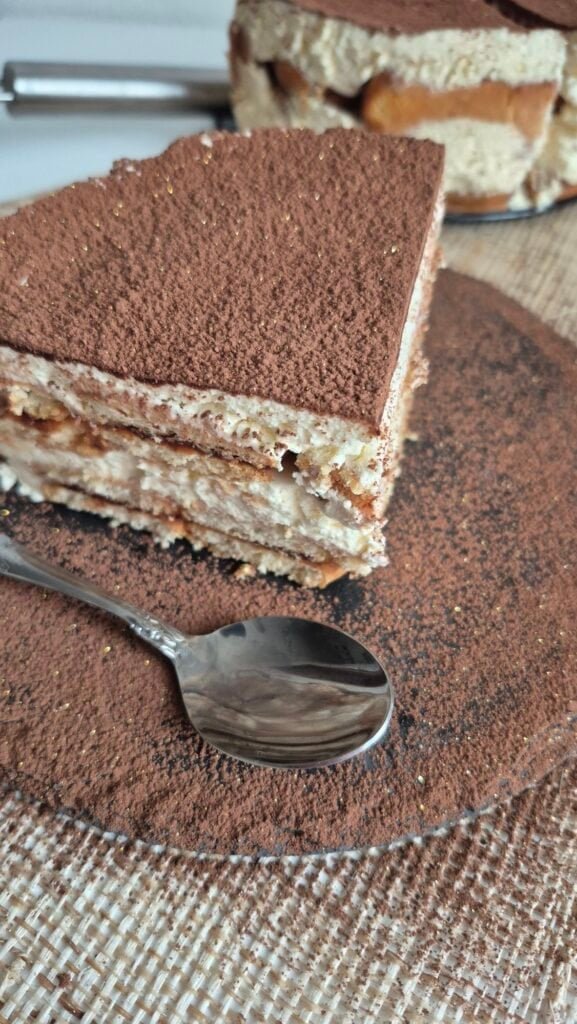
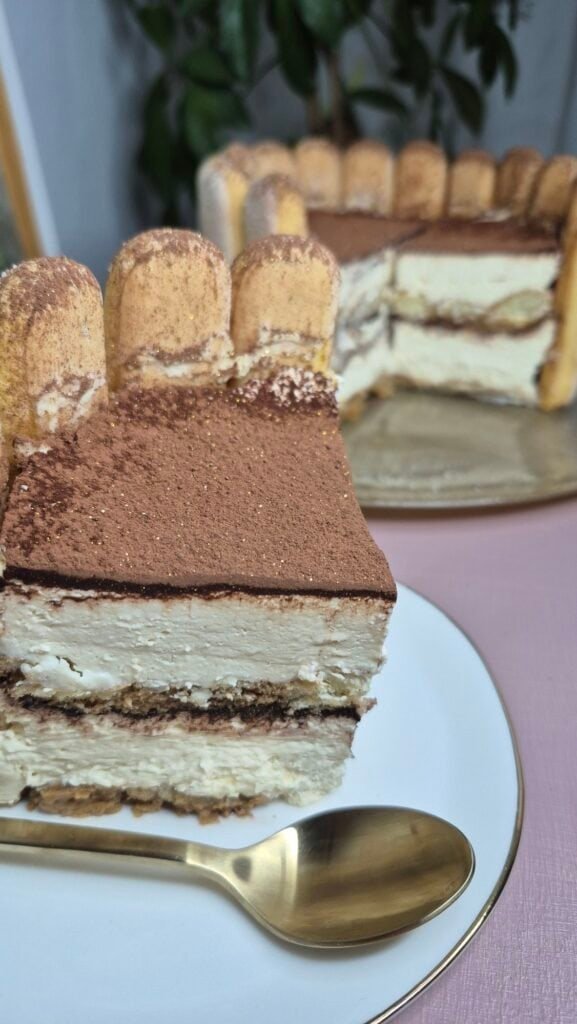
Cut into it and admire the layers: soft ladyfingers, creamy mascarpone, and that shiny caramel crown on top.
When you serve it, expect reactions like:
“Did you really make this?”
“That looks professional!”
“I need this recipe ASAP.”
And yes — they will absolutely want seconds.
Tips for Perfect Texture Every Time
Here are the exact techniques I use to make sure my cake turns out amazing:
Don’t oversoak the ladyfingers
A quick dip is enough. Oversoaking makes them mushy instead of cake-like.
Use cold heavy cream
Cold cream whips faster and gives better structure.
Don’t overmix the filling
The goal is creamy and semi-firm, not stiff.
Let the cake rest
One hour is the minimum. Two to three hours is even better.
Balance sweetness
Caramel is naturally sweet, but mascarpone helps mellow it out, creating the perfect harmony.
Flavor Variations You Might Want to Try
Once you make this dessert once, you’ll probably want to experiment — trust me!
Here are some delicious variations:
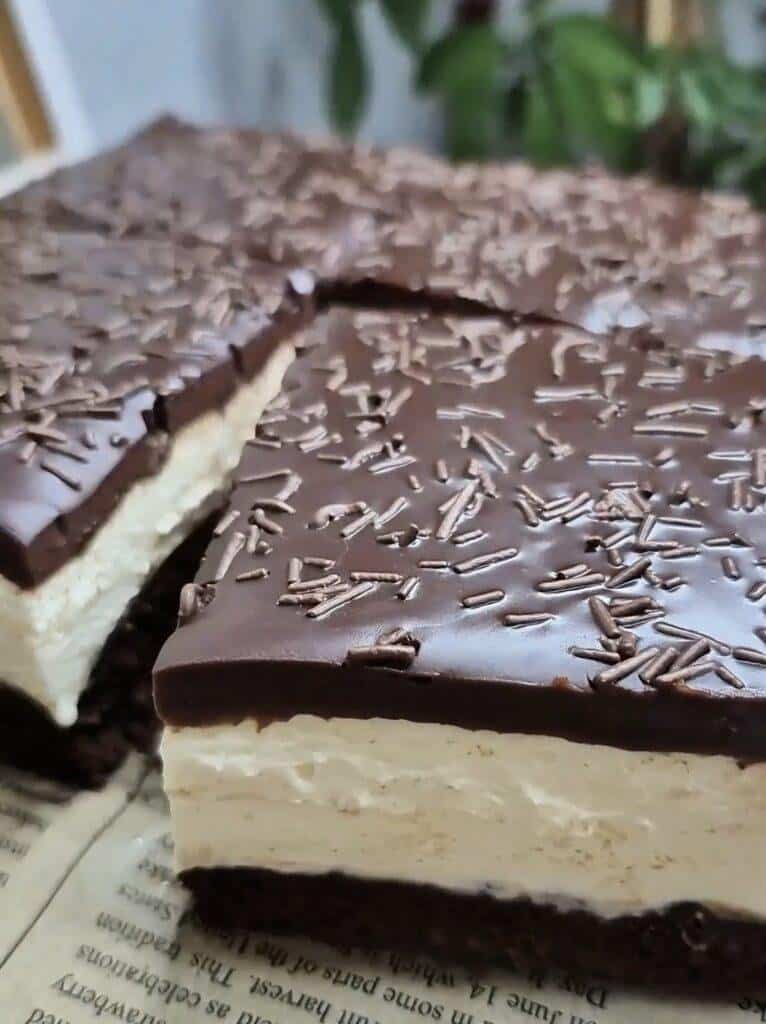
Salted Caramel Chocolate Version
Add a thin drizzle of melted chocolate between layers.
Coffee Lovers’ Version
Use strong coffee instead of coffee with milk for an intense tiramisu-like experience.
Caramel Nut Crunch
Add chopped walnuts, pecans, or hazelnuts on top of each cream layer.
Caramel Berry Delight
Add sliced strawberries or raspberries for a fresh twist.
Extra Caramel Swirl
Marble some caramel into the cream mixture before assembling.
How to Store This Cake
One of the many perks of this recipe is that it stores beautifully.
In the fridge:
Up to 3–4 days, covered well.
In the freezer:
You can freeze it for up to 2 months — just omit the caramel topping until you’re ready to serve.
Thaw in the refrigerator overnight for best results.
Why This Recipe Has Become One of My Go-To Desserts
Every time I make this cake, I’m reminded of why it’s such a keeper:
- It doesn’t require baking
- It’s elegant yet simple
- It satisfies both caramel lovers and cream dessert lovers
- It tastes like something you’d order at a high-end café
- It never fails to impress guests
- It’s perfect for any season — refreshing in summer, cozy in winter
Honestly, it’s the kind of dessert that becomes part of your regular rotation because it delivers on every level: taste, texture, simplicity, beauty.
Final Thoughts
If you’ve been searching for a dessert that offers maximum satisfaction with minimum effort, this Caramel Mascarpone Ladyfinger Cake is exactly what you need. It’s creamy, rich, elegant, and unbelievably easy to prepare — the kind of dessert that makes you feel proud every time you slice into it.
Whether you’re making it for a celebration, a cozy night in, or just to treat yourself because you absolutely deserve it, this recipe will never let you down.
Enjoy every caramel-filled bite!

Caramel Ladyfinger Cake
Ingredients
For the Cake Layers
- 200 g ladyfingers
- 150 ml coffee with milk or plain milk
- 250 ml heavy cream
- 250 g mascarpone cheese
- 2 tablespoons caramel cream
For the Topping
- 3 tablespoons caramel cream
Instructions
- Prepare a 20 × 20 cm square pan.
- Dip each ladyfinger briefly into the coffee with milk, making sure they are moistened but not soaked.
- Arrange the dipped ladyfingers in a single, even layer on the bottom of the pan.
- In a mixing bowl, whip the heavy cream until it reaches soft peaks.
- Add the mascarpone cheese and 2 tablespoons of caramel cream. Continue mixing until smooth and semi-firm.
- Divide the mascarpone filling into 2 equal portions.
- Spread the first half of the filling evenly over the ladyfingers.
- Dip the remaining ladyfingers into the coffee with milk and arrange them over the cream layer.
- Spread the second half of the filling evenly over the second layer of ladyfingers and smooth the top.
- Refrigerate for at least 1 hour so the layers can set.
- Gently melt the caramel cream for the topping over steam. If it is too thick, add a small amount of milk until it becomes pourable.
- Let the caramel cool slightly, then pour it evenly over the chilled cake.
- Decorate as desired, slice, and serve.
Notes
- Dip the ladyfingers quickly to avoid oversoaking and to keep the cake structured.
- Use cold heavy cream for better whipping and a more stable filling.
- Do not overmix after adding the mascarpone, so the texture stays light and creamy.
- For best results, chill the cake an additional 1–2 hours before slicing.
- Store covered in the refrigerator for up to 3–4 days.