If there is one dessert that instantly wins hearts, stops conversations, and disappears from the tray faster than anything else, it has to be Twix cheesecake chocolate bars. I’ve made these countless times and I can honestly say they never, ever fail. They are rich, creamy, chocolatey, and perfectly balanced with that irresistible caramel twist that makes you want “just one more piece”… again and again.
This recipe is a no-bake Twix cheesecake bar masterpiece, and it’s perfect for anyone who loves chocolate desserts, layered sweets, and that signature Twix-inspired flavor combination of biscuit, caramel, and milk chocolate. The best part? You don’t even need an oven – just a fridge, a little patience, and a serious love for chocolate.
These Twix cheesecake chocolate bars are ideal for birthdays, holidays, family gatherings, bake sales, or just when you want to treat yourself after a long day. They look luxurious, taste like they came straight from a high-end bakery, and are surprisingly simple to prepare.
Let me show you exactly how I make these legendary dessert bars step by step
Why These Twix Cheesecake Chocolate Bars Are So Addictive
There is something magical about the combination of:
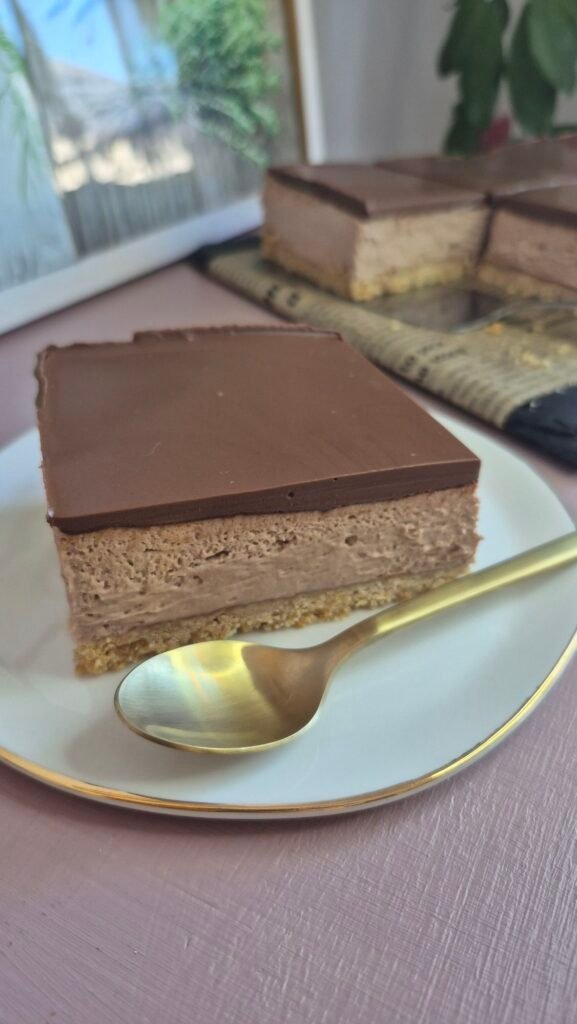
- Crunchy biscuit base
- Creamy caramel cheesecake filling
- Silky milk chocolate topping
Each bite gives you texture, richness, and sweetness in the most perfect harmony. The base is buttery and slightly crunchy, the filling is soft and velvety with caramel notes, and the topping melts in your mouth like a chocolate dream.
What I love most about this dessert is how professional it looks while being incredibly easy to make. People always think it took hours of complicated baking, but the truth is it’s mostly chilling time in the fridge doing all the hard work.

Ingredients for Twix Cheesecake Chocolate Bars
Here is everything I use to make this recipe. These ingredients create the perfect balance of flavors and textures:
For the Biscuit Base
- 150 g crushed biscuits
- 50 g melted butter
- 3–4 tablespoons milk
For the Cheesecake Filling
- 300 ml whipping cream
- 250 g mascarpone cheese
- 2 tablespoons caramel cream
For the Chocolate Topping
- 150 g milk chocolate
- 1 teaspoon butter
- 100 ml whipping cream
For Decoration
- Twix chocolate bars, chopped or whole
Step-by-Step: How I Make Twix Cheesecake Chocolate Bars
Step 1 – Creating the Perfect Biscuit Base
I start by crushing the biscuits until they turn into fine crumbs. You can use a food processor, but I love doing it manually – it gives me control over the texture and makes the whole process feel more personal.
Next, I mix the crushed biscuits with melted butter and milk. This is where the magic begins. The mixture should feel slightly moist and hold together when pressed.
I press this mixture firmly into a 20×20 cm pan, using the bottom of a glass or a spoon to create a smooth, compact layer. This step is very important – the base needs to be tightly packed so it doesn’t crumble later.
Once done, I place it in the refrigerator while I prepare the filling.

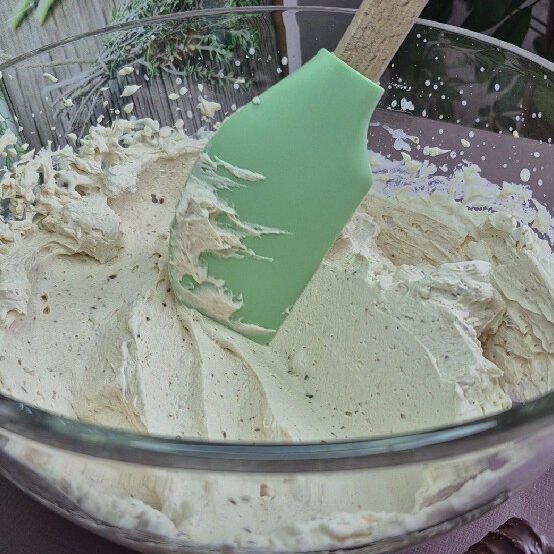
Step 2 – Whipping the Creamy Caramel Cheesecake Filling
In a large mixing bowl, I whip the cream until it reaches a half-whipped stage. This means it should be thickened but still soft and smooth.
Then I add:
- Mascarpone cheese
- Caramel cream
I continue mixing until I get a beautiful, semi-firm cream that looks silky, glossy, and irresistible. It should hold soft peaks and feel light, not stiff.
I gently spread this caramel cheesecake filling over the chilled biscuit base, smoothing the top with a spatula for that clean bakery-style finish
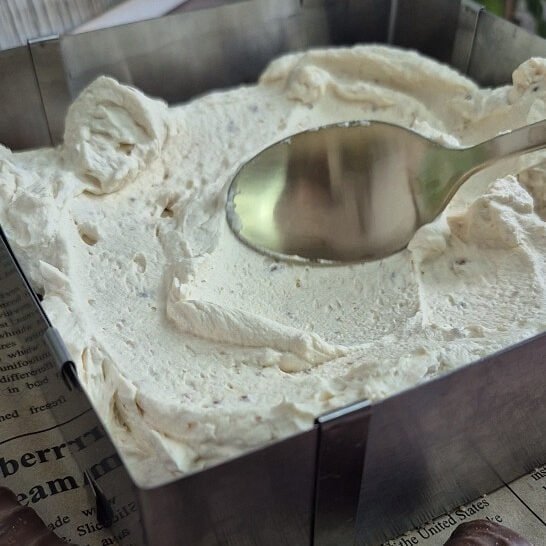
Back into the fridge it goes for 1 full hour to set perfectly.
Step 3 – Preparing the Silky Chocolate Ganache Topping
This part is pure chocolate therapy.
I heat the whipping cream and butter until just before boiling. Then I pour the hot mixture over the chopped milk chocolate.
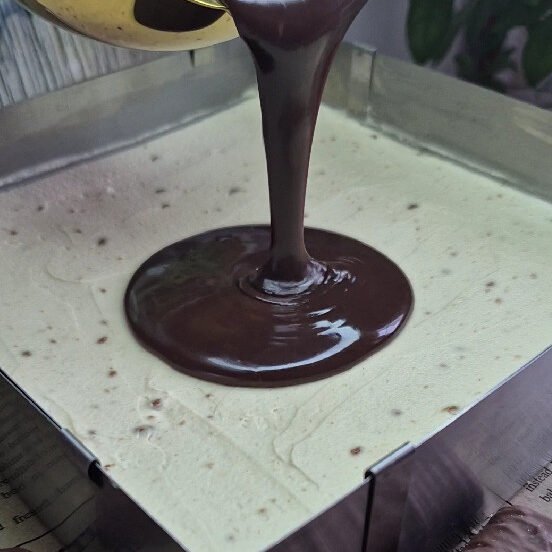
After a few minutes of resting, I stir slowly until the chocolate melts completely and turns into a smooth, glossy ganache. It should look like liquid silk.
I let it cool slightly before pouring it over the chilled cheesecake layer. This prevents melting the filling and gives that clean, professional layered look.
Step 4 – Decorating Like a Pro with Twix Bars
Now comes the fun and creative part.
I decorate the top with:
- Twix chocolate bars
- Chopped Twix pieces
- Chocolate drizzles
- Any extra touches I’m in the mood for
Once decorated, I place everything back into the refrigerator for at least 2 more hours. This final chill is what allows the bars to slice beautifully and hold their perfect shape.
How to Cut Perfect Twix Cheesecake Bars
When it’s time to cut, I use a sharp knife dipped in hot water and wiped dry between slices. This gives clean, sharp edges and makes the bars look stunning when served.
You can cut them into:
- Small squares for parties
- Larger bars for serious chocolate lovers
- Elegant rectangles for a bakery-style look
Storage Tips for Maximum Freshness
These Twix cheesecake chocolate bars store beautifully in the refrigerator.
Keep them chilled in an airtight container.
Stay fresh for up to 4–5 days.
Flavor gets even better after the first day.
They can also be lightly frozen and thawed slowly in the fridge if you want to prepare them ahead of time.
Best Occasions to Serve Twix Cheesecake Chocolate Bars
These bars are perfect for:
- Birthday parties
- Holiday tables
- Potlucks and gatherings
- Romantic dessert nights
- Afternoon coffee treats
No matter where I serve them, the reaction is always the same: silence… then “WOW”.
Final Thoughts on These Twix Cheesecake Chocolate Bars
These Twix cheesecake chocolate bars are one of those desserts that feel luxurious but are incredibly easy to prepare. The crunchy base, creamy caramel layer, and glossy milk chocolate topping come together to create a dessert that looks bakery-made but tastes homemade in the best possible way.
Every time I make them, they remind me how simple ingredients can turn into something truly special when layered with care and a little love.
If you love Twix, cheesecake, chocolate, and caramel, this dessert will quickly become one of your favorites.
Slice, serve, enjoy, and watch them disappear.

Twix Cheesecake Chocolate Bars (No-Bake)
Ingredients
For the Biscuit Base
- 150 g biscuits crushed into fine crumbs
- 50 g butter melted
- 3 –4 tbsp milk as needed, to bind
For the Caramel Cheesecake Filling
- 300 ml whipping cream cold
- 250 g mascarpone cold
- 2 tbsp caramel cream caramel spread or thick caramel sauce
For the Chocolate Topping (Ganache)
- 150 g milk chocolate chopped
- 100 ml whipping cream
- 1 tsp butter
For Decoration
- Twix bars chopped and/or whole
Instructions
Prepare the pan
- Line a 20×20 cm pan with parchment paper, leaving overhang on the sides for easy lifting.
Make the biscuit base
- In a bowl, mix crushed biscuits with melted butter. Add milk 1 tablespoon at a time (usually 3–4 tbsp total) until the mixture looks evenly moistened and holds together when pressed.
- Press firmly into the lined pan to form a compact, even layer. Refrigerate while you make the filling.
Make the caramel cheesecake filling
- Whip the cold whipping cream to a half-whipped stage (thickened but still soft).
- Add mascarpone and caramel cream, then mix until smooth, silky, and semi-firm (soft peaks).
- Spread evenly over the chilled base and smooth the top. Refrigerate for 1 hour to set.
Make the chocolate ganache topping
- Heat the 100 ml whipping cream and 1 tsp butter until hot (just before boiling).
- Pour over chopped milk chocolate. Let sit 2–3 minutes, then stir until smooth and glossy.
- Cool the ganache slightly (so it doesn’t melt the filling), then pour over the cheesecake layer and spread evenly.
Decorate and chill
- Top with chopped/whole Twix bars (and optional chocolate drizzle).
- Refrigerate at least 2 more hours, or until fully set.
Slice and serve
- Lift out using the parchment overhang. For clean cuts, use a sharp knife dipped in hot water and wiped dry between slices.
Notes
- Biscuit options: digestive biscuits, tea biscuits, graham-style crumbs.
- Caramel cream: use thick caramel spread, dulce de leche, or a thick caramel sauce (not runny).
- If the filling feels too soft, chill 15–20 minutes and briefly re-whip to thicken before spreading.