If there’s one dessert that has completely stolen the show in my kitchen lately, it’s this Kinder Schoko-Bons No-Bake Cake. Honestly, I didn’t expect it to turn out so dreamy the first time I whipped it up—yet the moment that first creamy slice hit the plate, everyone around the table gave me that look.
You know the one… the “please make this every week” look.
And truly, how could anyone resist?
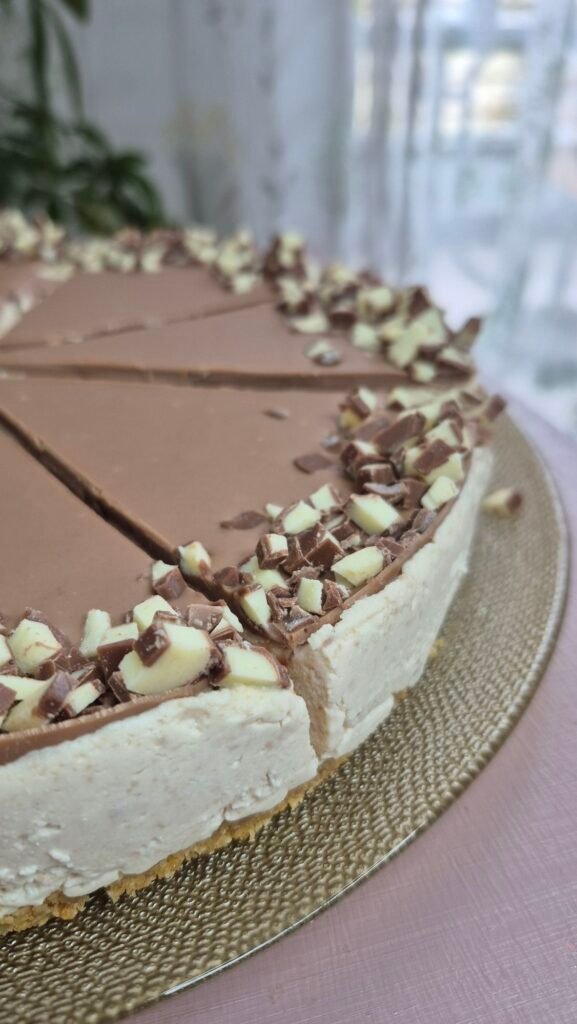
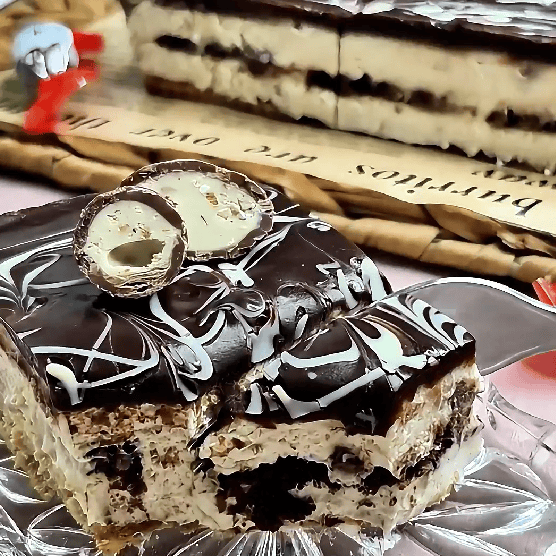
This cake brings together the soft sweetness of mascarpone, the gentle crunch of petit and cocoa biscuits, silky white chocolate, and that iconic Kinder Schoko-Bons flavor that instantly brings out your inner child.
But what really elevates it from “just another no-bake cake” to an absolute masterpiece is the thick, glossy chocolate ganache that melts into the creamy layers like a delicious chocolate waterfall. And yes… there’s more chocolate drizzled on top. Because is there ever such a thing as too much chocolate? Impossible.
In today’s post, I’m sharing every detail about how I make this cake, why each ingredient matters, little tips that take the recipe from good to chef’s kiss, and of course, the full step-by-step guide.
So grab a cup of coffee (or a piece of chocolate—no judgment here), and let’s dive into the sweetest no-bake adventure!
Why You’ll Fall in Love With This Kinder No-Bake Cake
When I say this cake has magical powers, I’m not even exaggerating. Whenever I serve it, I watch guests go through the five emotional stages of dessert bliss:
- Curiosity: “Ooooh, what’s this?”
- Awe: “It looks amazing…”
- Shock: first bite
- Love: “What IS this?!”
- Desperation: “Please tell me there’s more.”
Here’s why the cake works like a charm every single time:
Completely no-bake – zero oven stress.
Incredibly creamy thanks to mascarpone and whipped cream.
Balanced sweetness (not heavy or sugary!)
Layers stay stable – perfect for slicing.
Crowd-pleasing Kinder flavor.
Ready for any occasion – birthdays, celebrations, or just because you deserve something amazing today.
Looks impressive but is easy to make.
This is basically the dessert version of a warm hug.
Let’s Talk Ingredients (and Why They Matter)
Before we jump into the process, let me walk you through the ingredients and how they contribute to that melt-in-your-mouth texture.
For the base:
- 100–150 g petit biscuits
- 100–150 g cocoa biscuits
- 100 ml milk
The biscuits create the layered structure. By dipping them briefly in milk, they soften just enough to blend beautifully with the creamy filling without turning mushy.
For the filling:
- 500 g mascarpone
- 100 g melted Kinder Schoko-Bons + 60 g chopped ones
- 100 g white chocolate
- 500 ml whipping cream
This filling is the heart of the cake: delicate, fluffy, and wonderfully studded with mini Schoko-Bons pieces that melt slightly into each slice. The mascarpone gives it body, the white chocolate adds sweetness, and the whipped cream brings the cloud-like softness. Together? Absolute heaven.
For the ganache:
- 100 g dark chocolate
- 80 g milk chocolate
- 180 ml whipping cream
- 20 g butter
- 30 g white chocolate (for decoration)
This ganache is rich yet silky, the perfect contrast to the light filling. Drizzling white chocolate on top gives it that bakery-style finish. Trust me, people always ask if you bought it.
Let’s Bake (Well… Not Really)
How I Make the Kinder Schoko-Bons No-Bake Cake — Step by Step
Below is the full process, explained the way I make it in my own kitchen. Put on your apron and let’s get to the fun part!
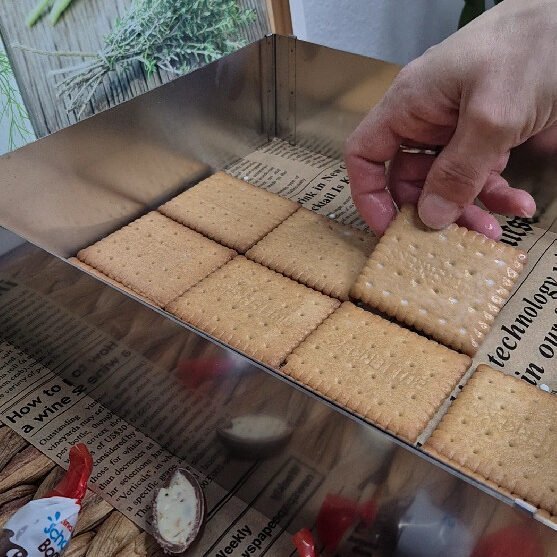
Build the first biscuit layer
I start by preparing a 24 × 24 cm square pan. You can use a slightly larger or smaller one, but this size gives the perfect height to each layer.
Now, the biscuits.
Each petit biscuit gets a very quick dip in milk—just enough to soften the edges. If you soak them too long, they’ll fall apart, so one swift dunk is perfect.
I place them tightly along the bottom of the pan. This is the foundation of the cake, so make sure there are no big gaps.
Create the creamy Kinder filling
This part is my favorite because the smell alone is enough to make you want to lick the bowl.
I melt 100 g of Kinder Schoko-Bons along with 100 g of white chocolate using a double boiler. When everything becomes smooth and glossy, I let it cool slightly—important so it doesn’t deflate the whipped cream later.
In a large mixing bowl, I whip together:
- mascarpone
- the cooled chocolate mixture
- whipping cream
It turns into a silky, fluffy filling that you could basically eat with a spoon. But hold on, we’re not done!
Next, I chop the remaining 60 g of Schoko-Bons into small pieces and fold them into the cream. And trust me, those little bursts of Kinder flavor throughout the cake? Pure magic.
I divide the filling into two equal portions, because we’re layering like professionals today.
Spread the first layer of filling
The first half of the creamy mixture goes right over the petit biscuit layer. I smooth it out with a spatula until everything looks even.
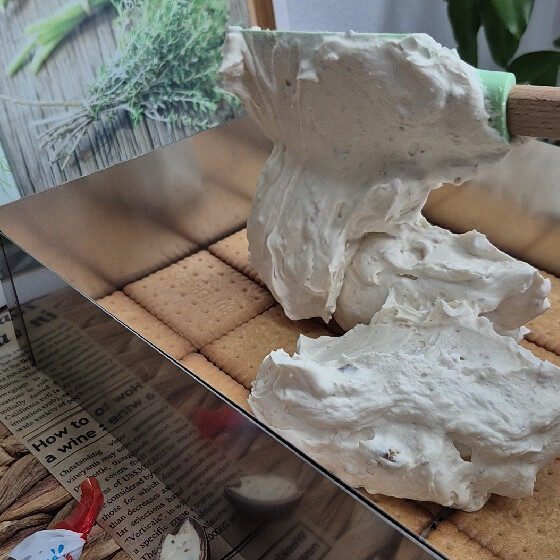
At this point, it already looks like the kind of dessert you want to dive into face-first… but patience, my friend.
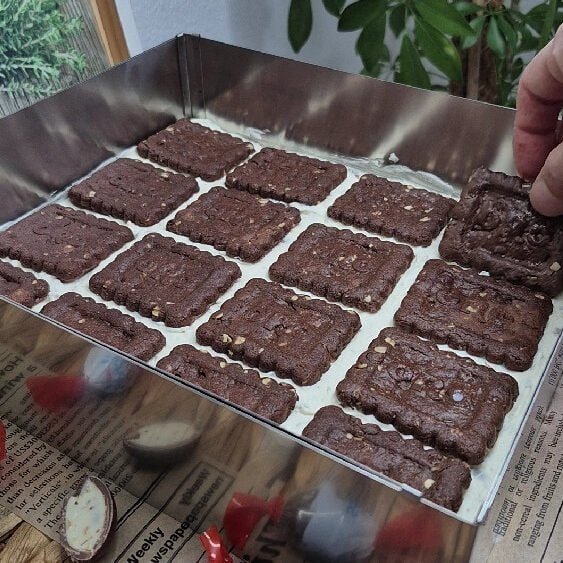
Add the cocoa biscuit layer
Just like with the petit biscuits, I dip cocoa biscuits briefly into milk and arrange them over the filling.
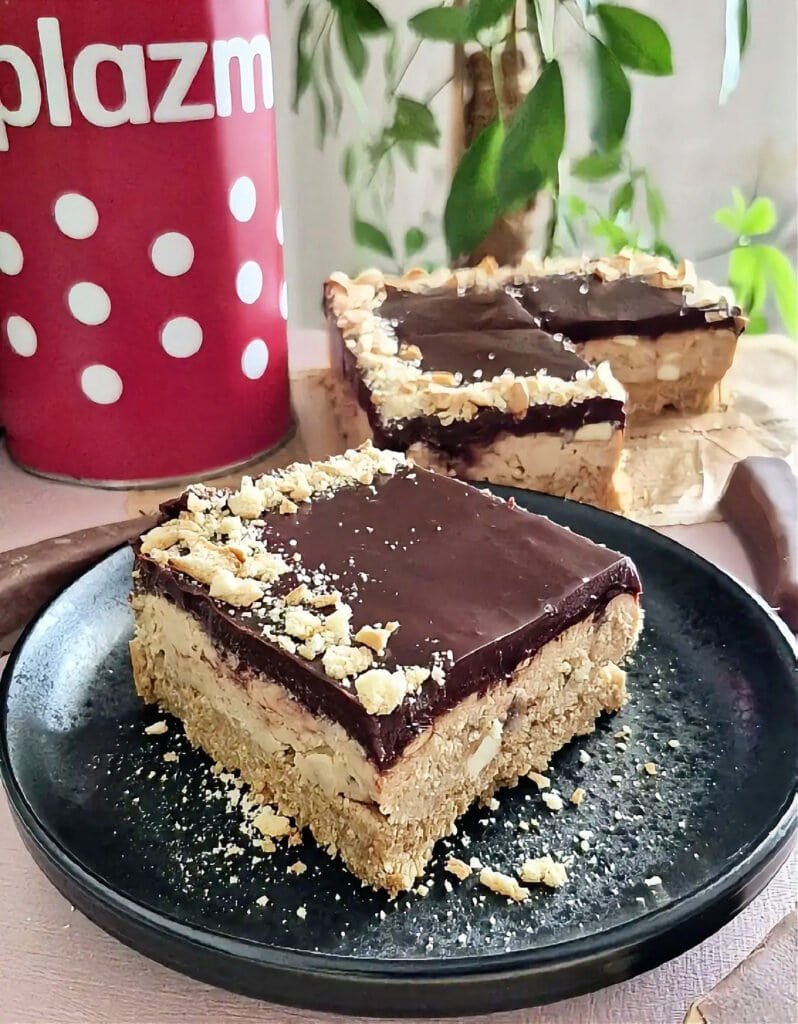
This layer gives the cake that beautiful visual contrast when sliced, and the deeper cocoa flavor complements the sweetness perfectly.
Add the second layer of filling
Now the second half of the mascarpone-Kinder mixture goes on top. Smooth it again and admire how perfect it already looks.
I cover the pan and let the cake chill in the fridge for 1–2 hours.
This helps the layers firm up before adding the ganache.
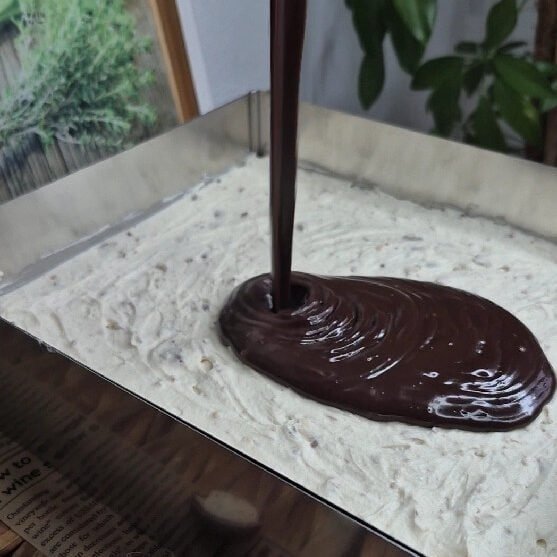
Prepare the silky chocolate ganache
In a small pot, I bring whipping cream and butter almost to a boil. As soon as it starts bubbling, I pour it over the mixture of chopped dark and milk chocolate.
After waiting a minute or two, I stir slowly until everything melts into a shiny, rich ganache.
Once completely smooth, I let it cool slightly—just until it’s pourable but not hot.
I pour it evenly over the cake, letting it spread beautifully to the edges.
Add the finishing touch
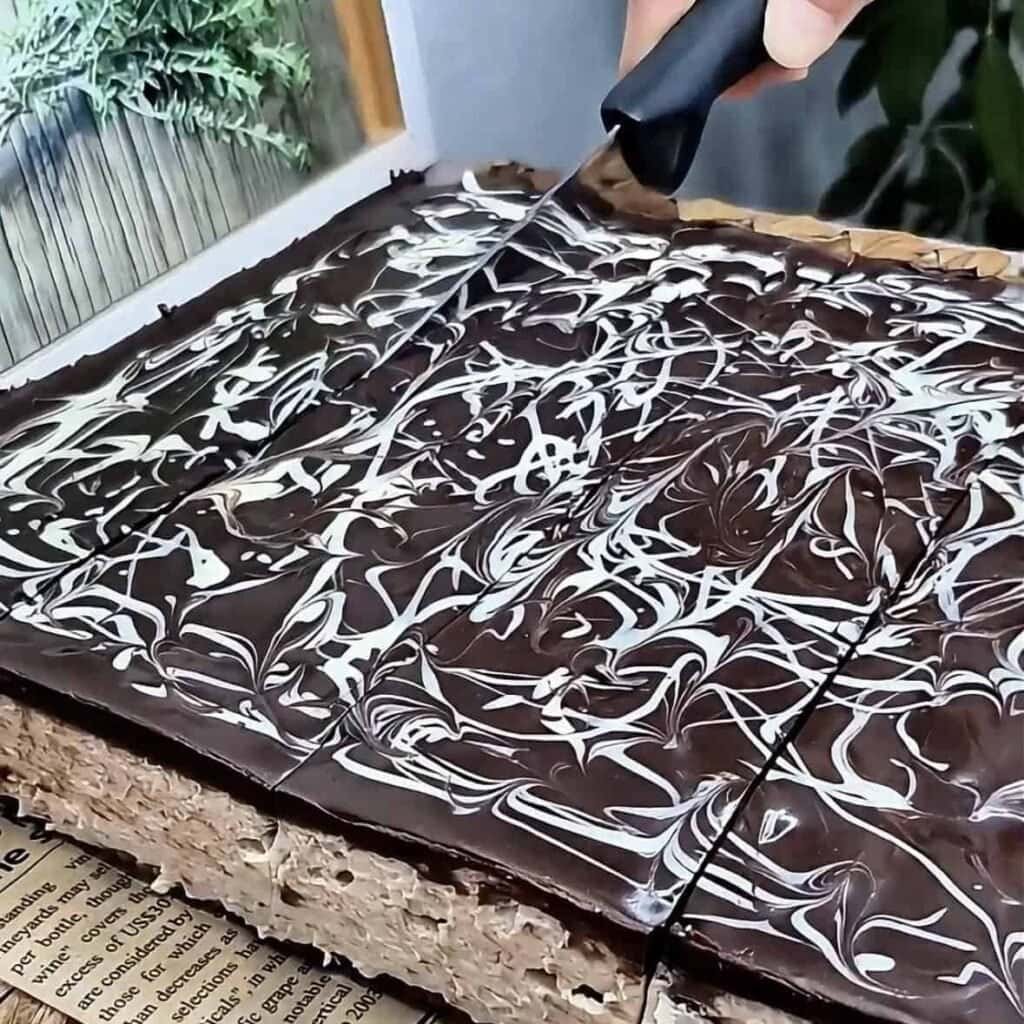
In my kitchen, no cake is allowed to leave without a little decorative touch. So I melt 30 g of white chocolate and use either a spoon or a thin stick to create delicate drizzles over the dark ganache.
This is what gives the cake that irresistible, luxurious final look.
Chill, slice, and enjoy
The hardest part of the entire recipe?
Waiting those final 2 hours while the cake sets fully in the fridge.
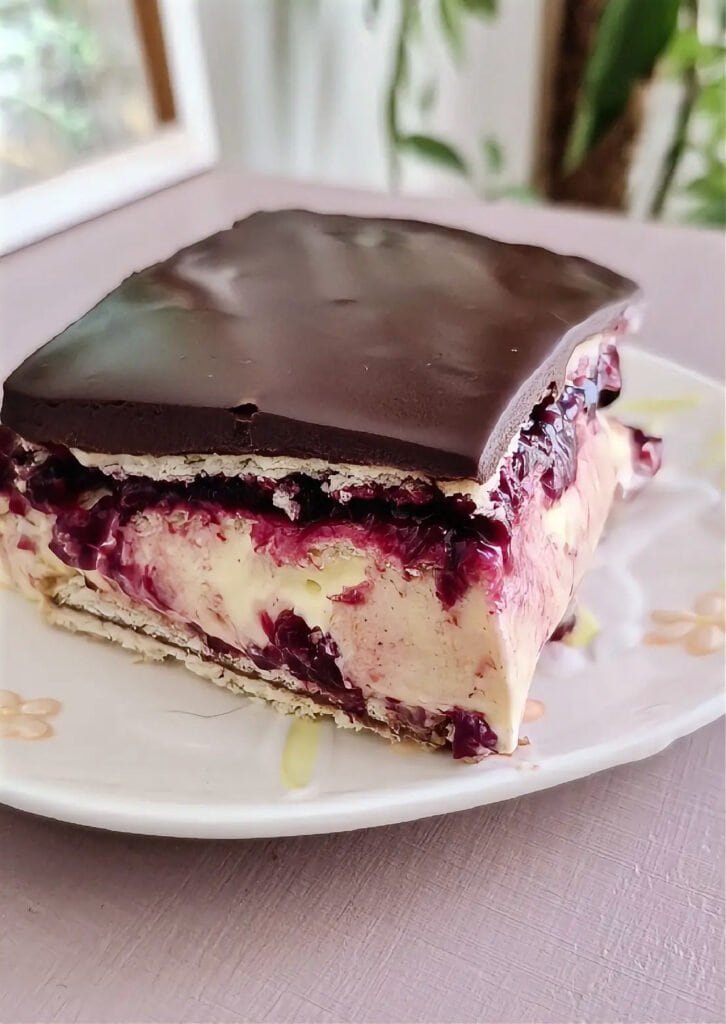
But once that time passes and I slice into the chilled layers… WOW.
Soft but stable. Creamy but not heavy.
Chocolatey but not overwhelming.
Just… perfection.
Tips From My Kitchen (Because I Want Your Cake to Be PERFECT)
Don’t over-soak the biscuits.
A quick dip = best texture.
Let the melted chocolate cool slightly before mixing with mascarpone.
Cold mascarpone + hot chocolate = disaster.
Use full-fat mascarpone.
Light versions won’t hold the structure as beautifully.
Chill the mixing bowl before whipping the cream.
It helps it whip faster and stay airy.
Let the ganache cool for a few minutes before pouring.
Too hot and it may melt the filling.
Chill the cake overnight if you can.
The flavor becomes even better the next day!
When to Serve This Cake
Short answer? Always.
Long answer? Here are some perfect occasions:
- birthdays
- weekend family gatherings
- potlucks (everyone will ask for the recipe)
- holidays
- children’s parties
- “just because I wanted something delicious today” days
And yes, it’s also freezer-friendly—just freeze slices individually!
The Flavors: What Makes This Cake So Special
Every bite has this smooth, melt-in-your-mouth texture, followed by tiny pops of Kinder goodness from the chopped Schoko-Bons. The layers of biscuits create the most satisfying contrast, while the ganache adds a deeper chocolate note that ties the entire cake together.
It’s elegant, playful, nostalgic, and modern all at once.
A cake that feels familiar… but tastes better than any Kinder-inspired dessert you’ve had before.
Full Recipe
Ingredients:
Base:
- 100–150 g petit biscuits
- 100–150 g cocoa biscuits
- 100 ml milk
Filling:
- 500 g mascarpone
- 100 g Kinder Schoko-Bons (melted) + 60 g (chopped)
- 100 g white chocolate
- 500 ml whipping cream
Ganache:
- 100 g dark chocolate
- 80 g milk chocolate
- 180 ml whipping cream
- 20 g butter
- 30 g white chocolate (for decoration)
Procedure:
- Dip petit biscuits briefly in milk and arrange in a 24×24 cm pan.
- Melt 100 g Schoko-Bons with 100 g white chocolate. Cool slightly.
- In a mixing bowl, whip mascarpone, the cooled chocolates, and whipping cream.
- Fold in 60 g chopped Schoko-Bons.
- Divide the cream into two equal portions.
- Spread the first half over the petit biscuit layer.
- Dip cocoa biscuits in milk and arrange over the filling.
- Spread the second half of the filling.
- Chill the cake for 1–2 hours.
- Heat whipping cream and butter until just boiling. Pour over chopped dark and milk chocolate.
- Stir until a smooth ganache forms.
- Pour cooled ganache over the cake.
- Melt white chocolate and drizzle on top for decoration.
- Refrigerate for 2 more hours before slicing.
Final Thoughts
If you’re searching for a dessert that’s show-stopping yet effortless, familiar yet luxurious, playful yet elegant—this Kinder Schoko-Bons No-Bake Cake is exactly what you need.
It has become one of my absolute favorites, not only because it tastes heavenly, but because every single time I make it, I see people’s eyes light up before they even take a bite.
There’s something about Kinder chocolate that awakens a bit of childhood joy in all of us… and when you wrap that nostalgia in layers of creamy mascarpone and glossy chocolate ganache, well—magic happens.
So go ahead and treat yourself.
You deserve a slice of happiness today.