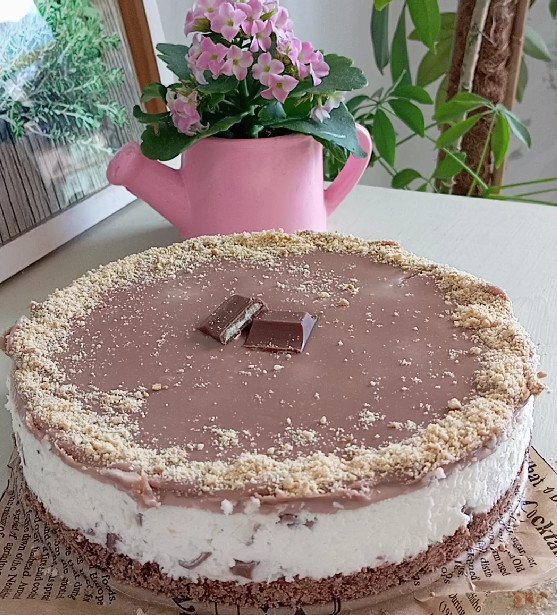
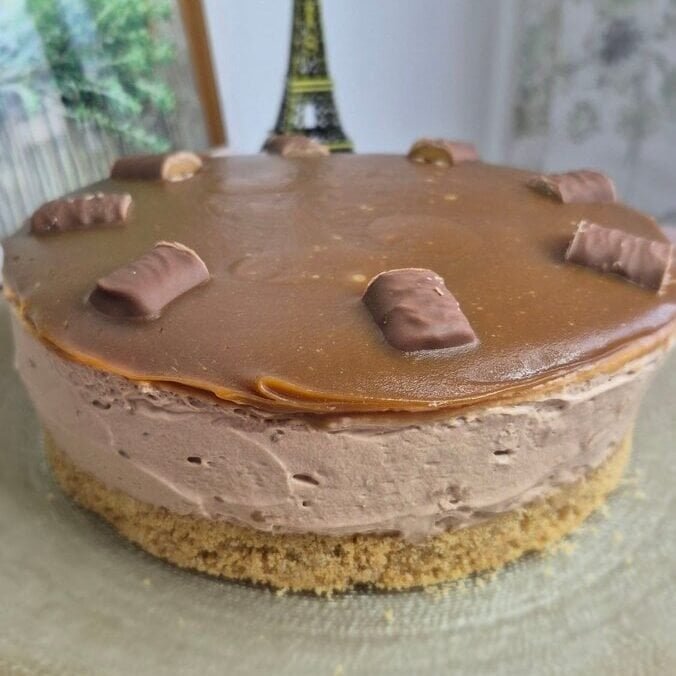
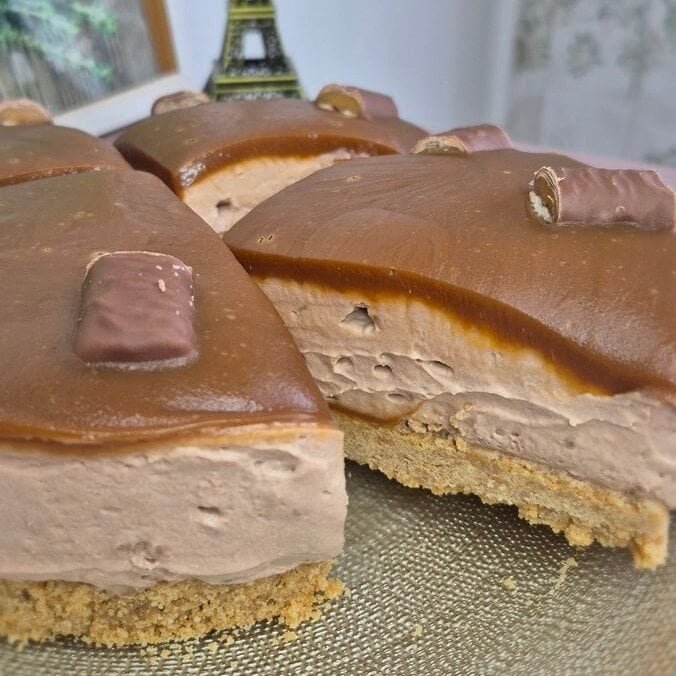
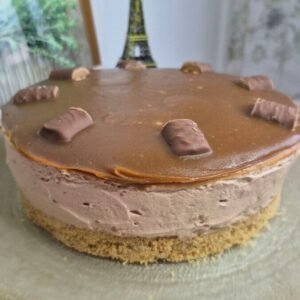
This Twix caramel cheesecake is the kind of cake that looks rich from the first slice, but the texture is what really makes it worth making.
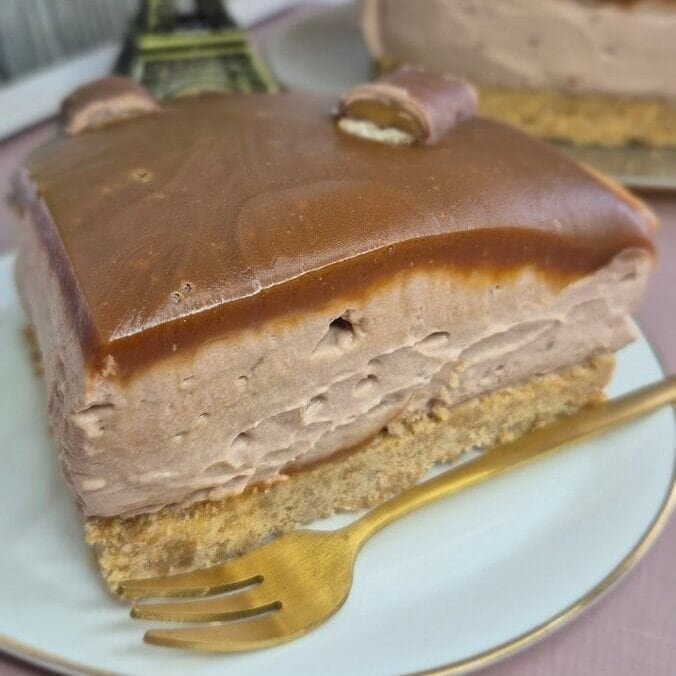
It has a biscuit base, a mascarpone filling with Twix spread folded through it, and a homemade caramel topping that sets properly once the cake has had enough time to chill.
The first time I cut it, I was too early.
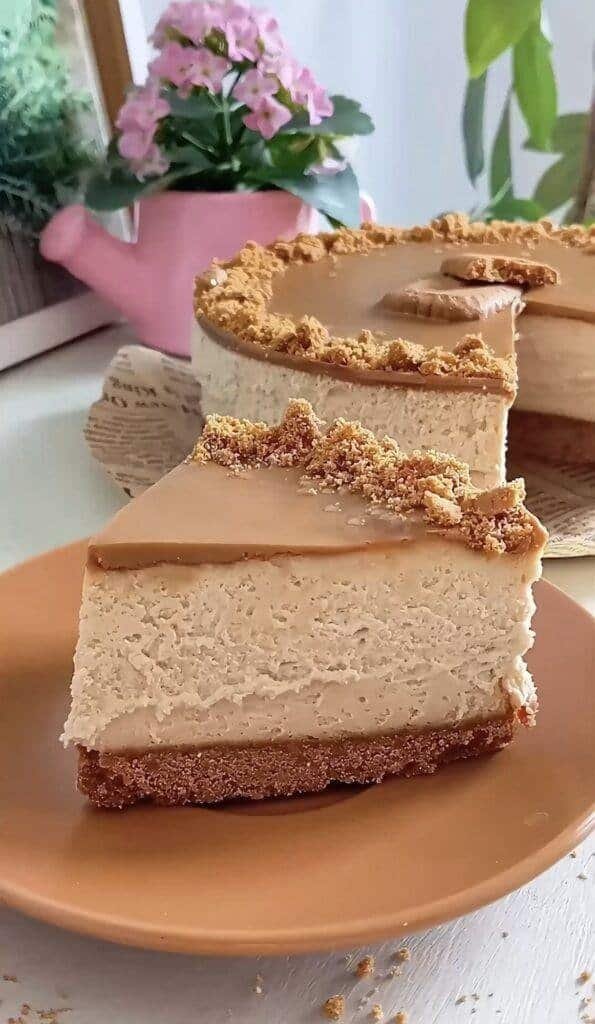
The caramel was still a little too soft, and while the flavor was right, the slices were not as neat as I wanted. The next day, though, it was exactly how this cake should be. Clean slices, a firm top, and a filling that held its shape without feeling heavy.
So that is the main thing I would say right away: this is not the cake to rush.
If you give it the full chilling time, it pays you back.
Why I keep making this cheesecake
There are a lot of no-bake cheesecakes that look good in photos but fall short once you cut into them.
Some are too soft.
Some taste mostly of cream.
Some are sweet without having much character.
This one has more going on.
The crust gives it a solid base and a bit of bite.
The mascarpone keeps the filling thick and smooth.
The whipped cream lightens that filling just enough, so it does not feel dense.
Then the caramel on top brings everything together and gives the cake that finished look.
The Twix spread is not there just for the name.
It adds a caramel-chocolate note to the filling without taking over the whole cake. You still get cheesecake texture, but with that familiar Twix flavor in the background.
Ingredient breakdown
This cheesecake uses basic ingredients, but each one has a job.
Biscuits
I use Digestive biscuits for the crust because they crush well and give a base that holds once chilled.
If you use another plain biscuit, that works too. Just pick something dry and crisp, not soft-filled cookies.
Butter
Melted butter binds the crumbs together and helps the crust firm up in the fridge.
Without enough butter, the base turns sandy. Too much, and it becomes greasy.
Milk
A little milk helps bring the crust together and makes it easier to press into the pan.
It is a small detail, but it helps the crumbs hold without making the base too hard once cold.
Mascarpone
This is what gives the filling its body.
Mascarpone makes the cheesecake smooth, rich, and stable. It also works really well with caramel flavors, which is why it fits this recipe better than a looser cream cheese filling.
Powdered sugar
There is only a small amount in the filling, and that is enough.
The caramel and the spread already bring sweetness, so the filling does not need much more.
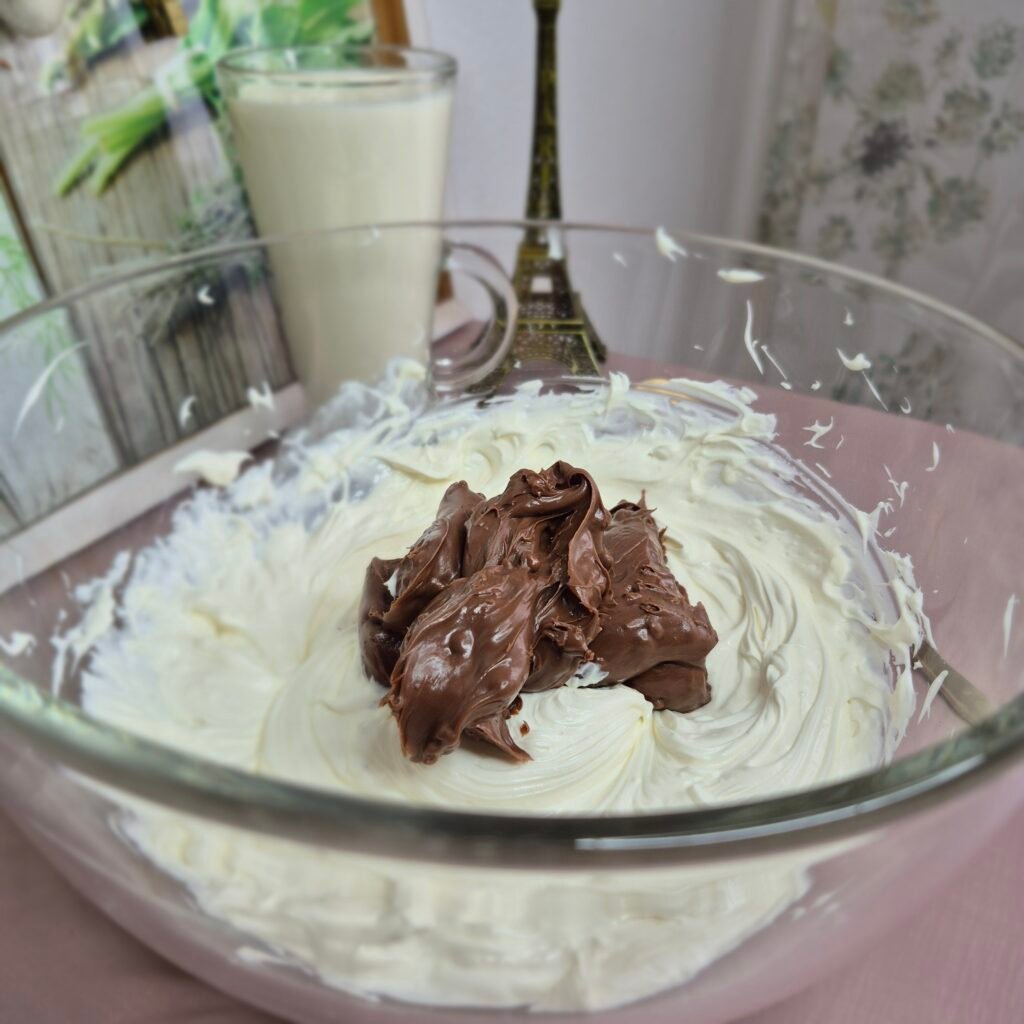
Twix spread
This is what gives the filling its character.
It adds sweetness, caramel flavor, and that candy-bar note without turning the cheesecake into a novelty dessert. I do not use too much, because I still want the mascarpone to come through.
Heavy cream
The cream does two different jobs here.
First, it gets whipped and folded into the filling to make it lighter.
Then more cream goes into the caramel topping to turn the melted sugar into a smooth sauce.
For both parts, the cream matters. Use full-fat cream, and for the filling make sure it is very cold before whipping.
Sugar
This is for the caramel topping.
It gets melted on its own, slowly, until it turns golden. That color is important. Too pale, and the caramel tastes flat. Too dark, and it becomes bitter.
Butter for the caramel
Butter finishes the caramel and gives it a smoother texture.
It also helps the topping set with a softer bite instead of becoming sticky and hard.
How I make This cheesecake
This cheesecake comes together in stages, and I always treat each one separately.
That makes the whole process feel easier.
1. Make the crust first
I start by crushing the biscuits very finely.
You can do this in a food processor or by hand with a rolling pin, but the crumbs should be fine and even. Big pieces make the base harder to slice neatly later.
Once the crumbs are ready, I mix them with melted butter and milk until the mixture looks like damp sand.
Then I press it firmly into the bottom of the pan.
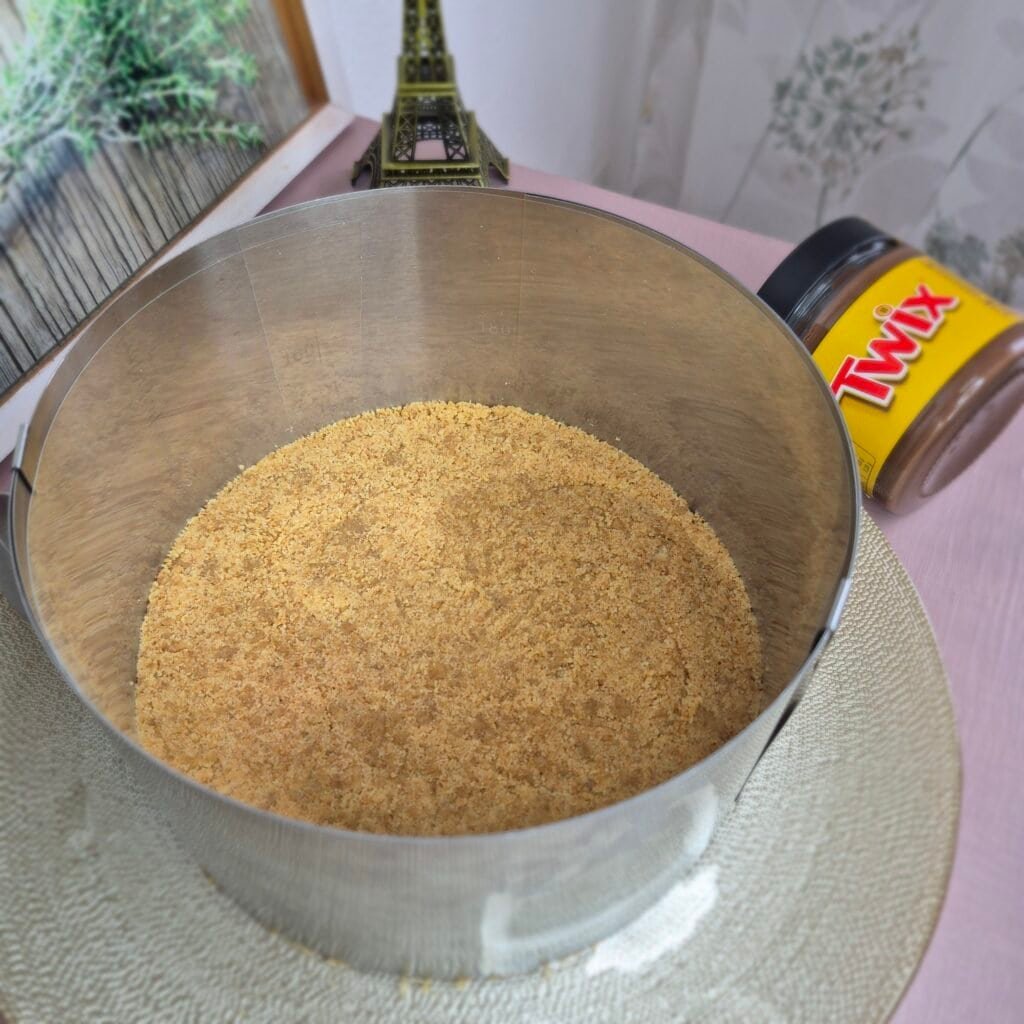
I do not leave it loose or fluffy. I press it down well with the bottom of a glass or spoon so the crust is compact and even across the whole base.
After that, it goes into the fridge while I make the filling.
2. Prepare the filling
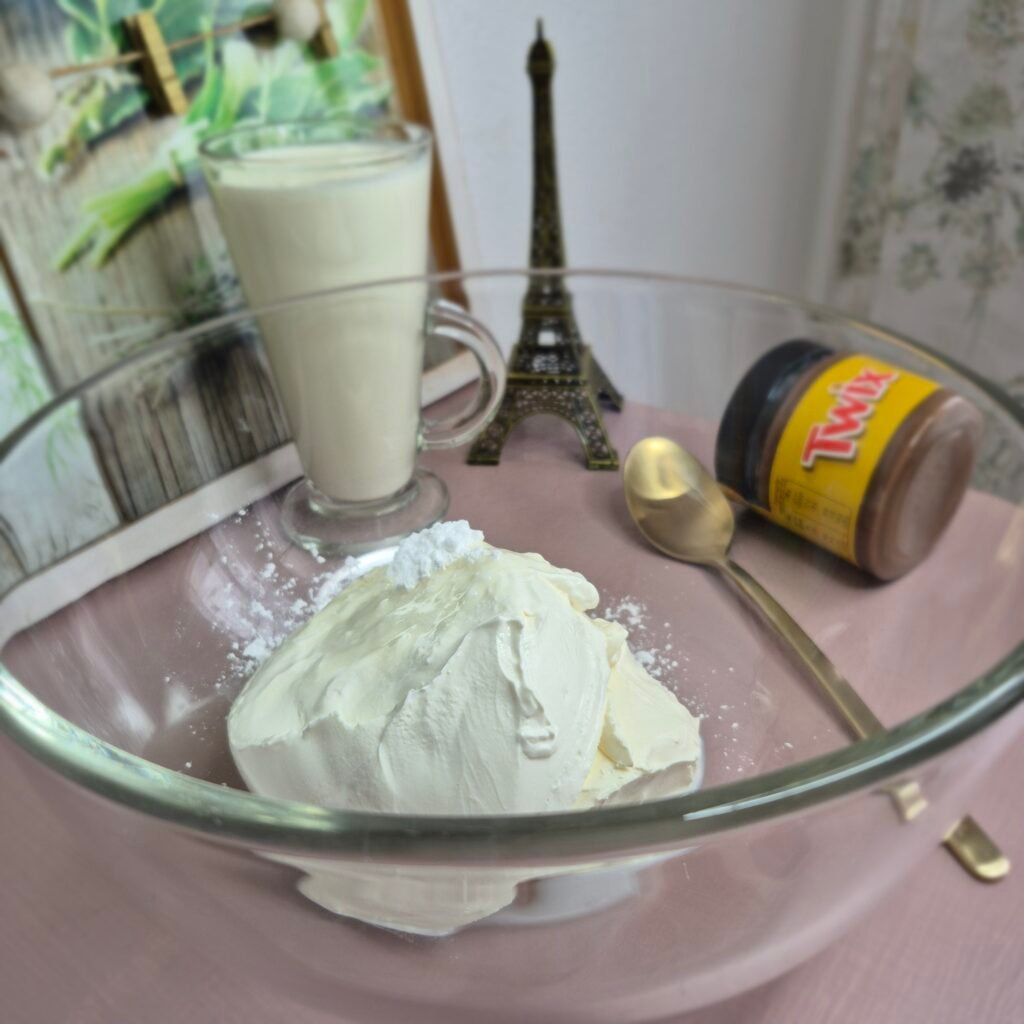
The filling is simple, but texture matters.
I mix the mascarpone with the powdered sugar and Twix spread until smooth. I do not overbeat it. I just mix until there are no lumps and everything looks evenly combined.
In a separate bowl, I whip the cold cream until stiff peaks form.
This step needs a bit of attention. Under-whipped cream makes the filling too loose. Over-whipped cream starts turning grainy, and that affects the final texture.
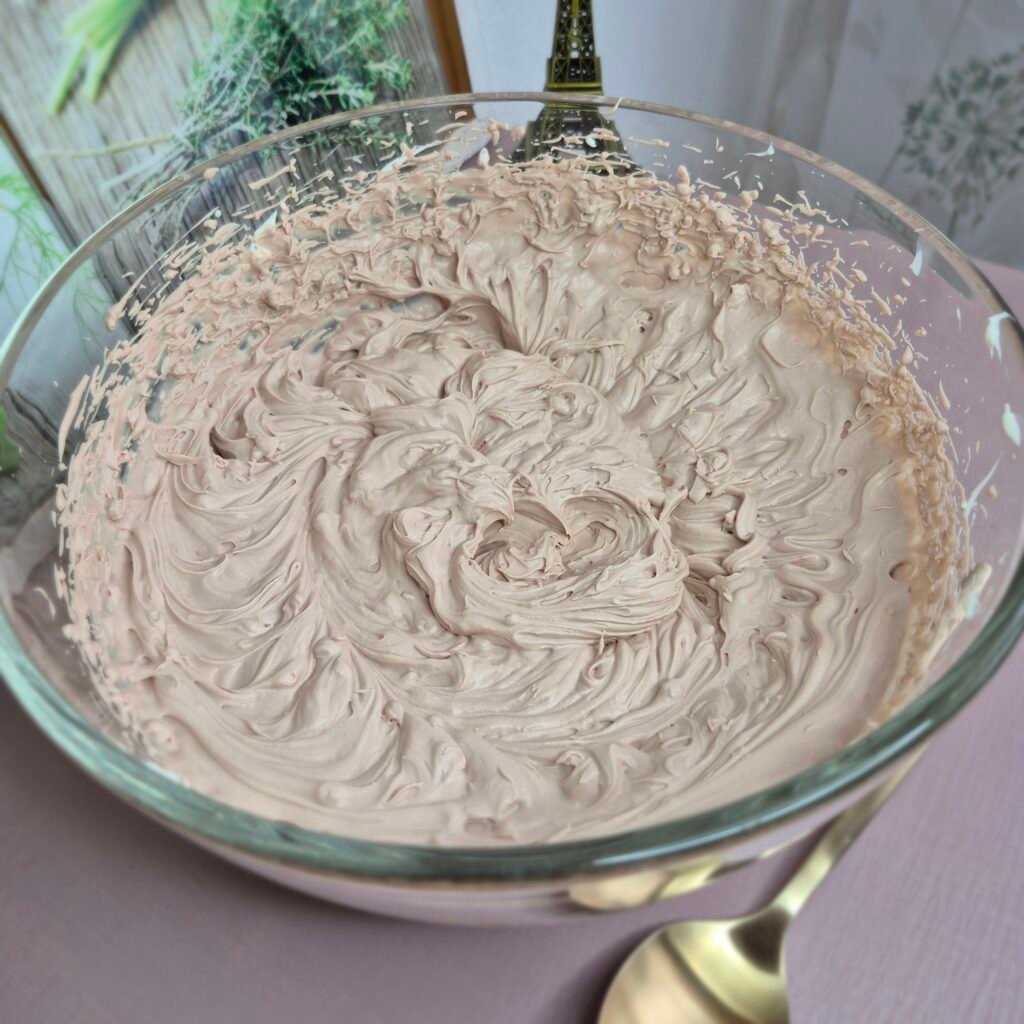
Once the cream is ready, I fold it into the mascarpone mixture with a spatula.
I do this gently and in stages, not all at once. That way the mixture stays airy and smooth.
Then I spread the filling over the chilled crust and level the top.
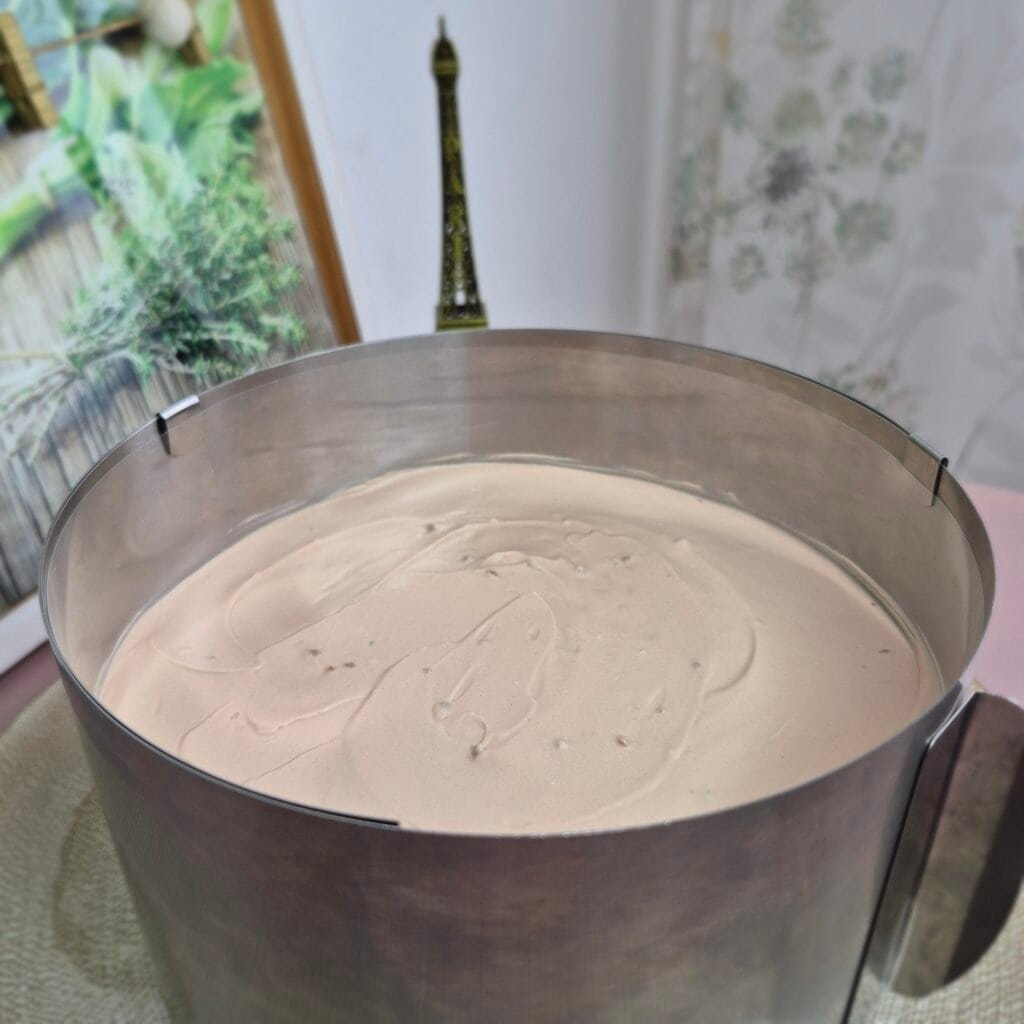
At this point, the cheesecake goes back into the fridge so it can firm up before the caramel goes on.
3. Make the caramel topping
This is the part people tend to worry about most, but it is manageable as long as you do not rush it.
I put the sugar into a saucepan and let it melt over low heat.
I do not stir it with a spoon.
Instead, I gently shake the pan now and then if needed. Stirring too early can make the sugar seize or crystallize, so I leave it alone until it has mostly melted.
Once the sugar is fully melted and golden, I take the pan off the heat and add the cream.
This part bubbles up, so I add it carefully and stir continuously until it comes together.
Then the butter goes in.
After that, I return the pan to the heat briefly so the caramel smooths out properly.
I let it cool a little before pouring it over the cheesecake. Not cold, because then it thickens too much. Not very hot, because I do not want it melting the top layer underneath.
Then I pour it over the cake and spread it gently if needed.
4. Chill properly before slicing
This is the most important step in the whole recipe.
Once the caramel is on, the cheesecake needs a long chill.
A few hours will get it cold, but overnight is what makes it really slice well.
That extra time changes the texture of the top completely. The caramel firms up enough to stay in place, and the filling settles into a cleaner slice.
I learned that the hard way.
When I cut it too soon, the caramel was still too loose. The next day, it was perfect.
Simple tips for making this cake
Use cold cream for the filling
If the cream is not cold enough, it takes longer to whip and may not hold properly.
I usually keep the bowl cold too if my kitchen is warm.
Do not overmix the mascarpone
Mascarpone can loosen too much if beaten aggressively.
Mix just until smooth, then stop.
Let the caramel turn golden, not dark brown
The color tells you most of what you need to know.
You want a proper golden caramel flavor, but once it gets too dark, the bitterness comes through fast.
Cool the caramel slightly before pouring
Fresh caramel straight from the stove is too hot.
Give it a few minutes so it thickens slightly and does not run straight off the top.
Chill overnight if you want clean slices
This is my strongest advice for this recipe.
You can technically serve it sooner, but the texture is much better the next day.
Wipe the knife between slices
Because of the caramel, the knife picks up a lot with each cut.
A clean knife gives a much neater slice.
A few useful swaps
If you cannot find Digestive biscuits, another plain biscuit works fine for the base.
If you do not have Twix spread, use a similar caramel-chocolate spread, but keep in mind the flavor will change slightly.
I would not swap mascarpone for something much lighter here unless you already know how it behaves in no-bake fillings. Mascarpone is one of the reasons this cheesecake sets so nicely.
How I store it
I keep this cheesecake in the fridge, covered, for a few days.
The texture stays best when it stays cold.
I do not leave it out too long before serving, especially if the room is warm, because the caramel softens again.
For serving, I usually take it out just long enough to slice comfortably.
Best way to serve it
I like this cheesecake cold, straight from the fridge, with nothing extra on top.
It already has enough going on.
You have the crumb base, the creamy filling, and the caramel finish, so it does not need whipped cream, extra chocolate, or more decorations.
If you want a cleaner look, just slice and serve.
That is enough.
FAQ
Can I make this cheesecake a day ahead?
Yes, and I actually think it is better that way.
The overnight chill improves both the texture and the slicing.
Can I freeze it?
You can, but I prefer it fresh from the fridge.
Freezing may change the texture of the filling and caramel slightly once thawed.
Why did my caramel stay too soft?
Usually it is one of two things.
Either it did not cook long enough after adding the cream and butter, or the cheesecake was sliced before it had enough time to chill.
Can I use cream cheese instead of mascarpone?
You can, but the flavor and texture will be different.
Mascarpone gives this cheesecake a smoother and slightly richer finish.
Twix Caramel Cheesecake
Ingredients
For the crust
- 150 g Digestive biscuits or another type
- 70 g butter melted
- 2 –3 tablespoons milk
For the filling
- 500 g mascarpone cheese
- 1 tablespoon powdered sugar
- 2 –3 tablespoons Twix spread
- 250 ml heavy cream 35% fat, cold
For the caramel topping
- 200 g sugar
- 200 ml heavy cream
- 50 g butter
Instructions
- Crush the biscuits into fine crumbs.
- Mix the biscuit crumbs with the melted butter and milk until the mixture resembles damp sand.
- Press the crust mixture firmly into the bottom of a 20 cm pan.
- Place the pan in the refrigerator while you prepare the filling.
- In a mixing bowl, beat the mascarpone cheese, powdered sugar, and Twix spread until smooth.
- In a separate bowl, whip the cold heavy cream until stiff peaks form.
- Gently fold the whipped cream into the mascarpone mixture with a spatula until fully combined.
- Spread the filling evenly over the chilled crust and smooth the top.
- Refrigerate for 1–2 hours to help the filling firm up.
- To make the caramel topping, add the sugar to a saucepan and melt it over low heat without stirring, only gently shaking the pan when needed.
- Once the sugar has fully melted and turned golden, remove the pan from the heat.
- Carefully add the heavy cream, stirring constantly until the mixture comes together.
- Add the butter and return the pan to low heat for 2 minutes, stirring until smooth.
- Let the caramel cool slightly.
- Pour the caramel topping over the cheesecake.
- Chill the cheesecake for at least 4–5 hours, ideally overnight, before slicing and serving.
Notes
- For the cleanest slices, chill the cheesecake overnight.
- If the caramel feels too soft, it usually just needs more chilling time.
- Use very cold heavy cream for the filling so it whips properly.
- Do not overmix the mascarpone mixture.