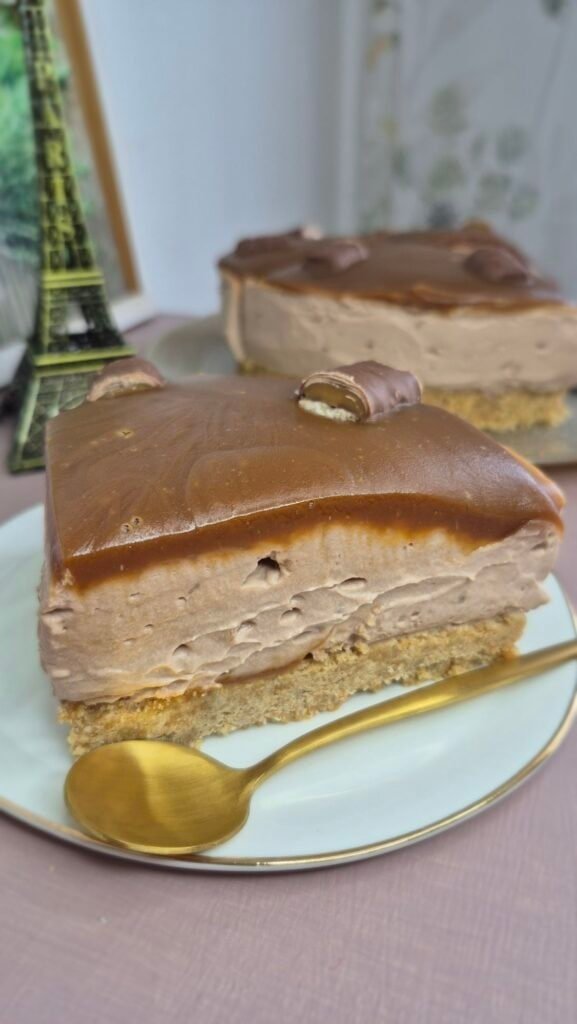
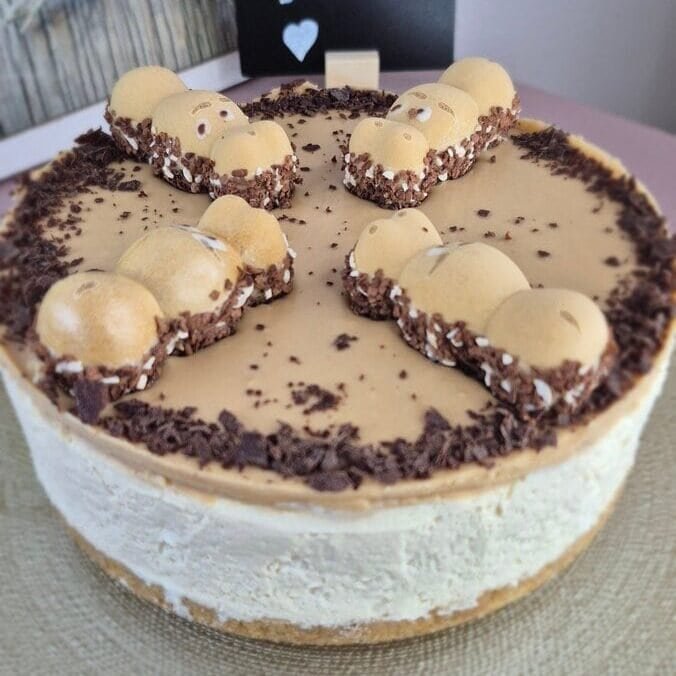
Happy Hippo Cheesecake is the kind of cake people notice straight away.
It looks playful because of the topping, but the flavour is actually very balanced. You get a soft biscuit base, a light mascarpone filling with a little hazelnut spread mixed through, and a smooth top layer that sets just enough to give the finished cake a clean look.
I like this recipe because it does not try too hard.
The filling stays simple. The base is pressed in by hand. The topping is just melted hazelnut spread, slightly cooled so it pours neatly instead of running everywhere. Then the decoration does the rest.
This is also the kind of no-bake cheesecake that slices better than you would expect. The small amount of milk in the base makes a real difference. It softens it just enough, so you do not get that hard refrigerated crust that cracks and flies across the plate when you cut into it.
Why this Happy Hippo Cheesecake turns out so well
The first thing is the texture.
The base is firm enough to hold the filling, but not dry.
The filling is creamy without feeling heavy. Because the whipped cream is folded into the mascarpone mixture rather than beaten all together from the start, it stays lighter and smoother.
The topping adds more than just looks. It gives a stronger hazelnut flavour right on top, so every slice tastes finished. Without it, the cheesecake would still be good, but it would not have that same full flavour from top to bottom.
Then there is the decoration.
Happy Hippo bars work well here because they bring crunch, chocolate, and that familiar hazelnut note. They also make the cake look like it took more effort than it actually did, which is always useful.
Ingredient breakdown
This cheesecake uses a short list of ingredients, and each one has a clear job.
Biscuits
Digestive biscuits are my first choice for the base because they crush evenly and hold together well once mixed with butter. They also have a plain, slightly malty flavour that does not fight with the filling.
If you do not have digestives, another plain biscuit works too. Just avoid anything with a very strong flavour unless you want that to come through in the final cake.
Butter
Melted butter binds the crumbs and gives the base structure once chilled.
It is worth mixing it through really well so you do not end up with dry patches.
Milk
This is the small detail that improves the base.
A lot of biscuit bases are too compact once they come out of the fridge. A little milk softens the mixture and makes the finished cheesecake easier to slice neatly.
Mascarpone
Mascarpone gives the filling body and that rich cheesecake texture without needing baking.
It should be cold, but not rock hard. If it is too stiff straight from the fridge, it can stay lumpy when mixed.
Powdered sugar
You only need a little.
The hazelnut spread already adds sweetness, so the sugar here is more about balancing the mascarpone than making the filling taste sugary.
Heavy cream
This gives the filling lift.
Whipping it separately first is important because it keeps the cheesecake light instead of turning dense.
Hazelnut spread
This goes into both the filling and the topping.
Inside the filling, it adds flavour without making the mixture too loose. On top, it gives the cake a smooth finish and ties the whole dessert together.
Decorations
Happy Hippo bars are the obvious choice, but I also like adding a little whipped cream, chopped chocolate, or a few biscuit crumbs if I want the top to look fuller.
You do not need to overdo it.
A few pieces arranged properly already make the cake look finished.
How the cheesecake should look at each stage
This part matters more than people think.
When the biscuit base is mixed, it should hold together when pressed in your hand. It should not be dusty, and it should not look greasy either.
When the filling is ready, it should look thick and smooth. It should sit on the spoon rather than run off it.
After the first chill, the top should feel set when lightly touched. Not hard, just stable.
When you add the topping, it should still be fluid enough to spread, but not hot. If it is too warm, it can soften the filling underneath and ruin the clean layers.
Once fully chilled, the cake should cut in one clean downward motion with a sharp knife.
Step-by-step instructions
1. Make the biscuit base
Crush the biscuits very finely.
You can do this in a food processor or by placing them in a bag and crushing them with a rolling pin. I prefer a fine crumb here because it presses into a smoother base and holds together better after chilling.
Mix the crumbs with the melted butter first.
Then add the milk gradually. You are looking for a mixture that feels slightly softer than a standard cheesecake base.
Press it into your cake pan.
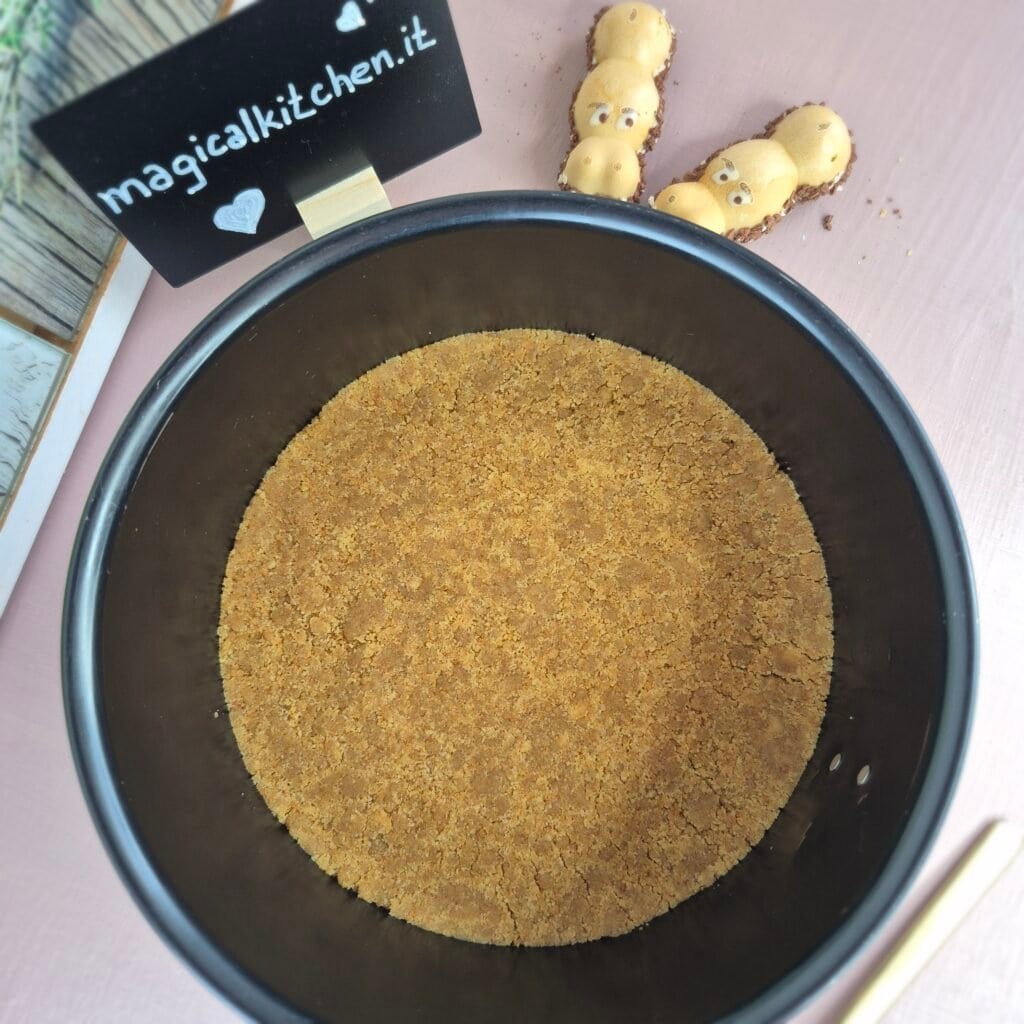
I usually use the bottom of a glass or a spoon to flatten it evenly, especially around the edges. Once it is level, chill it while you make the filling.
2. Prepare the filling
In one bowl, mix the mascarpone with the powdered sugar and hazelnut spread.
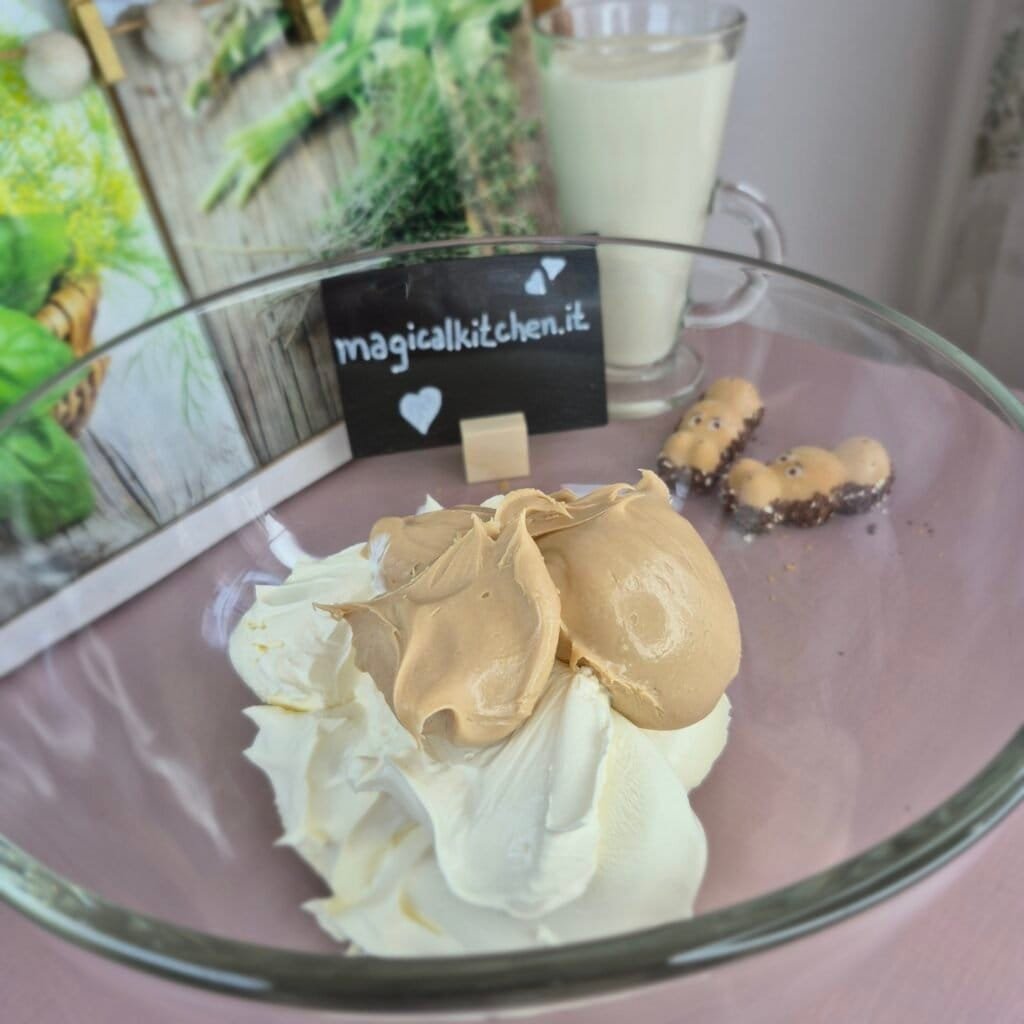
Do not overmix it. You only want it smooth and evenly combined.
In a separate bowl, whip the cream until it holds its shape.
It should be whipped enough to keep the filling stable, but not so much that it turns grainy.
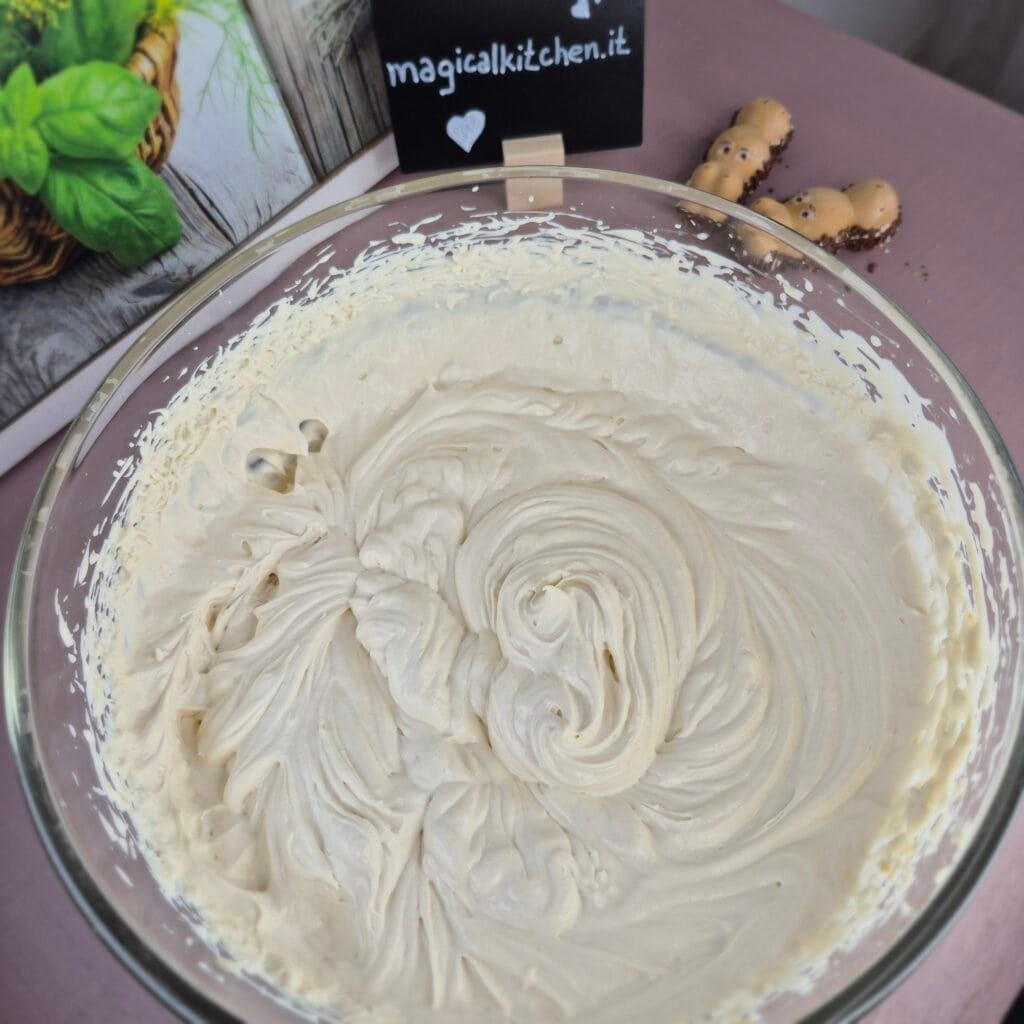
Fold the whipped cream into the mascarpone mixture with a spatula.
Do this gently. The goal is to keep the mixture light while still fully combining it.
Spread the filling over the chilled base.
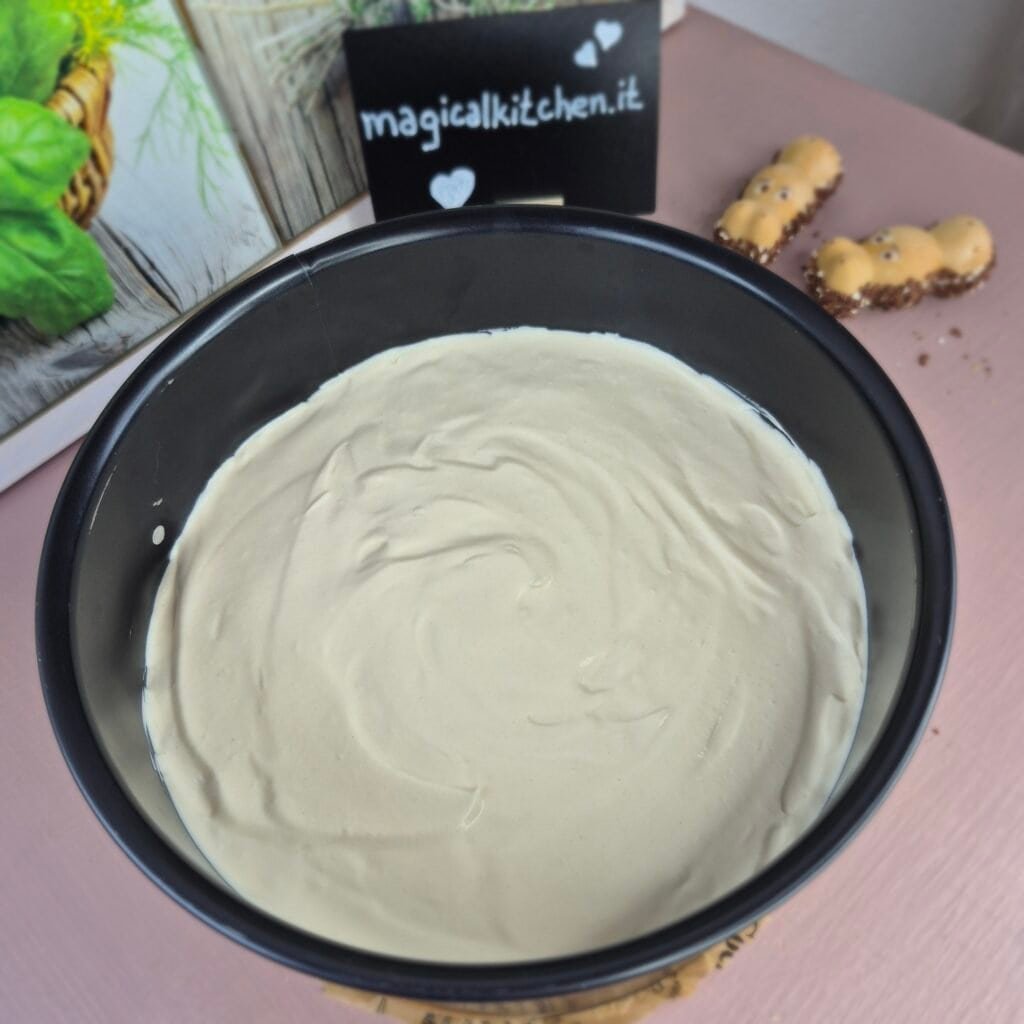
Smooth the top as evenly as you can, then return the cheesecake to the fridge.
3. Chill before adding the topping
This resting time is important.
It gives the filling time to firm up, which helps the topping sit properly on top instead of mixing into the cream layer.
Do not skip it.
4. Add the hazelnut topping
Warm the hazelnut spread gently over a double boiler.
You want it pourable, not hot.
Let it cool slightly, then pour it over the chilled cheesecake. Spread it gently if needed, but usually it settles well on its own if the consistency is right.
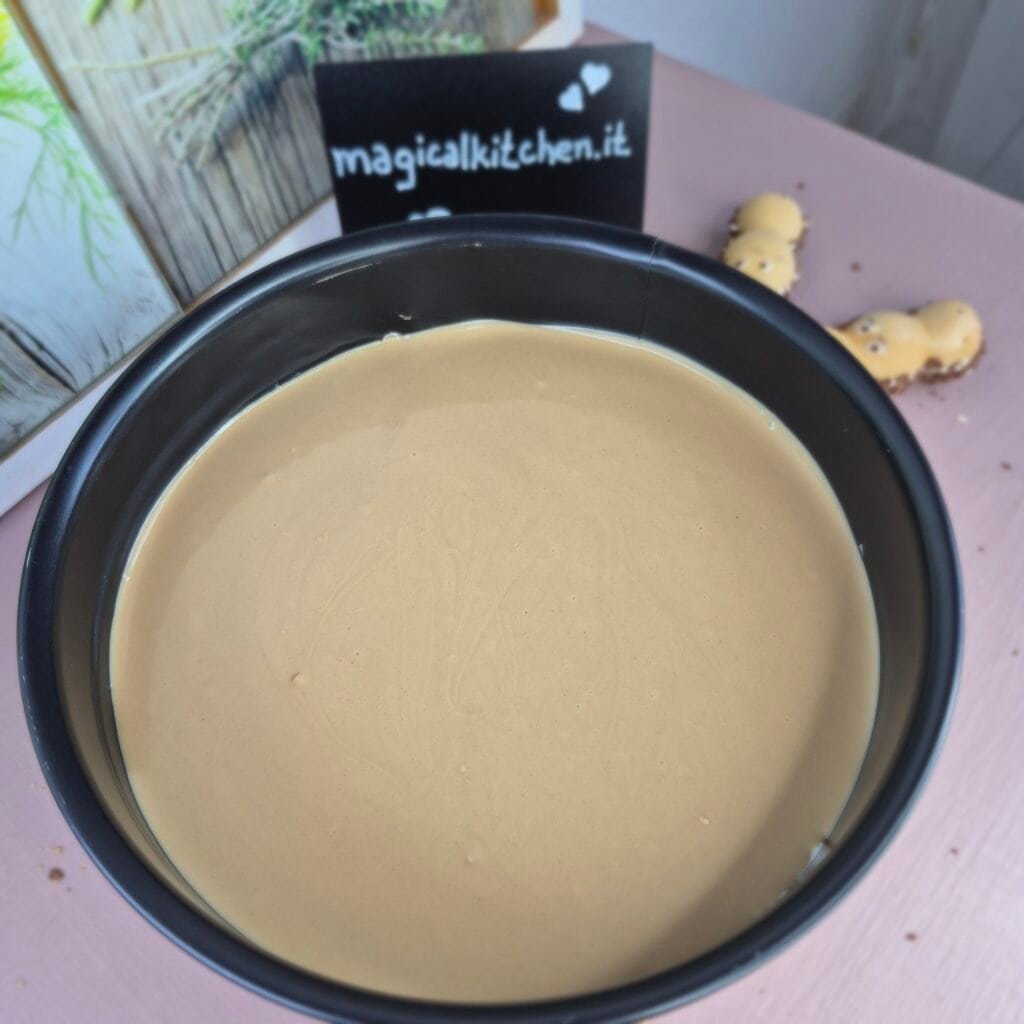
Decorate the top before the topping fully sets.
Place the Happy Hippo pieces where you want them, then add anything extra like whipped cream or chopped chocolate.
5. Chill again and slice
The final chill is what brings everything together.
Once the cake is properly set, remove it from the pan and slice with a sharp knife. Wiping the knife between cuts helps keep the layers neat.
helpful tips
Crush the biscuits properly
Large chunks can make the base harder to cut and less tidy once sliced.
A finer crumb gives a better result.
Do not add all the milk at once
Some biscuits absorb more than others.
Add it little by little and stop once the mixture feels right.
Keep the topping warm enough to pour, but not hot
This is probably the easiest place to go wrong.
If the topping is too thick, it will drag across the filling. If it is too hot, it can soften the cheesecake underneath.
Fold, do not beat
Once the whipped cream is ready, use a spatula and fold it in.
This keeps the filling airy.
Chill for the full time
A rushed cheesecake is always harder to slice.
The texture improves a lot after the second chill, so it is worth being patient.
decoration ideas
I usually keep the top simple.
A few cut Happy Hippo bars placed around the edge already look good.
For a fuller finish, I sometimes add small swirls of whipped cream and set the chocolate pieces between them. Chopped hazelnuts also work well if you want a little crunch.
If the cake is for a birthday table or party, I decorate it right before serving so the bars stay crisp.
How to store it
Keep the cheesecake in the fridge.
It is best on the day it is fully set and the day after. After that, it still tastes good, but the decorations can start to soften.
Store it covered so it does not dry out or absorb fridge smells.
If I know I am making it ahead, I sometimes leave off the final decoration until closer to serving time.
simple variations
You can change the look of this cheesecake without changing the base recipe too much.
Try a chocolate biscuit base if you want a darker flavour.
Use chopped wafer bars instead of Happy Hippo on top if that is what you have.
Add a little more decoration around the edges for a more finished party-style cake.
But I would keep the filling exactly as it is.
That is the part that makes the recipe work.
Questions people usually ask
Can I make this Happy Hippo Cheesecake the day before?
Yes, and it works well that way.
In fact, making it the day before gives it plenty of time to set properly.
Can I freeze it?
You can freeze the undecorated cheesecake, then thaw it in the fridge.
I would add the topping decorations after thawing for the best texture.
Can I use cream cheese instead of mascarpone?
You can, but the flavour will be tangier and the texture slightly different.
Mascarpone gives this cheesecake a softer, rounder flavour that works really well with the hazelnut spread.
Do I need a springform tin?
It helps the most for easy removal, but any cake pan with a removable base works well too.
Final notes before the recipe card
This is a very straightforward no-bake cheesecake, but it does not come out looking basic.
The layers are clean.
The flavour makes sense from base to topping.
And the decoration gives it that extra bit of character without making the recipe complicated.
That is why I keep coming back to it.
It is easy to make, easy to serve, and it looks like something you actually planned rather than threw together at the last minute.

Happy Hippo Cheesecake
Ingredients
For the base:
- 150 g Digestive biscuits
- 80 g butter melted
- 3 tablespoons milk
For the filling:
- 300 g mascarpone cheese
- 1 tablespoon powdered sugar
- 250 ml heavy cream 35% fat
- 2 tablespoons hazelnut spread
For the topping:
- 2 –3 tablespoons hazelnut spread
For decoration (optional):
- Happy Hippo bars
- Whipped cream
- Chopped chocolate
- Biscuit crumbs
Instructions
Make the base:
- Crush the Digestive biscuits into very fine crumbs.
- Add the melted butter and mix well.
- Add the milk and stir until the mixture holds together and feels slightly soft.
- Press the biscuit mixture firmly into the base of a 20 cm cake pan.
- Place the pan in the refrigerator while you prepare the filling.
Make the filling:
- In a large bowl, beat the mascarpone cheese, powdered sugar, and hazelnut spread until smooth.
- In a separate bowl, whip the heavy cream until it holds its shape.
- Gently fold the whipped cream into the mascarpone mixture using a spatula.
- Spread the filling evenly over the chilled biscuit base.
- Refrigerate for 2 hours.
Add the topping:
- Melt the hazelnut spread gently over a double boiler until smooth and pourable.
- Let it cool slightly.
- Pour the hazelnut spread over the chilled cheesecake and spread gently if needed.
- Decorate with Happy Hippo bars, whipped cream, chocolate, or biscuit crumbs.
- Return the cheesecake to the refrigerator for another 2 hours.
Serve:
- Remove the cheesecake from the pan.
- Slice with a sharp knife and serve chilled.
Notes
- Add the milk gradually to the biscuit base, as some biscuits absorb more than others.
- Do not pour the topping on while it is hot, or it may soften the filling.
- For cleaner slices, wipe the knife between each cut.
- This cheesecake can be made a day in advance and kept chilled until serving.