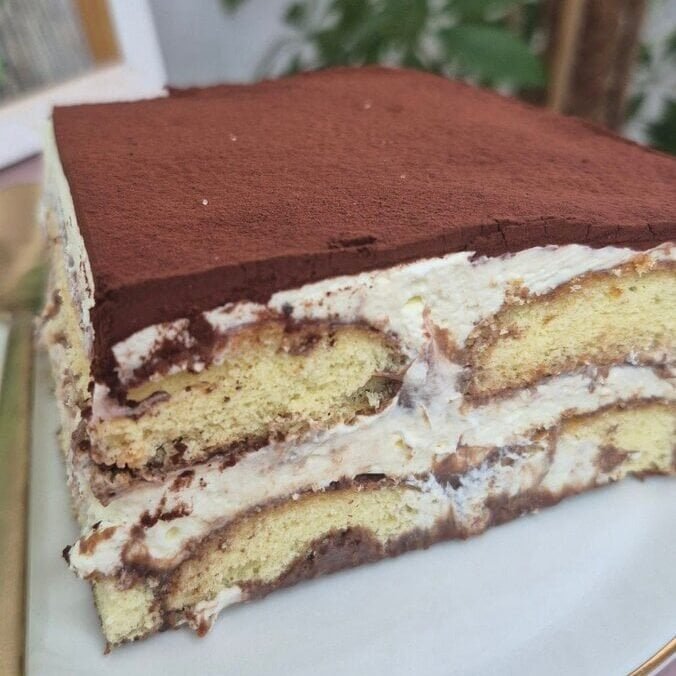
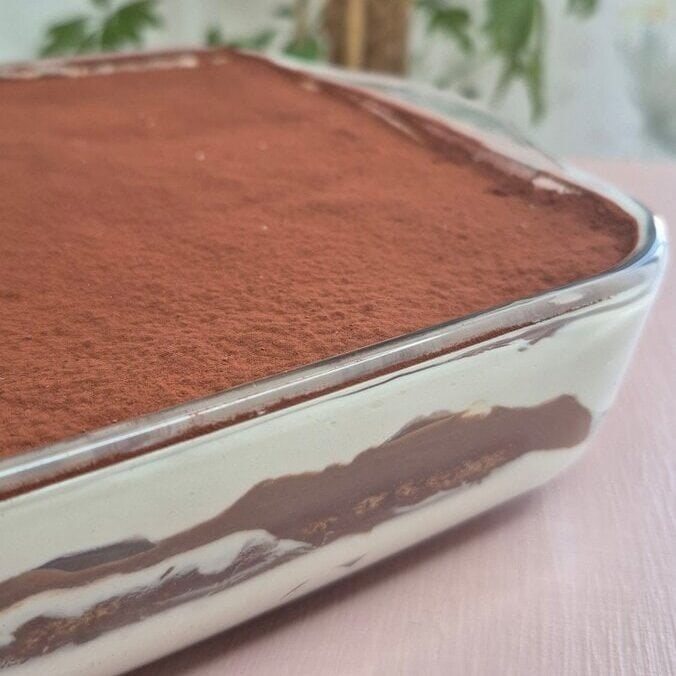
This is tiramisu, but built around warm hot chocolate instead of espresso. The result is still unmistakably “tiramisu” in texture—soft soaked ladyfingers, a thick mascarpone cream, cocoa on top—but the flavor leans more like a chocolate dessert you’d order in winter. It’s gentle, not bitter, and it holds up really well after a night in the fridge.
I’ve made this version enough times now that I can tell you exactly what matters: the hot chocolate has to be thick (so it clings to the biscuits), warm (so it soaks in), and not boiling (so the ladyfingers don’t collapse). Do that, and the layers set cleanly with a sliceable structure.
What this hot chocolate tiramisu tastes like
- Chocolate-forward, but not heavy like a ganache cake
- Soft and spoonable after a few hours, sliceable after overnight chilling
- Balanced sweetness, especially if you keep the cocoa dusting generous
- No coffee flavor at all, so it works for kids and for anyone who doesn’t like espresso desserts
Ingredients overview (breakdown)
Ladyfingers
You can use standard ladyfingers or Savoiardi-style. The main thing is that they’re dry enough to absorb liquid without disintegrating.
- Ladyfingers / Savoiardi: choose crisp ones, not soft sponge-cake style.
- Cocoa powder for dusting: use unsweetened cocoa. It finishes the tiramisu and also keeps the top from tasting too sweet.
Hot chocolate for dipping
This is the “coffee” layer replacement, and it’s what makes the whole dessert work.
- Milk gives body and a softer chocolate taste than water.
- Dark chocolate brings depth (even if you use sugar).
- Cocoa powder helps intensify the flavor without needing more chocolate.
- Cornstarch is the trick: it thickens the hot chocolate so it coats the ladyfingers instead of soaking straight through.
- Sugar: the amount depends on your chocolate and how sweet you like the dessert. I keep it moderate because the mascarpone cream already has sweetness.
Mascarpone cream filling
This one is egg-free, and it’s the style I use when I want a stable cream without fuss.
- Mascarpone should be cold but not rock-hard. If it’s too firm, it can look a little grainy when whipped.
- Cold whipping cream: temperature matters here; the colder it is, the faster it whips and the sturdier it stays.
- Powdered sugar sweetens and helps the cream hold its shape.
Equipment you’ll need
- 20×20 cm pan (8×8 inch)
- Saucepan + whisk
- Bowl + electric mixer
- Fine sieve for cocoa dusting
Step-by-step instructions (with details that actually help)
1) Make the hot chocolate (thick, smooth, and dip-friendly)
Start by mixing the cornstarch and cocoa powder with a little cold milk. I do this first so you don’t get cocoa lumps later.
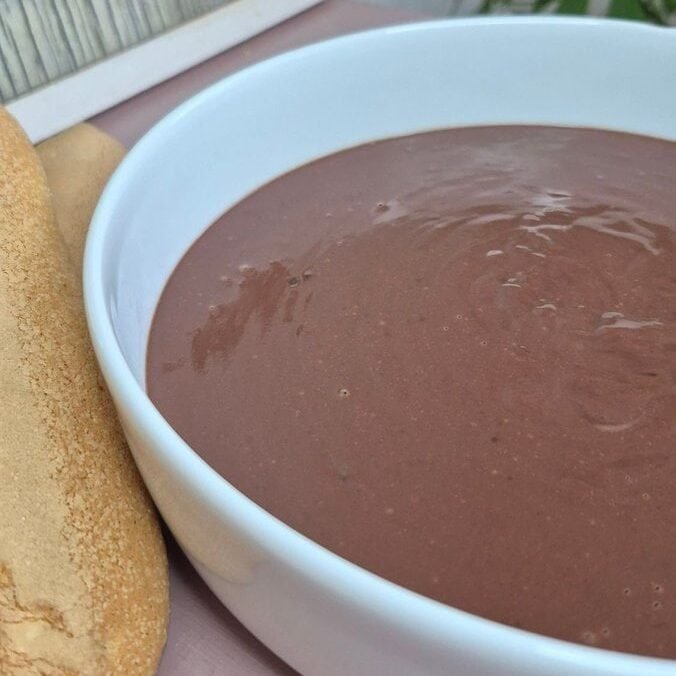
Heat the remaining milk in a saucepan until it’s steaming but not boiling. Then whisk in the cocoa-cornstarch mixture and keep stirring. After a minute or two, you’ll notice it thicken—this is what you want. Once it thickens, add the dark chocolate and sugar and stir until everything is completely melted and smooth.
Important: keep the hot chocolate warm, not boiling. If it’s too hot, the ladyfingers go from “soaked” to “collapsed” fast, and then you lose the layers.
What you’re looking for: a hot chocolate that coats a spoon lightly. Not pudding-thick, just thick enough to cling.
2) Whip the mascarpone cream filling
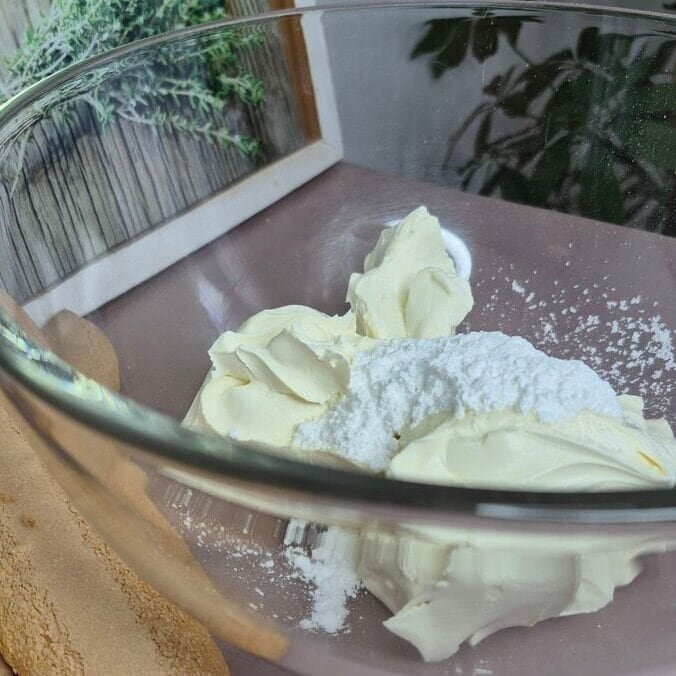
In a mixing bowl, beat the mascarpone with the powdered sugar first. This loosens it and spreads the sweetness evenly.
Then add the cold whipping cream and whip until you get a semi-firm cream. Think: it holds shape, but it’s still silky and spreadable. If you whip it too far, it can turn stiff and a bit grainy once it sits in the fridge.
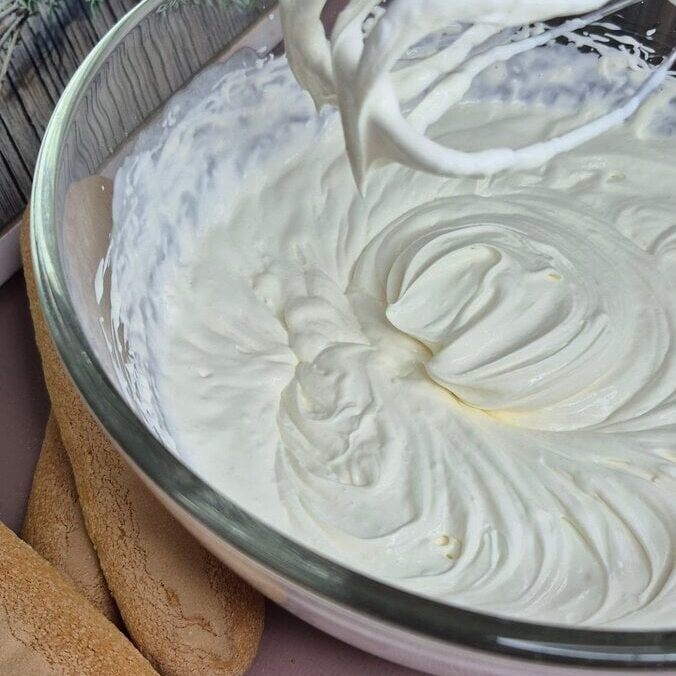
Quick check: lift the beaters—peaks should stand but gently fold at the tip.
3) Dip and layer (fast dips only)
Set your pan nearby so you’re not walking around with dripping biscuits.
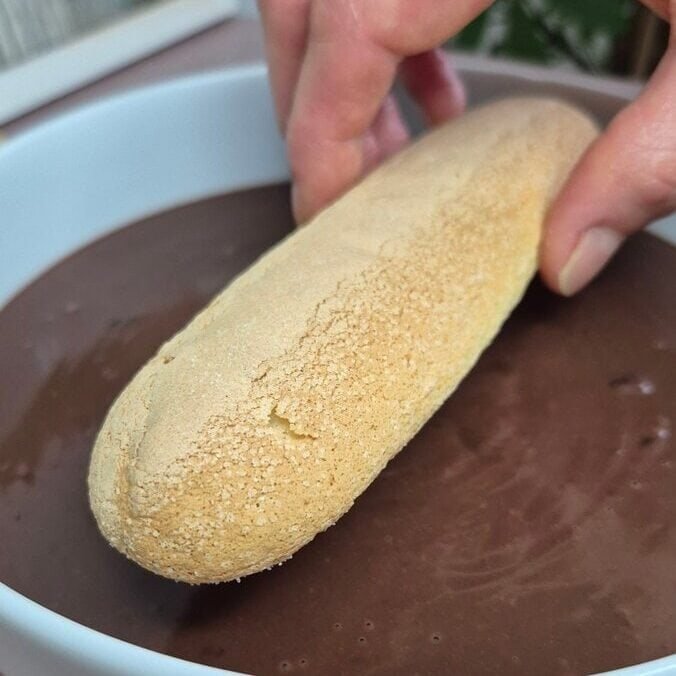
Dip each ladyfinger briefly into the warm hot chocolate—in and out. Don’t soak them. Even if they feel firm at first, they soften a lot while chilling.
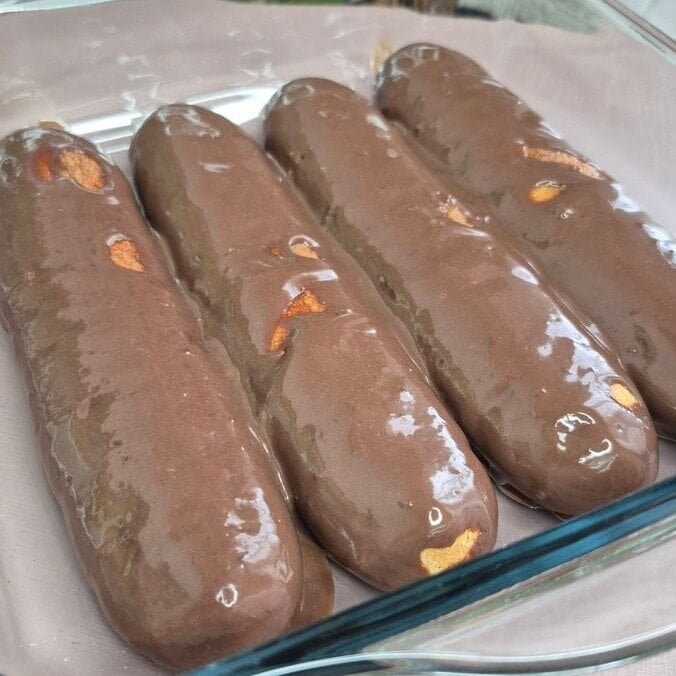
Arrange the first layer in the pan. If you need to break a few biscuits to fill gaps, do it—tight layers make cleaner slices later.
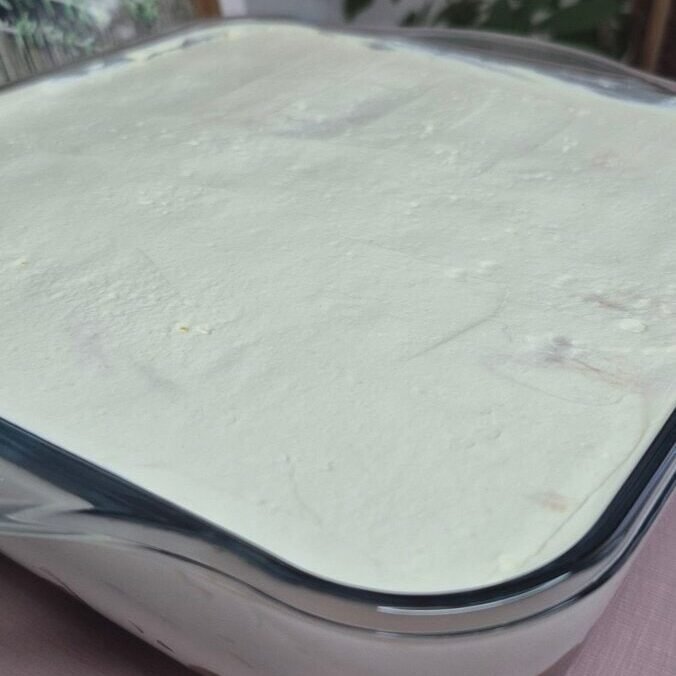
Spread half of the mascarpone cream evenly over the first layer. Try not to press too hard; just smooth it gently to keep the structure airy.
Repeat with a second layer of dipped ladyfingers, then spread the remaining cream on top.
4) Chill long enough for the magic part
Cover and refrigerate for at least a few hours, but if you can, leave it overnight. The hot chocolate settles into the ladyfingers and the cream firms up properly.
If you slice it too early, it’s still delicious, but it’s more of a spoon dessert than a clean square.
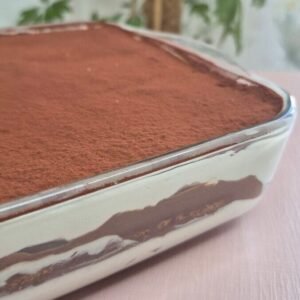
5) Finish with cocoa right before serving

Dust cocoa powder on top using a sieve. I usually do a generous layer because it balances the sweetness and gives that classic tiramisu look.
If you dust too early and leave it overnight, it can look a bit damp (still fine to eat). For the best finish, dust shortly before serving.
Tips I’ve learned after making it a few times
Keep the hot chocolate warm, not hot
Warm = good absorption. Boiling = ladyfingers turn to mush. If your hot chocolate thickens too much as it sits, just whisk it and warm it gently.
Dip quickly
Everyone thinks they need to soak the biscuits until they feel soft. Don’t. They soften in the fridge. Quick dip is the difference between layers and a collapse.
Semi-firm cream is the sweet spot
If the cream is too loose, it can ooze. If it’s too stiff, the texture becomes heavier than it needs to be. Stop whipping as soon as it holds soft peaks.
Use real unsweetened cocoa on top
Sweet cocoa makes the dessert taste flat. Unsweetened cocoa gives that slightly bitter edge that makes tiramisu taste like tiramisu.
Want a stronger chocolate hit?
Use darker chocolate (higher %), keep sugar on the lower end, and dust cocoa a bit heavier. The flavor gets deeper without making the dessert sweeter.
Storage notes
- Keeps well in the fridge for 2–3 days, covered.
- The texture is best after it has fully chilled (especially overnight).
- I don’t love freezing this one—the cream can lose its smoothness—but if you do freeze, thaw in the fridge and expect a softer texture.
Hot Chocolate Tiramisu (No Coffee, Eggless)
Ingredients
For the tiramisu
- 250 –300 g ladyfingers or 150 Savoiardi Sardi
- Cocoa powder for dusting (2–3 tablespoons)
Hot chocolate for dipping
- 300 ml milk
- 80 g dark chocolate chopped
- 1 tbsp cocoa powder unsweetened
- 1 tbsp cornstarch
- 1 –2 tbsp sugar adjust to taste
Filling
- 300 g mascarpone cold
- 300 ml heavy/whipping cream cold
- 1 tbsp powdered sugar
Instructions
Make the hot chocolate
- In a small bowl, whisk the cornstarch and cocoa powder with a splash of cold milk until smooth.
- Heat the remaining milk in a saucepan over medium heat until steaming (do not boil).
- Whisk in the cocoa-cornstarch mixture and stir constantly until the hot chocolate thickens.
- Add the dark chocolate and sugar. Stir until fully melted and smooth.
- Keep warm over very low heat (warm, not boiling), so the ladyfingers don’t turn to mush.
Make the filling
- In a mixing bowl, beat mascarpone with powdered sugar until smooth.
- Add cold whipping cream and whip until semi-firm peaks form (thick, spreadable cream).
Assemble
- In a 20×20 cm pan, briefly dip each ladyfinger into the warm hot chocolate (quick dip) and arrange a layer in the pan.
- Spread half of the mascarpone cream evenly over the first layer.
- Add a second layer of dipped ladyfingers.
- Spread the remaining mascarpone cream on top.
Chill & finish
- Cover and refrigerate for 2–3 hours (ideally overnight).
- Before serving, dust generously with cocoa powder.
Notes
- Keep the hot chocolate warm, not boiling, or the ladyfingers can fall apart.
- Dip ladyfingers quickly— they soften more as the dessert chills.
- For best slices and flavor, chill overnight before serving.