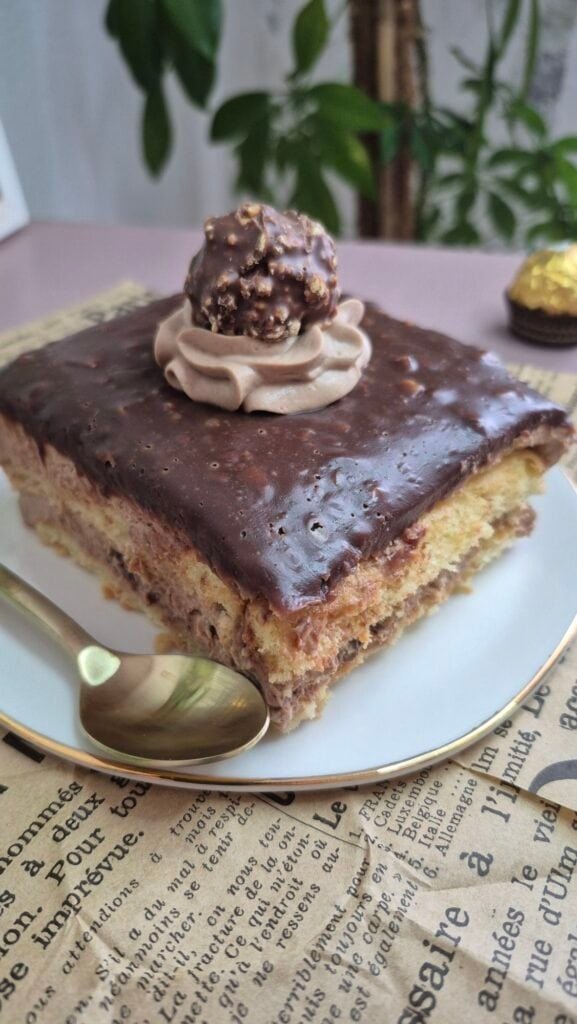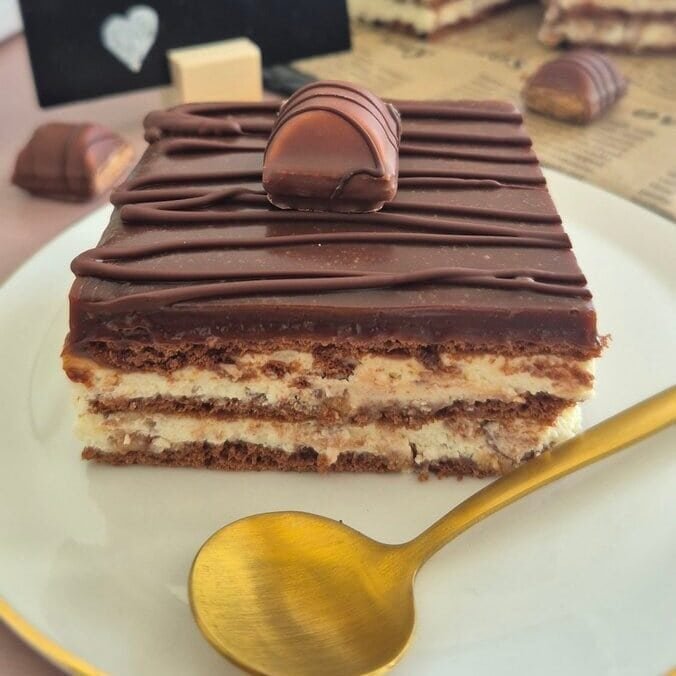
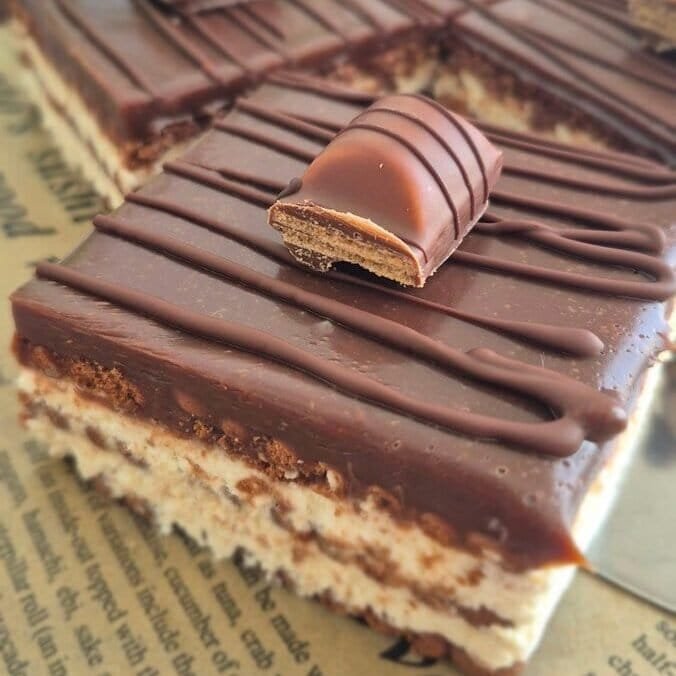
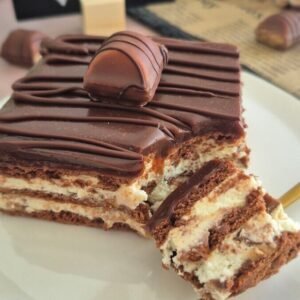
These Kinder Bueno bars look detailed once sliced, but the method is actually very straightforward.
They start with cocoa biscuits dipped lightly in milk, then two layers of mascarpone cream with chopped Kinder Bueno folded in, and a soft chocolate topping poured over the top after chilling. Once the cake sets, you can cut it into neat bars and each slice gives you clear layers without needing anything complicated.
What I like about this recipe is that it keeps the Kinder Bueno flavor in the background in a good way. It is there, but it does not take over everything. The mascarpone keeps the filling light, the biscuits give it structure, and the chocolate topping ties the whole thing together.
What these Kinder Bueno bars are like
The base and top layers are made with cocoa biscuits, so the cake already has a chocolate base before the topping even goes on.
The filling is made with mascarpone, whipped cream, and powdered sugar, so it stays soft and creamy without turning heavy. Chopped Kinder Bueno bars are folded in at the end, which gives the cream a little texture and that hazelnut-wafer flavor through the middle.
Then the chocolate topping goes over the chilled cake. It sets just enough to hold when sliced, but it stays soft enough to cut without cracking all over the top.
The result is somewhere between a chilled biscuit cake and a no-bake dessert bar. It is rich enough to feel like a real dessert, but the layers still stay balanced.
Ingredient notes that matter here
This recipe uses a short ingredient list, so each one has a job.
Cocoa biscuits
These make the structure of the bars. Since they are dipped briefly in milk, they soften in the fridge and turn into clean layers instead of staying dry or crumbly. Cocoa biscuits work especially well here because they match the filling and topping better than plain tea biscuits.
Milk
The milk is only there to soften the biscuits slightly. A quick dip is enough. If the biscuits stay in too long, they can become too soft and the layers will not hold as neatly.
Mascarpone
Mascarpone gives the filling body. It also keeps the cream from tasting too light or airy. You want it cold so it mixes into a firm filling instead of loosening too much.
Heavy cream
This is what makes the filling lighter. The trick here is not to fully whip it at the beginning. Starting with half-whipped cream helps everything combine more evenly once the mascarpone goes in.
Powdered sugar
Only a small amount is needed. Kinder Bueno and the topping already bring sweetness, so the filling does not need much more.
Kinder Bueno bars
These go into the filling at the end. Chopping them rather than crushing them too finely gives small pieces through the cream, which is better for texture.
Milk chocolate and dark chocolate
The topping is mostly milk chocolate, which keeps the flavor softer and closer to the Kinder Bueno filling. The small amount of dark chocolate helps balance it so the top is not too sweet.
How to make Kinder Bueno bars
This cake comes together in a few simple stages. None of them are difficult, but the order matters.
1. Make the filling first

Start with the cold cream and whip it only until it thickens slightly. You do not want stiff peaks at this point.
Then add the mascarpone and powdered sugar and continue mixing until the filling becomes firm and smooth.
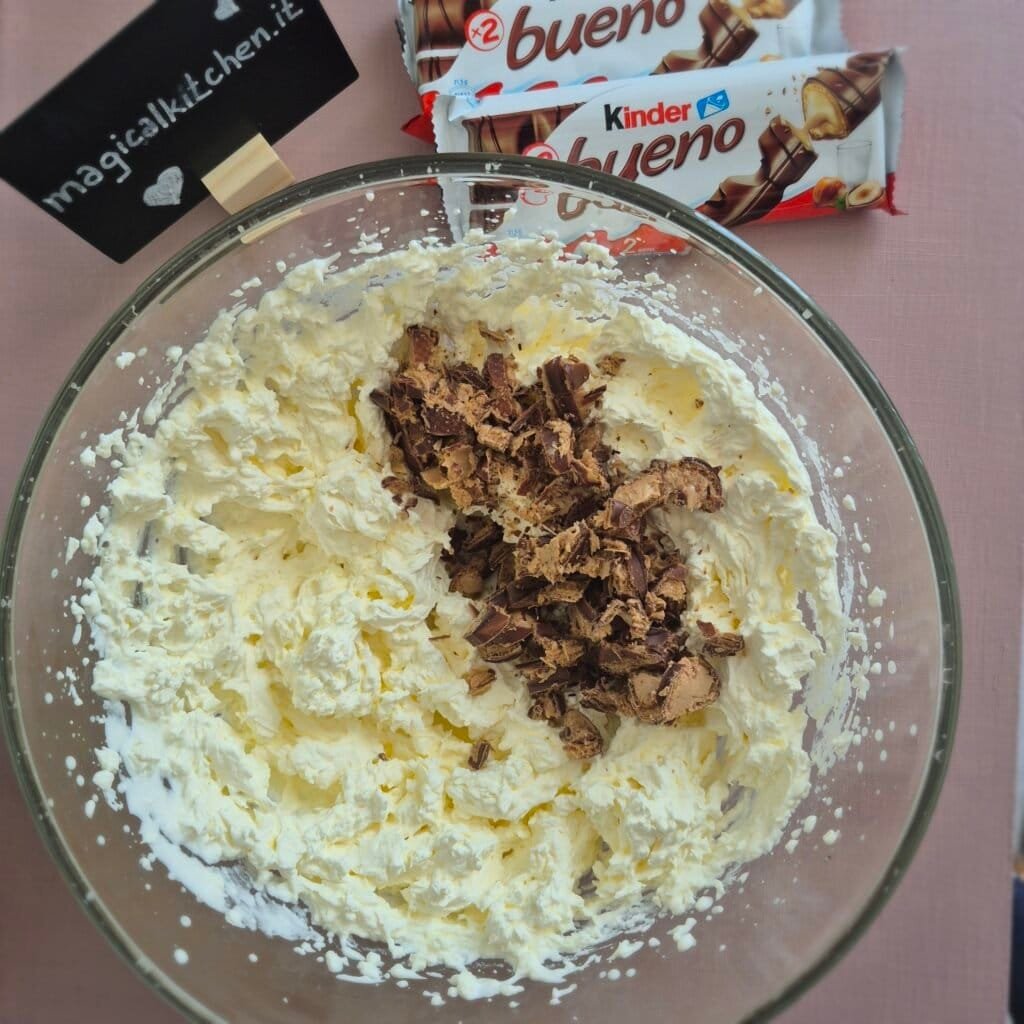
Once it looks stable, fold in the chopped Kinder Bueno with a spatula. That last step is better done by hand so the filling keeps its texture and the chocolate pieces stay visible.
After that, divide the filling into two equal parts. This makes assembling easier and helps the layers stay even.
2. Build the first layers
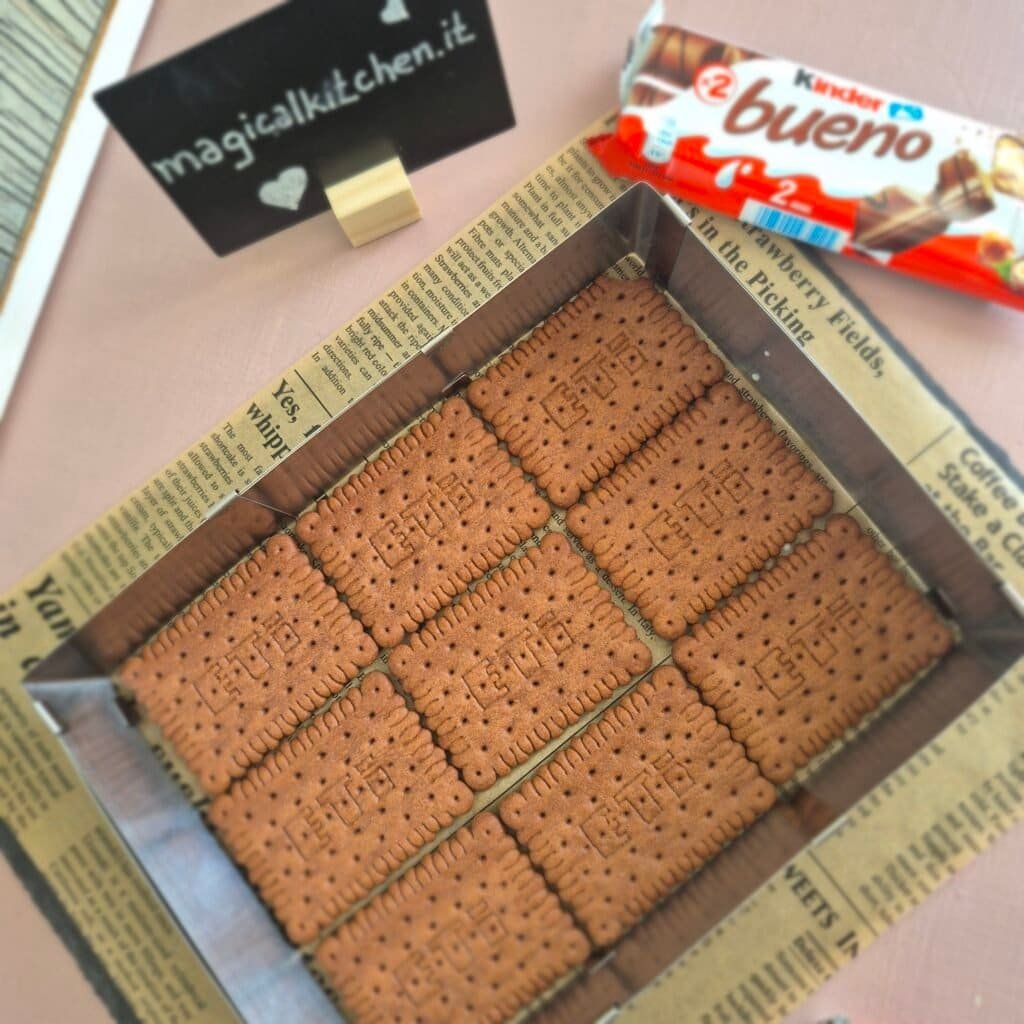
Dip each cocoa biscuit briefly in milk and arrange the first layer in the bottom of the pan.
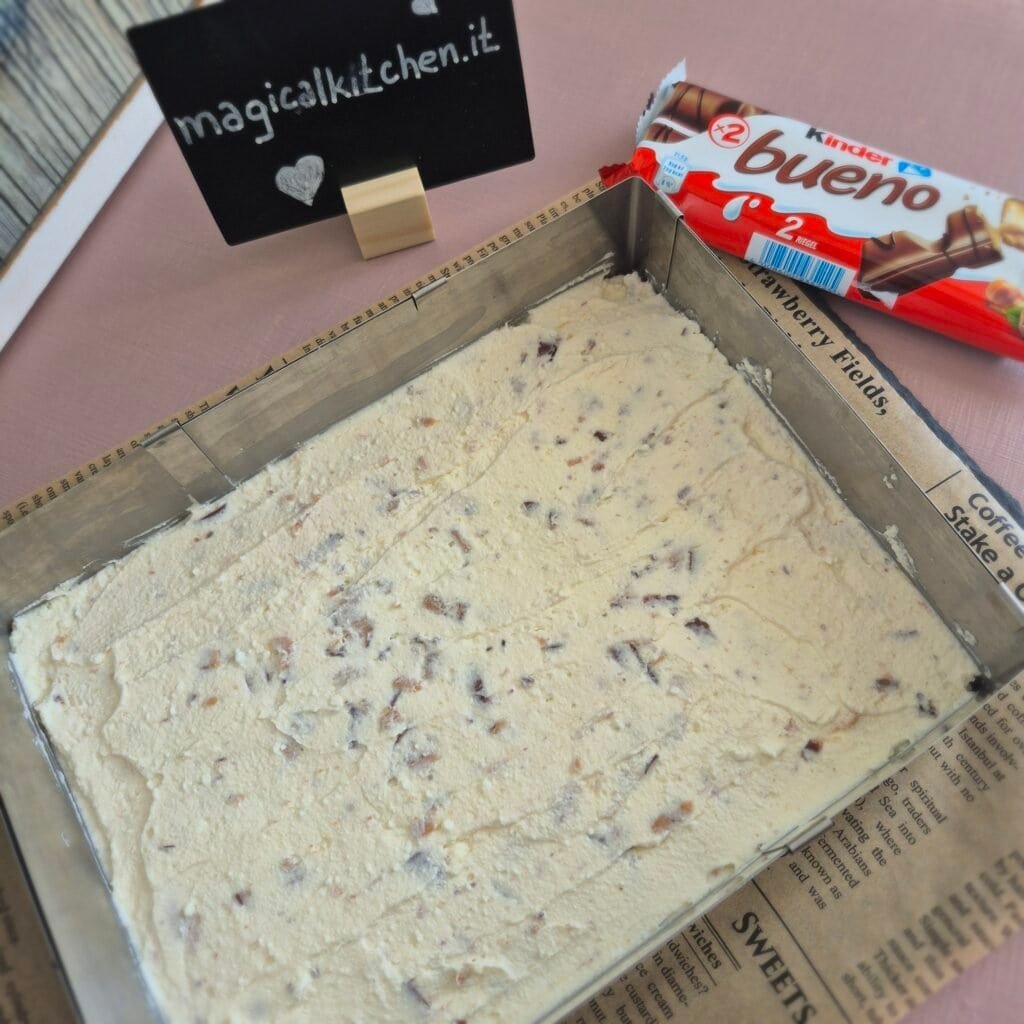
Spread over the first half of the filling and smooth it gently so it reaches the edges.
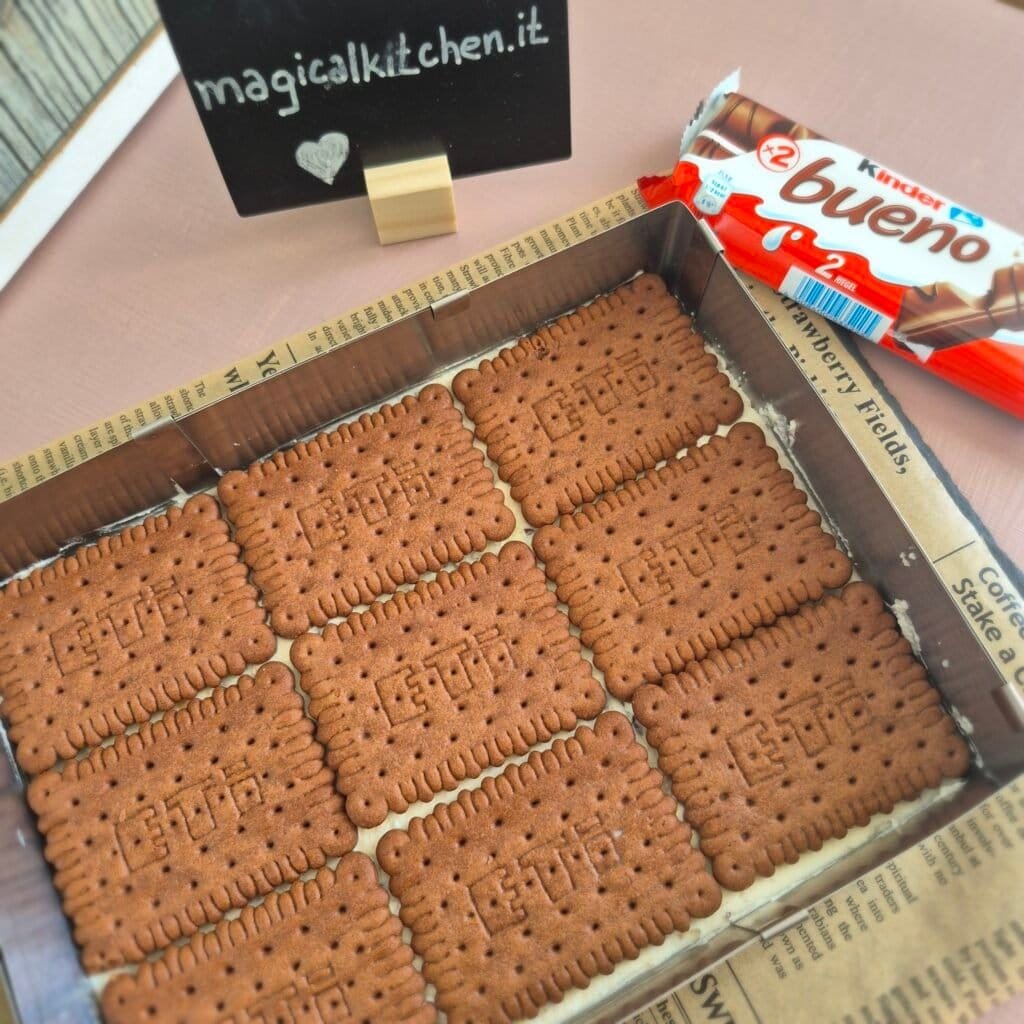
Add another layer of dipped biscuits on top, then spread over the second half of the filling.
Finish with one last layer of biscuits on top. This top biscuit layer is important because the chocolate topping will sit on it later and give the bars that clean finished look.
3. Chill before adding the topping
At this point the cake needs time in the fridge so the filling can firm up a little before the chocolate goes on.
This first chill makes a difference. If the filling is still too soft when the topping is poured over, the top can sink in or mix slightly with the cream underneath.
Once the layers feel more settled, you can move on to the topping.
4. Make the chocolate topping
Heat the cream until it is hot but not boiling aggressively.
Pour it over the chopped chocolate and let it sit for a moment so the heat starts melting everything. Then stir until smooth. If needed, give it a little time to cool so it is still fluid but not very hot.
That part matters more than it seems. If the topping is too warm, it can soften the upper biscuit layer too much and make the surface messy. Slightly cooled chocolate spreads more evenly.
5. Finish and chill again
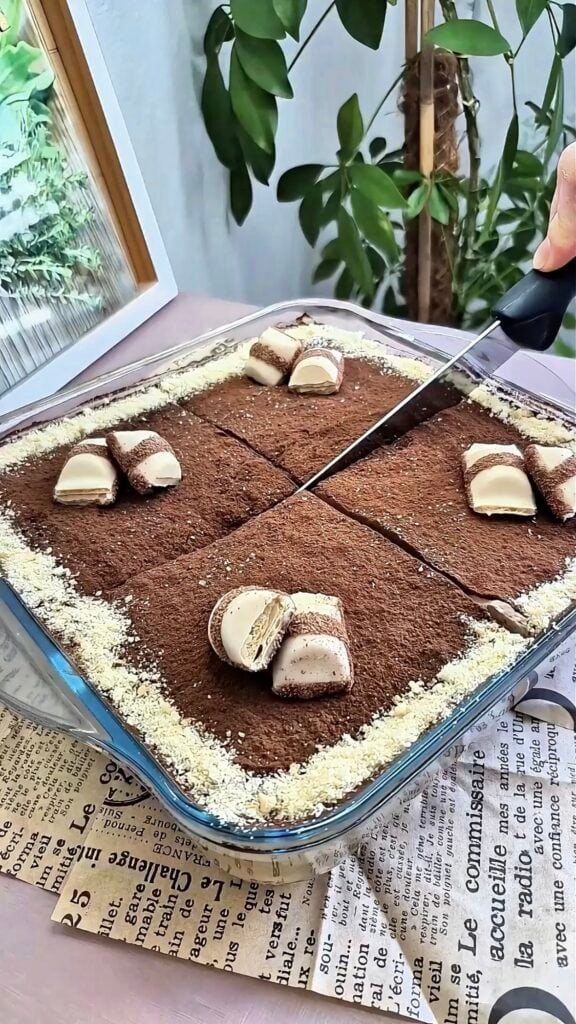
Pour the topping over the chilled cake and spread it gently across the top.
Then return it to the fridge until everything is fully set.
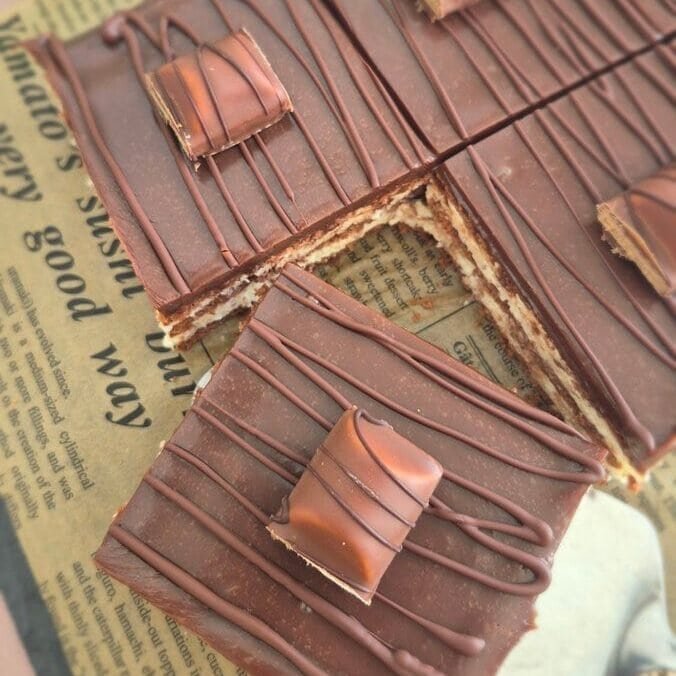
If you want to decorate it, a little melted chocolate drizzled over the top works well, and a few Kinder Bueno pieces make it obvious what flavor the bars are before anyone even cuts into them.
Before making the bars
Use cold mascarpone and cold cream straight from the fridge. That gives you a firmer filling and makes the mixing easier.
Do not over-dip the biscuits. They only need a quick pass through the milk. If they absorb too much liquid, the cake can turn too soft after chilling.
Fold in the Kinder Bueno at the end, not earlier. If it goes in while the filling is still being mixed, the bars can break down too much and disappear into the cream.
Let the topping cool slightly before pouring. Warm is fine. Hot is not.
Try to smooth each filling layer evenly. This helps the finished bars look better once sliced, especially at the sides.
Texture and flavor after chilling
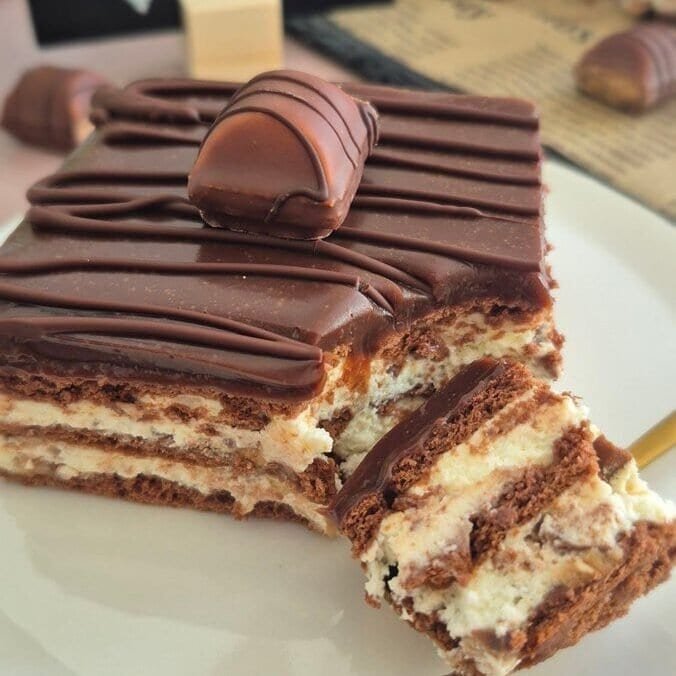
After a few hours in the fridge, the biscuits soften enough to cut neatly, but they still keep the layers defined.
The filling stays creamy and stable because of the mascarpone.
The chopped Kinder Bueno pieces are softer after chilling, but they still give small bites of wafer and chocolate through the cream.
The top sets into a smooth chocolate layer that holds the whole dessert together. It is not meant to be thick like a firm ganache block. It should stay soft enough that each slice cuts cleanly without needing force.
This balance is what makes the recipe work. Nothing in it is too heavy on its own, and each layer does something different.
A final note
This is one of those recipes that does not need much explaining once you make it once.
The method is straightforward, the ingredient list is short, and the finished cake looks better than the effort suggests.
What makes it worth repeating is the balance. The mascarpone keeps the filling from feeling too sweet, the cocoa biscuits give the bars shape, and the Kinder Bueno pieces give just enough texture and flavor without making the cream too busy.
If you want a no-bake cake that slices into proper bars and keeps a clear layer structure, this one is easy to come back to.
No-Bake Kinder Bueno Bars
Ingredients
For the biscuit layers
- 180 g cocoa biscuits
- 80 ml milk
For the filling
- 250 g mascarpone cheese cold
- 2 tablespoons powdered sugar
- 250 ml heavy cream 35%, cold
- 2 Kinder Bueno bars chopped
For the topping
- 150 g milk chocolate chopped
- 100 ml heavy cream
- 20 g dark chocolate chopped
Optional decoration
- Melted chocolate for drizzling
- Kinder Bueno pieces
Instructions
- In a mixing bowl, whip the cold heavy cream until half-whipped.
- Add the mascarpone cheese and powdered sugar, then mix until the filling becomes firm and smooth.
- Fold in the chopped Kinder Bueno bars with a spatula.
- Divide the filling into 2 equal parts.
- Briefly dip 9 cocoa biscuits in milk and arrange them in the bottom of a small rectangular pan to form the first layer.
- Spread over the first half of the filling and smooth it out evenly.
- Dip another layer of biscuits briefly in milk and place them over the filling.
- Spread over the second half of the filling.
- Finish with one more layer of dipped biscuits on top.
- Refrigerate for 1–2 hours so the cake firms up.
- To make the topping, heat the heavy cream until just before boiling.
- Pour the hot cream over the milk chocolate and dark chocolate. Let it sit briefly, then stir until smooth.
- Let the topping cool slightly, then pour it over the chilled cake.
- Return the cake to the fridge for about 2 more hours, or until fully set.
- If desired, drizzle with melted chocolate and decorate with Kinder Bueno pieces before slicing into bars.
Notes
- Use cold mascarpone and cold heavy cream for the best filling texture.
- Dip the biscuits very briefly so they soften without becoming soggy.
- Let the chocolate topping cool slightly before pouring it over the cake.