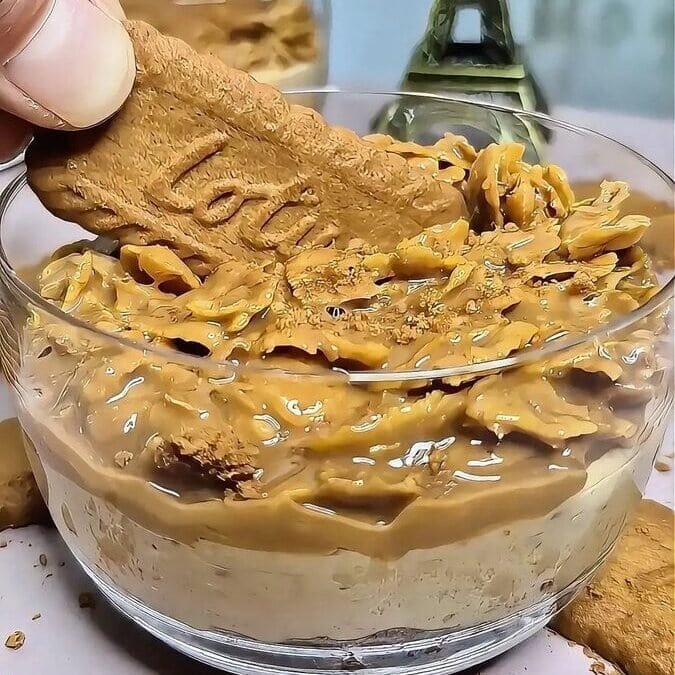
This Crunchy Lotus Biscoff Dessert in a Glass is one of those recipes that looks neat in the serving glass, takes very little effort, and still gives you different textures in every spoonful.
The base is soft and buttery from the crushed Lotus biscuits.
The middle layer is smooth, creamy, and lightly flavored with Biscoff spread.
Then the top brings the crunch back in a big way, thanks to the cornflakes mixed with melted Biscoff.
What I like most here is the balance.
The cream layer is not too heavy.
The biscuit base is simple and does its job.
And the topping is what makes the whole thing stand out from a standard no-bake dessert cup.
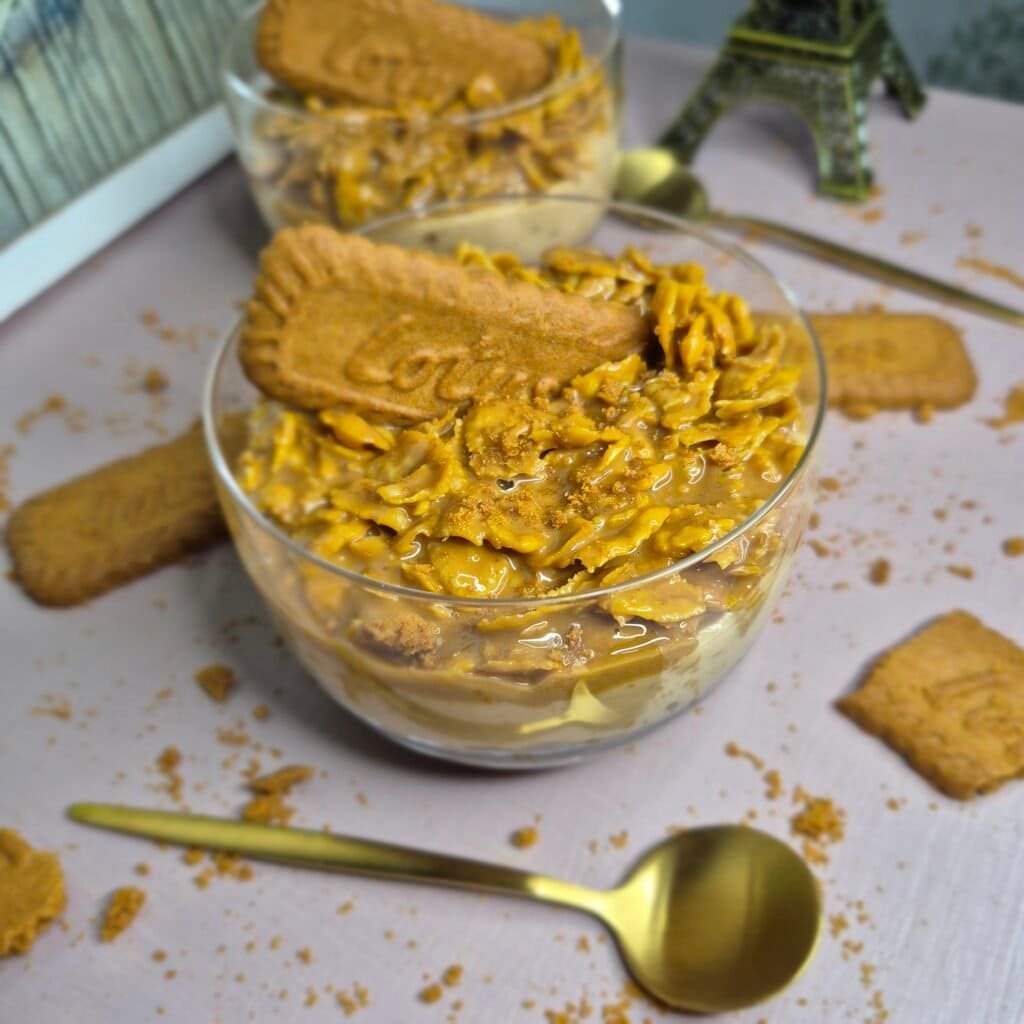
I made mine in two glass dessert cups, and that size worked really well for this recipe.
It also makes the layers visible, which always helps with a dessert like this.
This is a chilled dessert, so it is good when you want something you can make ahead and keep in the fridge until serving time.
There is no baking.
No complicated steps.
And no long ingredient list.
Why this dessert works
A lot of Biscoff desserts can end up feeling too soft from top to bottom.
This one does not.
The biscuit base gives you a firm first layer.
The filling stays creamy and smooth.
And the cornflake topping adds a crisp finish that changes the whole texture of the dessert.
That top layer is not just there for decoration.
It gives the dessert a proper contrast.
Without it, this would still be nice, but it would not have the same bite.
Another good thing is that the flavors are easy to build.
Lotus biscuits already have that caramelized spiced taste.
The Biscoff spread matches it naturally.
The cream cheese cuts through the sweetness.
And the whipped cream keeps the filling light enough so it does not feel dense.
It is also a very manageable dessert.
You are not making a full cake.
You do not need to level layers or line tins.
You just build everything in glasses, chill, and serve.
Ingredient breakdown
Lotus biscuits
These are the base of the dessert and also the main flavor running through the whole recipe.
Once crushed and mixed with a little milk, they turn into a soft biscuit layer that holds together nicely in the bottom of the glass.
You can also add a little extra ground biscuit to the filling if you want a slightly stronger Lotus flavor.
Milk
The milk is only there to bring the crushed biscuits together.
You do not want the base wet.
You just want it moistened enough so it presses neatly into the glass and sets into a soft layer after chilling.
Whipping cream
This helps make the filling light.
Because the dessert is served in a glass, the cream layer should be smooth and airy, not stiff or heavy.
Use cold whipping cream for the best texture.
Cream cheese
Cream cheese gives the filling body and keeps it from tasting like plain whipped cream.
It also balances the sweetness from the biscuit spread.
Let it soften slightly before mixing so the filling comes out smoother.
Biscoff spread
This goes into the filling and the topping.
In the filling, it brings the main flavor.
In the topping, it coats the cornflakes and turns them into a crunchy caramel-spiced layer.
Melt it gently so it mixes easily and does not become too runny.
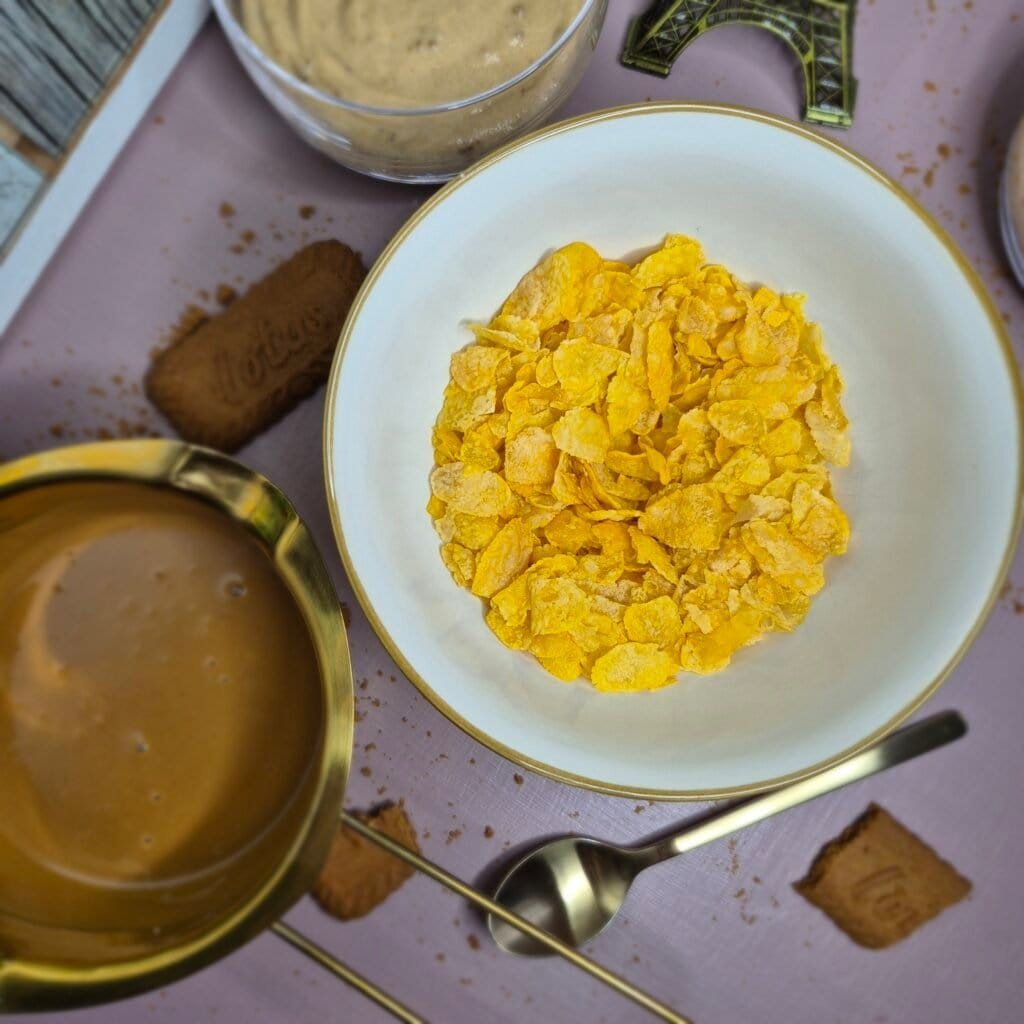
Cornflakes
Cornflakes might sound simple, but they work really well here.
They stay crisp, they mix quickly with melted Biscoff, and they give the dessert a texture that crushed biscuits alone cannot give.
This is the part that makes the dessert live up to the word crunchy.
How to make It
1. Make the biscuit base

Start by crushing the Lotus biscuits into fine crumbs.
You can do this in a food processor, or put them in a bag and crush them with a rolling pin.
Add enough milk to bring the crumbs together.
The texture should look like damp sand.
It should not be loose and powdery, but it should not be wet either.
Spoon the biscuit mixture into the bottom of your dessert glasses.
Press it down gently with the back of a spoon.
Do not compact it too hard.
You want it to hold its shape, but still stay soft enough to eat easily with a spoon.
2. Prepare the filling
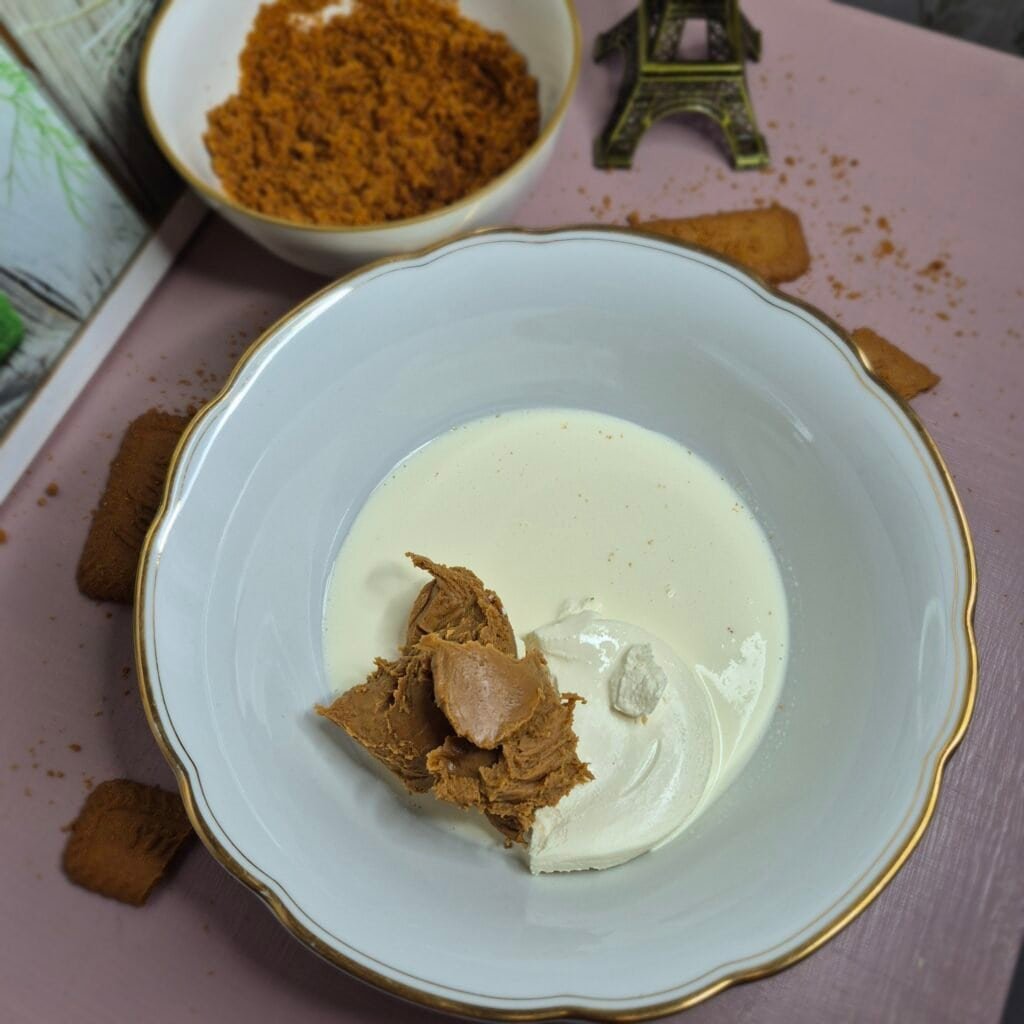
Add the cream cheese, Biscoff spread, and cold whipping cream to a mixing bowl.
Whip until the mixture becomes smooth, thick, and pipeable.
The filling should hold its shape without turning grainy or overmixed.
At this stage, you can mix in a little extra ground Lotus biscuit if you want a slightly deeper biscuit flavor.
I sometimes do this when I want the middle layer to feel a bit more connected to the base.
3. Pipe the cream layer
Transfer the filling to a piping bag.
Pipe it over the biscuit base in each glass.
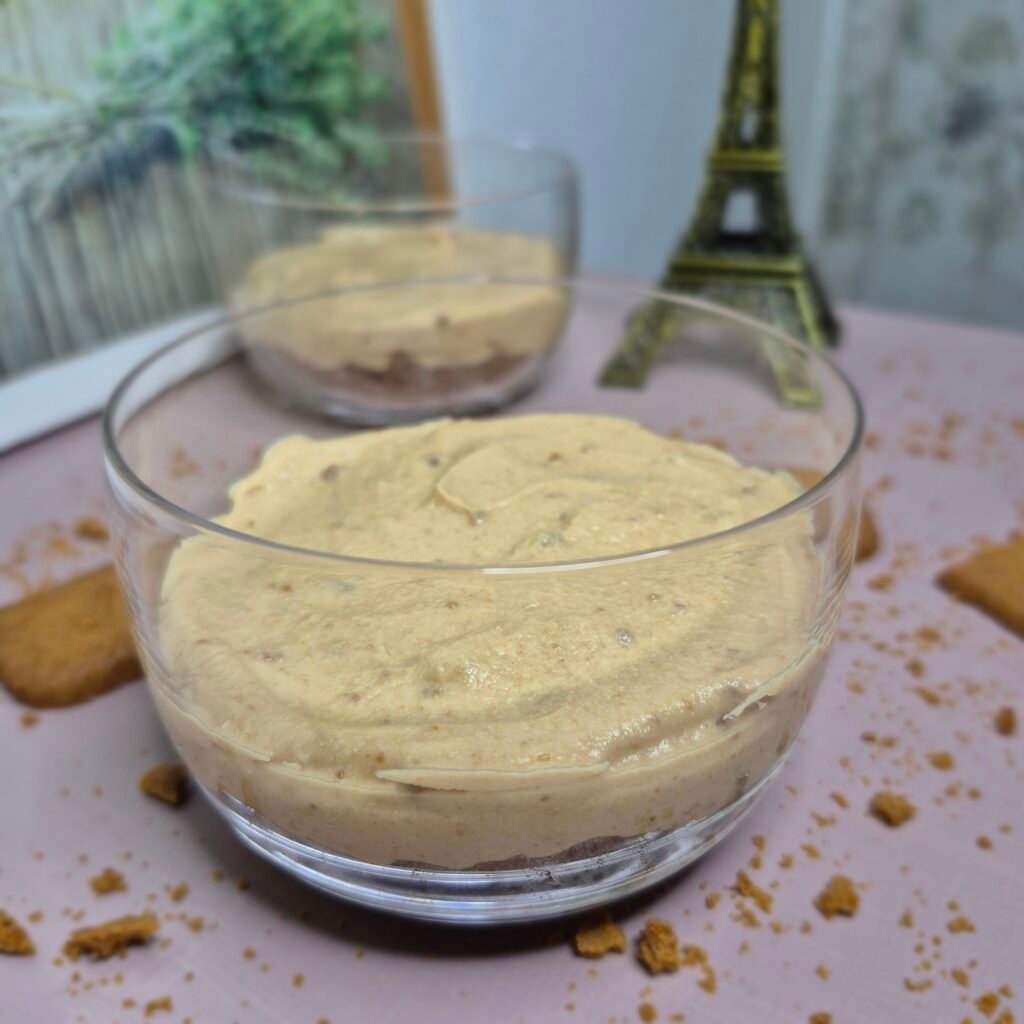
This gives a cleaner finish than spooning it in, especially when you want the layers to look neat from the side.
If you do not have a piping bag, you can spoon the filling in carefully and smooth the top.
Either way works.
The piping bag just makes it easier.
4. Make the crunchy topping
Melt the Biscoff spread gently over a double boiler.
Once smooth, stir in the cornflakes.
Mix carefully so the flakes are evenly coated, but do not crush them too much.
You want chunks and texture here, not crumbs.
Spoon the cornflake mixture over the cream layer.
Spread it lightly across the top.
Try not to press it down too much, or the filling underneath can lose its shape.
5. Chill before serving
Place the glasses in the fridge and chill for at least one hour.
This gives the base time to set slightly, firms up the filling, and helps all the layers come together.
After chilling, the dessert is ready to serve.
few tips
Use cold whipping cream straight from the fridge.
That helps the filling whip properly and keeps it from turning loose.
Do not add too much milk to the biscuit base.
A dry base is a problem, but a wet one is worse.
If it is too wet, it will look heavy and sit flat in the bottom of the glass.
Make sure the cream cheese is soft enough to blend smoothly.
Cold cream cheese can leave small lumps in the filling.
Melt the Biscoff spread gently.
Do not overheat it.
You only want it smooth enough to mix with the cornflakes.
Let the topping cool for a minute if it feels very warm.
If it goes straight onto the cream layer while hot, it can soften the filling too much.
Chill the dessert fully before serving.
It tastes better cold, and the texture is much cleaner after the resting time.
Best glasses to use
I made this recipe in two glass dessert cups.
That size gave a nice amount for each serving and showed the layers clearly.
You can also use small tumblers, short jars, or mini trifle glasses.
What matters most is the shape.
A clear glass works best because the base and cream layer look much better when they are visible.
If you want smaller servings, divide the mixture into more glasses.
That works well for parties or dessert tables.
Easy variations
You can keep this recipe exactly as it is, or change a few small things depending on what you have at home.
For a stronger Lotus flavor, add a little ground biscuit to the filling.
For a slightly softer top, crush the cornflakes a bit before mixing them with the melted Biscoff.
For a cleaner finish, save a few plain biscuit crumbs and sprinkle them over the top right before serving.
You can also make the dessert in one larger serving dish instead of individual glasses.
Just layer everything the same way and spoon it out when serving.
Storage
Keep the dessert covered in the fridge.
It is best on the day you make it or the next day.
The filling keeps well, but the cornflake topping is at its best while it still has some crunch.
If you need to make it further ahead, you can prepare the base and filling first, then add the crunchy topping a bit later.
That way the top stays crisp for longer.
I would not freeze this one.
The texture of the filling and the cornflakes is much better fresh from the fridge.
Final note
This is a very simple dessert, but it does not taste plain.
The biscuit base, the smooth cream layer, and that crunchy Biscoff cornflake topping all do something different, and that is why it works.
It is quick to put together.
It looks good in the glass.
And the texture is what makes people go back for another spoonful.
If you want a Biscoff dessert that is easy to make but does not feel one-note, this is a solid one to keep.

Crunchy Lotus Biscoff Dessert in a Glass
Ingredients
For the base:
- 100 g Lotus biscuits
- 2 –3 tbsp milk
For the filling:
- 100 ml whipping cream
- 100 g cream cheese
- 2 tbsp Biscoff spread
For the topping:
- 100 g cornflakes
- 2 tbsp Biscoff spread
Instructions
- Crush the Lotus biscuits into fine crumbs.
- Mix the biscuit crumbs with the milk until the texture resembles wet sand.
- Divide the mixture between 2 glass dessert cups and gently press it down to form the base.
- In a mixing bowl, add the whipping cream, cream cheese, and Biscoff spread.
- Whip until smooth and thick. If desired, mix in a little extra ground Lotus biscuit for more flavor.
- Transfer the filling to a piping bag and pipe it over the biscuit base.
- Melt the Biscoff spread for the topping over a double boiler until smooth.
- Add the cornflakes and stir until evenly coated.
- Spoon the cornflake mixture over the cream layer in each glass.
- Chill for 1 hour before serving.
Notes
- Use cold whipping cream for the best texture.
- Do not add too much milk to the biscuit base or it can become too wet.
- Let the melted Biscoff cool slightly before adding it over the filling.
- Best served chilled on the same day or the next day for the best crunch.