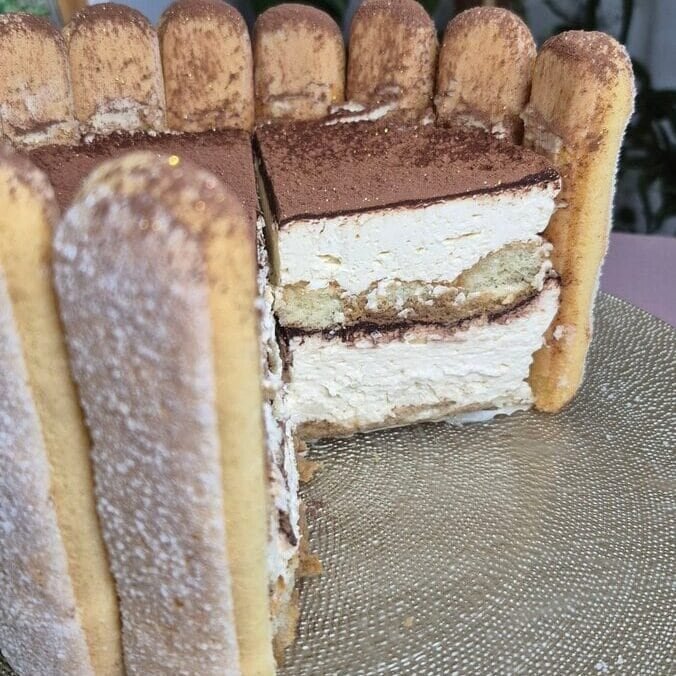
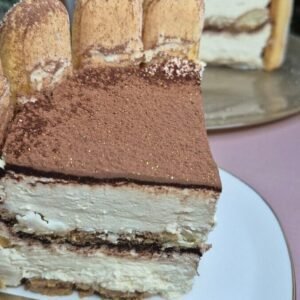
This was my first time making a Charlotte Tiramisu Cake, and I was honestly doing it a bit “let’s see if this works.” The idea is straightforward: ladyfingers on the bottom, more ladyfingers standing around the sides, then a thick coffee-and-cocoa style filling in the middle.
What surprised me is how neat it turned out after chilling. Once it set, the sides held nicely, the layers showed up when I sliced it, and it tasted like proper tiramisu—just in cake form.
What is a Charlotte Tiramisu Cake?
This is basically a no-bake tiramisu presented in a charlotte-style shape:
- Ladyfingers form the base and the “fence” around the edge.
- Coffee is the only soak (simple and strong).
- Cream cheese + whipped cream makes a stable filling that sets nicely in the fridge.
- Cocoa gets layered inside and dusted on top, like traditional tiramisu.
It’s not meant to be fussy. No eggs, no gelatin, no baking, no complicated syrup. Just a straightforward dessert that looks like a cake when you unmold it.
Ingredients (and why they matter)
For the cake structure
200 g ladyfingers
Ladyfingers are doing all the heavy lifting here. They create the shape and give that familiar tiramisu texture. If yours are very crisp (most are), they’ll soften perfectly after chilling.
100 ml coffee
This is the flavor backbone. I usually make espresso or strong moka pot coffee, then let it cool. If you use weak coffee, the cake tastes a little flat, so go stronger than you think.
For the filling
250 g cream cheese (Philadelphia)
Philadelphia-style cream cheese gives structure and a mild tang. Full-fat works best here; low-fat tends to get looser and can taste a bit watery.
200 ml heavy whipping cream (sweet cream, 35%)
This is what makes the filling light. It also helps the cake set and slice. The higher the fat %, the more stable the final texture.
2 tbsp powdered sugar
Powdered sugar dissolves quickly and keeps the filling smooth. If you prefer it less sweet, you can reduce it slightly, but keep enough to balance the coffee/cocoa.
2–3 tbsp cocoa
Cocoa gives that classic tiramisu finish. I use unsweetened cocoa. If your cocoa is very bitter, stay closer to 2 tbsp; if it’s mild, 3 tbsp is great.
Equipment you’ll need
- 20 cm (8-inch) round pan (a springform pan makes removal easiest)
- A mixing bowl
- A hand mixer or stand mixer
- Spatula
- Shallow bowl or cup for coffee dipping
If you don’t have a springform pan, you can still do this in a regular cake pan—just line it with parchment (base and sides) so you can lift it out.
Step-by-step instructions
1) Prep the coffee
Make your coffee and let it cool to room temp (or slightly warm at most). Hot coffee will turn the ladyfingers soggy too fast and can loosen the filling later.
Pour the coffee into a shallow bowl or wide cup so dipping is easy.
2) Build the ladyfinger base and sides
Take your 20 cm pan.
- Bottom layer: Dip each ladyfinger quickly in coffee (a fast dip—don’t soak), then arrange them across the bottom of the pan. Break a few if you need to patch gaps. It doesn’t have to look perfect; the filling hides small spaces.

- Side “wall”: Dip more ladyfingers quickly and stand them upright around the inside edge of the pan in a circle. Place them close together so the filling doesn’t push between them.

Tip I learned the hard way: if you dip the side ladyfingers too long, they get floppy and slide down. A quick dip is enough—they’ll soften in the fridge.
3) Make the filling
In a bowl, add the cream cheese and powdered sugar. Beat until smooth and creamy.
Now add the heavy cream (35%) and mix until it becomes thick and holds shape. Start on low so it doesn’t splatter, then increase speed. You want a filling that looks like a firm mousse—soft, but not runny.

Important: Stop mixing as soon as it thickens. Overmixing can make it grainy, especially with cream cheese.
4) Divide and layer
Divide the filling into two equal parts (eyeballing is fine).
- Spread the first half over the bottom layer of ladyfingers.
- Smooth it out with a spatula.
- Sprinkle 1 tablespoon cocoa evenly over the filling.
5) Add the second ladyfinger layer
Dip more ladyfingers quickly in coffee and lay them over the cocoa layer. This becomes the center of the cake.
Try to cover most of the surface so each slice gets that tiramisu look.
6) Finish with the remaining filling
Spread the second half of the filling on top. Smooth it nicely—this is the top surface you’ll see.
Dust the top with another 1–2 tablespoons cocoa, depending on how cocoa-forward you want it.
7) Chill
Refrigerate for at least 3 hours. This time is what makes it sliceable. If you have longer (overnight), it gets even better: the ladyfingers soften evenly and the coffee flavor settles in.
8) Slice and serve
If using a springform pan, run a thin knife around the edge and release the ring.
Slice with a sharp knife. Wipe the knife between cuts for cleaner slices (especially if you want nice layers).
Tips that actually help
Use cool coffee
Warm is okay, hot isn’t. Hot coffee makes ladyfingers collapse faster than you want.
Dip fast, especially for the side ladyfingers
A quick in-and-out dip gives you structure now and softness later.
Start with cream cheese at room temperature
Cold cream cheese can leave lumps. If it’s straight from the fridge, let it sit 20–30 minutes before mixing.
Don’t overwhip the filling
Once it’s thick and holds soft peaks, stop. If you keep going, the texture can turn heavy or slightly grainy.
Chill before decorating
If you plan to add anything extra (chocolate curls, extra cocoa, a few ladyfingers on top), do it after the cake has had time to set.
Want cleaner sides?
Line the pan with a strip of parchment around the inside. It helps lift and keeps the ladyfingers from sticking.
Flavor variations (optional, but easy)
If you want to keep the base recipe exactly as-is, skip this. But if you’re making it again, these are small changes that work well:
- Add vanilla: 1 tsp vanilla in the filling makes it taste rounder.
- Add a little salt: a small pinch in the filling balances sweetness and cocoa.
- Mocha vibe: mix 1 tsp instant espresso into the cocoa dusting.
(Keeping it simple is the point, so I don’t add too many extras unless I’m in the mood.)
Storage
- Fridge: Keep covered and refrigerated. Best within 2–3 days.
- Freezing: You can freeze it, but the texture changes slightly (still good, just less creamy). If freezing, wrap well and thaw in the fridge overnight.
Charlotte Tiramisu Cake (20 cm)
Ingredients
Base
- 200 g ladyfingers
- 100 ml strong coffee cooled
Filling
- 250 g cream cheese Philadelphia
- 200 ml heavy whipping cream 35%
- 2 tbsp powdered sugar
- 2 –3 tbsp cocoa powder for layering and topping
Instructions
- Pour the cooled coffee into a shallow bowl.
- Dip ladyfingers quickly in the coffee and arrange a layer on the bottom of a 20 cm pan.
- Dip more ladyfingers and stand them upright around the inside edge of the pan to form a circle.
- Beat cream cheese with powdered sugar until smooth. Add heavy cream and whip/mix until thick and fluffy.
- Divide the filling into two parts. Spread the first half over the bottom ladyfingers.
- Dust about 1 tbsp cocoa powder over the filling.
- Add a second layer of coffee-dipped ladyfingers.
- Spread the remaining filling on top and smooth.
- Dust the top with 1–2 tbsp cocoa powder.
- Refrigerate for 3 hours (or longer), then slice and serve.
Notes
- Dip ladyfingers quickly to avoid sogginess.
- Chill longer for cleaner slices and better texture.