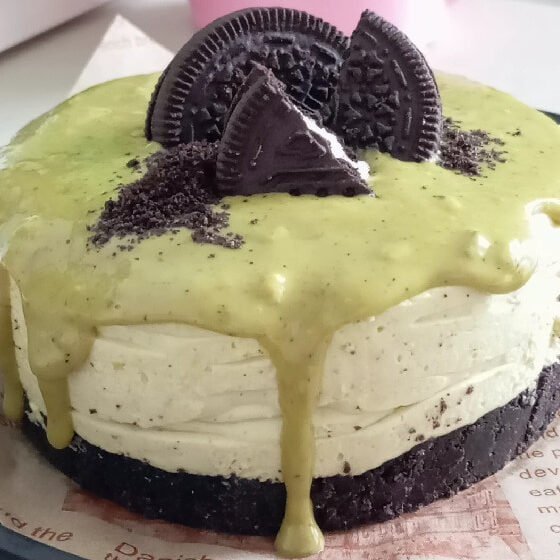
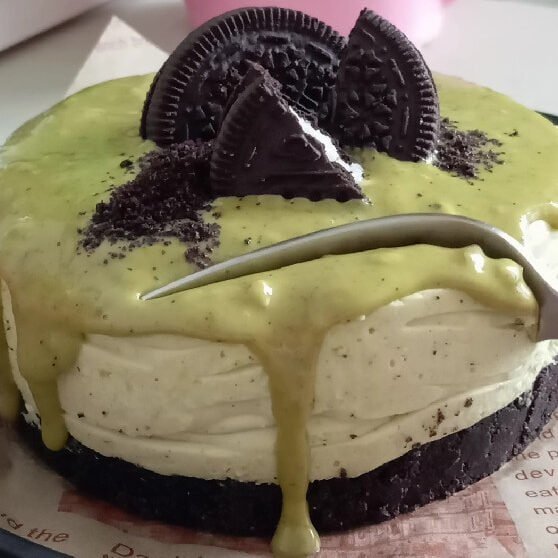
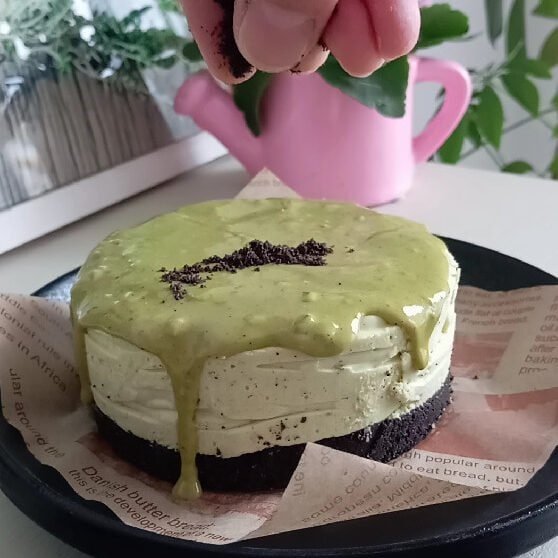
I didn’t set out to create a “signature” mini cake, but this one ended up in my regular rotation because it’s quick, it slices clean, and it hits that sweet spot between crunchy and creamy. The base is straight-up Oreo crust (no extra sugar needed), the filling is a whipped mascarpone cream with a spoon of pistachio cream for flavor, and the top gets a thin pistachio layer that sets like a soft glaze.
It’s also the kind of dessert I can make in a small pan without committing to a full-size cake hanging around the fridge for days. If you’ve got a 10 cm pan and a handful of Oreos, you’re basically halfway there.
What this mini Oreo cake is like
- Texture: crunchy cookie base + airy cream filling + smooth pistachio topping
- Sweetness: moderate (Oreos do most of the work)
- Time: about 20–25 minutes of hands-on time, then chill
- Size: one 10 cm cake (small, but rich)
Equipment you’ll need
- 10 cm springform pan or small cake ring (with a base)
- Baking paper (highly recommended for easy removal)
- Small saucepan (for melting butter + warming pistachio cream)
- Bowl + hand mixer (or stand mixer)
- Spoon/spatula
If you don’t have a springform, a small bowl lined with plastic wrap can work in a pinch, but slicing won’t be as neat.
Ingredients (with a quick breakdown)
Crust
- 7 Oreo cookies
This is just enough for a solid base in a 10 cm pan. If your pan is slightly larger, bump it to 8–9 cookies. - 25 g butter (melted)
Butter holds the crumbs together and helps the crust set firm in the fridge.
Filling
- 150 ml heavy (whipping) cream
This is where the volume comes from. Whipping it gives that light mousse-like feel. - 70 g mascarpone
Mascarpone adds structure and that rich, slightly tangy dairy taste. It also keeps the whipped cream from collapsing too fast. - 1 tbsp pistachio cream
This gives a gentle pistachio flavor without turning the cake into something overly sweet. (Different brands vary a lot—more on that below.) - 1 sheet gelatin + 2 tbsp water
This is the “slice insurance.” The cake will still taste creamy, but it won’t slump when you cut it.
Topping
- 2 tbsp pistachio cream
Warmed just enough to pour. It sets into a thin layer that makes the cake look finished without extra effort.
Optional decoration: Oreo crumbs, mini Oreos, chopped pistachios, or even a pinch of flaky salt if you like that sweet-salty thing.
About pistachio cream (because they’re all different)
Pistachio cream ranges from thick, nutty pastes to sweeter spread-style jars. If yours is:
- Very thick / paste-like: it may need a little longer over the double boiler to loosen.
- Very sweet / spreadable: use level tablespoons, not heaping ones, or it can take over the whole cake.
- A bit runny: it’ll still work, but the topping layer may set thinner.
No need to overthink it—just taste a tiny bit first so you know what you’re working with.
Step-by-step instructions
1) Prep the pan
Line the bottom of a 10 cm pan with baking paper. If you want extra-easy removal, also line the sides with a thin strip of baking paper or acetate.
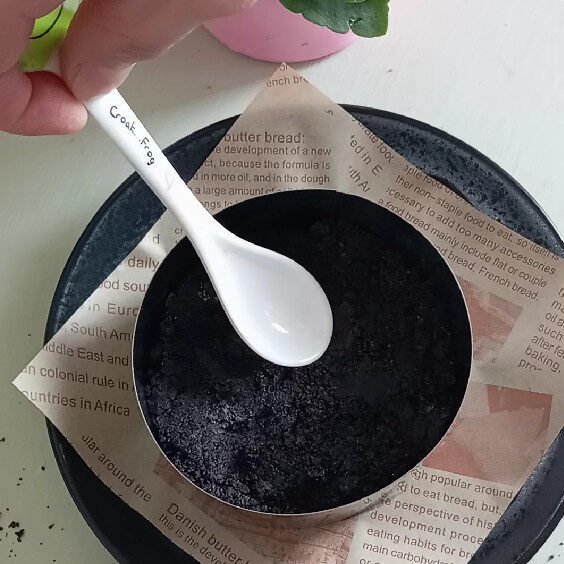
2) Make the Oreo crust
- Grind 7 Oreo cookies into fine crumbs. (Food processor is easiest; a zip bag + rolling pin works too.)
- Melt 25 g butter and mix it into the crumbs until everything looks evenly moistened.
- Press the mixture firmly into the bottom of the pan. I use the bottom of a glass to compact it well—this helps the crust hold together when you slice.
- Pop it in the fridge while you make the filling.
Tip: Press the edges slightly higher than the center if you like a “crust wall,” but it’s optional.
3) Whip the filling
- In a bowl, add 150 ml heavy cream, 70 g mascarpone, and 1 tbsp pistachio cream.
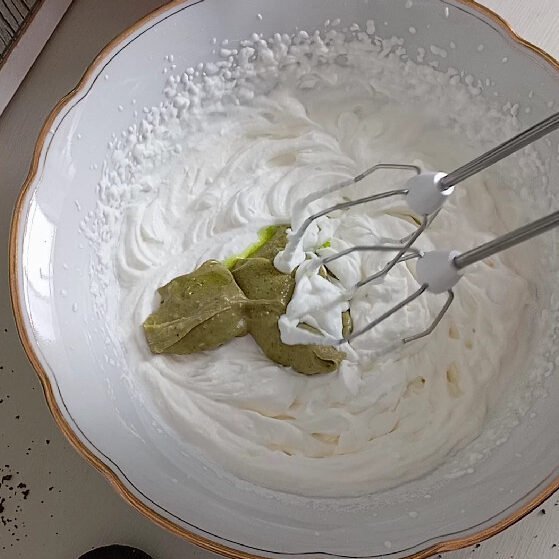
- Whip until it thickens and holds soft peaks. You want it creamy and stable, not overwhipped and grainy.
How I judge it: when the whisk leaves visible trails and the mixture mounds instead of flowing flat, it’s ready.
4) Dissolve the gelatin (sheet method)
- Soften 1 sheet gelatin according to the package directions (usually in cold water for a few minutes).
- Squeeze out excess water.
- Dissolve it with 2 tbsp water (warm it gently until fully melted—don’t boil).
Now work fairly quickly. Gelatin sets as it cools.
5) Add gelatin to the filling
With the mixer on low (or using a whisk), pour the dissolved gelatin into the filling and mix briefly—just until combined.
Important little detail: If your gelatin mixture is warm and your filling is cold, add a spoon of filling into the gelatin first, mix, then pour it back in. It helps prevent tiny gelatin bits.
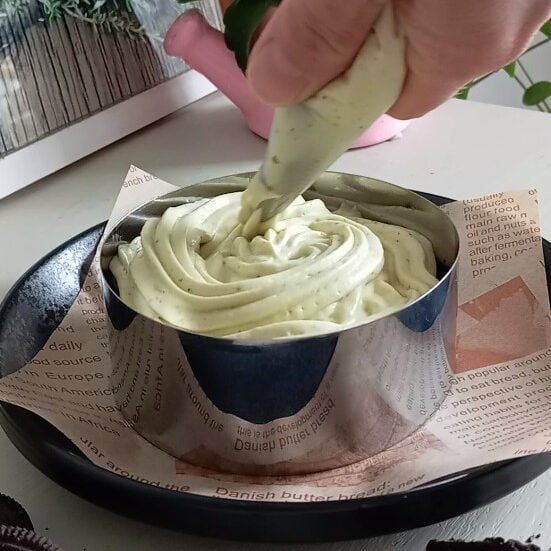
6) Assemble
Spoon the filling over the chilled crust and smooth the top. Tap the pan gently on the counter once or twice to settle air pockets.
7) Add the pistachio topping
- Put 2 tbsp pistachio cream in a heatproof bowl.
- Warm it over a double boiler (or very gently in the microwave in short bursts) until it’s loose enough to pour.
- Pour it on top and tilt the pan so it spreads evenly.
8) Decorate and chill
Top with Oreo crumbs, crushed cookies, chopped pistachios—whatever you’ve got.
Chill until set. I usually give it at least 4 hours, and if I’m not rushing, I leave it overnight for the cleanest slices.
Tips that actually help (from making this more than once)
- Don’t skip pressing the crust firmly. Loose crust = messy slices.
- Mascarpone should be cool, not rock-hard. If it’s too cold, it can clump. I let it sit out 5–10 minutes.
- Stop whipping as soon as it’s stable. Overwhipped cream can turn grainy fast, especially with mascarpone.
- Use a warm knife for neat slices. Dip the knife in hot water, wipe, slice. Repeat.
- If you want more pistachio flavor: add another teaspoon of pistachio cream to the filling (not a whole extra tablespoon unless your pistachio cream is very mild).
- If you don’t have sheet gelatin: powdered gelatin can work, but the amount depends on brand. Use enough to set about 250–300 ml of mixture, and bloom it in the water first.
Storage and make-ahead notes
- Fridge: keeps well for 2–3 days in a covered container.
- Freezer: you can freeze it (wrap well). The texture is a bit more “ice cream cake” after thawing, but still good.
- Make ahead: honestly, it’s better after a night in the fridge. The crust firms up and the topping sets smoother.
Mini Oreo Cake Recipe Card (10 cm)
Yield: 1 mini cake (10 cm)
Prep time: 25 minutes
Chill time: 4 hours (or overnight)
Ingredients
Crust
- 7 Oreo cookies
- 25 g butter, melted
Filling
- 150 ml heavy (whipping) cream
- 70 g mascarpone
- 1 tbsp pistachio cream
- 1 sheet gelatin
- 2 tbsp water
Topping
- 2 tbsp pistachio cream
Optional
- Oreo crumbs/cookies, chopped pistachios for decoration
Instructions
- Prep: Line a 10 cm pan with baking paper.
- Crust: Crush Oreos into fine crumbs. Mix with melted butter. Press firmly into the pan. Chill.
- Filling: Whip cream, mascarpone, and 1 tbsp pistachio cream until thick and creamy.
- Gelatin: Soften gelatin sheet, squeeze out water, then dissolve with 2 tbsp water (warm gently).
- Combine: Mix dissolved gelatin into the filling briefly until smooth.
- Assemble: Spread filling over crust and smooth the top.
- Topping: Warm 2 tbsp pistachio cream until pourable. Pour over the cake and spread/tilt to cover.
- Chill: Decorate as you like. Refrigerate at least 4 hours, preferably overnight.
Notes
- For clean slices, use a warm knife and wipe between cuts.
- Pistachio creams vary in sweetness—taste yours and adjust slightly if needed.