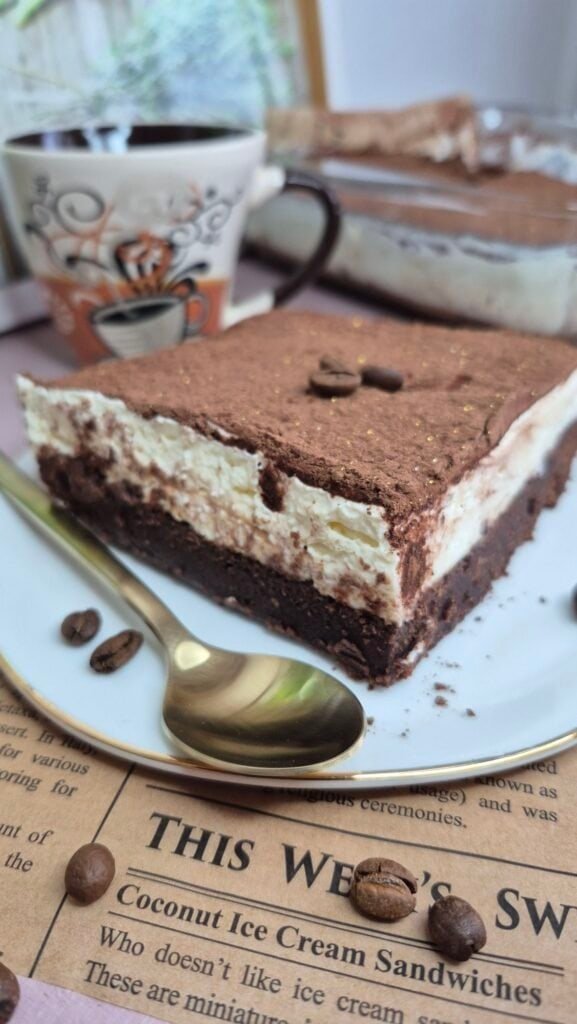
Some cakes are good. Some cakes are great. And then there’s Black Forest Cake – a true classic that never goes out of style. This is the kind of dessert that makes people stop, stare, and immediately ask, “Did you really make this?”.
For me, Black Forest Cake is not just about chocolate and cherries. It’s about layers of soft chocolate sponge, clouds of mascarpone cream, and glossy cherry filling coming together in perfect harmony. Every time I make it, it feels like creating a small piece of edible art.
This version of homemade Black Forest Cake is rich but not heavy, elegant but not complicated, and filled with real fruit flavor, not artificial syrups. It’s a cake that looks like it came from a high-end bakery but can be created in your own kitchen with simple, honest ingredients.
If you’re searching for a true Black Forest Cake recipe, full of flavor, texture, and visual drama, this is the one you want.
Why This Black Forest Cake Is So Loved
This cake has everything a perfect dessert should have:
A soft, fluffy chocolate sponge that stays moist for days.
A fresh cherry filling that’s sweet, juicy, and slightly tangy.
Light mascarpone cream that melts in your mouth.
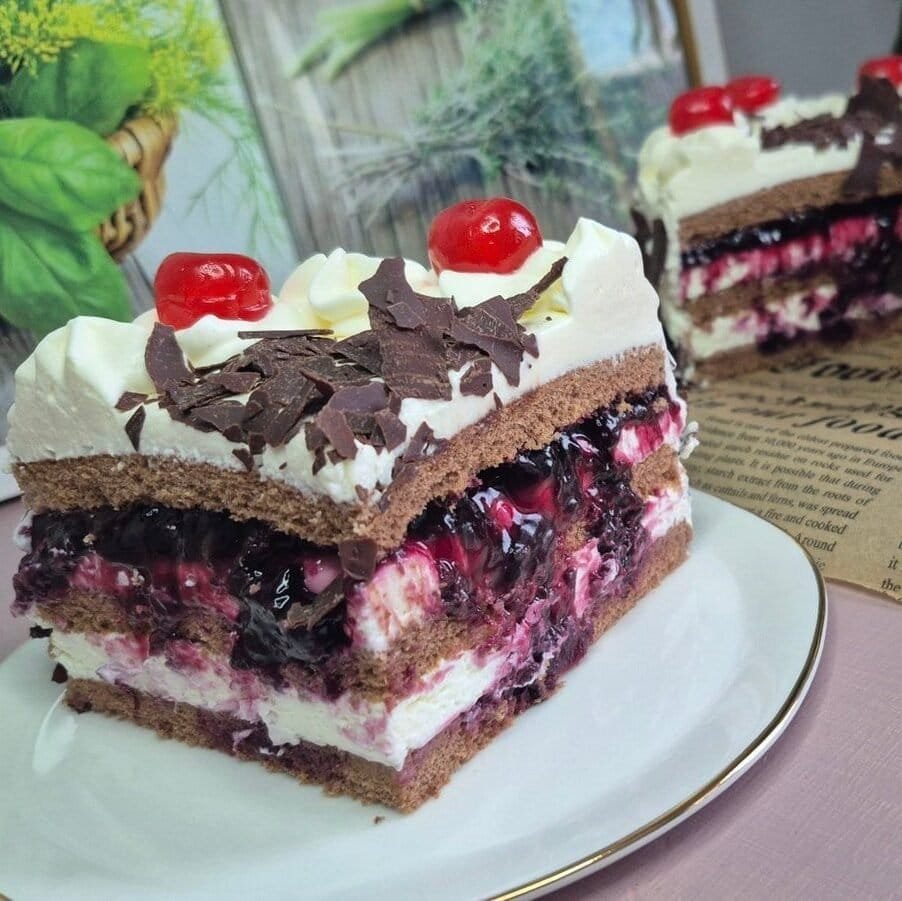
A beautiful chocolate finish that turns heads.
Each slice looks like a celebration and tastes even better than it looks.
Ingredients for the Perfect Black Forest Cake
I believe great cakes start with good ingredients. Here’s everything I use to make this cake taste like pure luxury:
Chocolate Sponge Layers:
- 4 large eggs
- 120 g sugar
- 120 g all-purpose flour
- 2 tablespoons cocoa powder
- 1 packet baking powder
- Vanilla sugar or vanilla extract
- 100 ml milk
Cherry Filling:
- 300 g cherries (fresh or frozen)
- 3 tablespoons sugar
- 1 tablespoon cornstarch + 1 tablespoon water
Mascarpone Cream:
- 250 ml heavy whipping cream
- 250 g mascarpone cheese
- 1 tablespoon powdered sugar
Decoration:
- 50–100 g chocolate
- Candied cherries
How I Make Black Forest Cake From Scratch
This cake comes together in stages, and each stage matters. None of it is complicated, but every step adds to that perfect final result.
Step 1: Baking the Chocolate Sponge Cake
I start by placing eggs and sugar into a large mixing bowl and beating them with a mixer until the mixture becomes pale, thick, and creamy. This step fills the batter with air and makes the final sponge light and fluffy.
In a separate bowl, I sift together:
- Flour
- Cocoa powder
- Baking powder
Sifting removes lumps and makes the sponge incredibly soft.
I then gently mix the dry ingredients into the egg mixture, adding vanilla and milk to create a smooth, velvety batter.
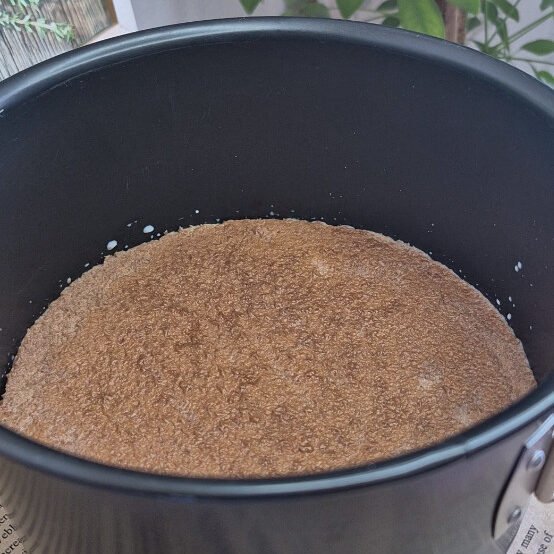
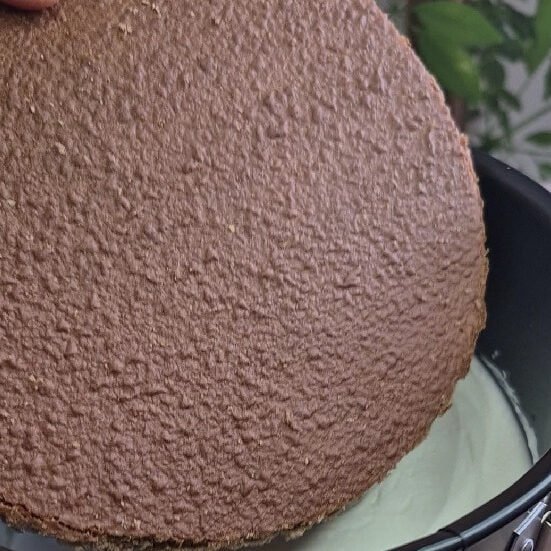
The batter goes into a 20 cm baking pan, lined with parchment paper.
I bake it at 180°C (350°F) for 20–30 minutes, until the cake springs back when lightly touched.
After baking, I let it cool completely before slicing.
Step 2: Creating Perfect Cake Layers
Once the cake is cool, I carefully cut it horizontally into three even layers. This is where the layered magic begins.
Even layers make the cake look professional and balanced when sliced.
Step 3: Cooking the Cherry Filling
This step makes the kitchen smell absolutely incredible.
I place the cherries and sugar in a saucepan and cook them over low heat until they soften and release their beautiful ruby-red juices.
In a small bowl, I mix cornstarch and water and stir it into the cherries. After about one minute, the mixture thickens into a glossy, spoonable cherry compote.
I let this cool completely before using it in the cake.
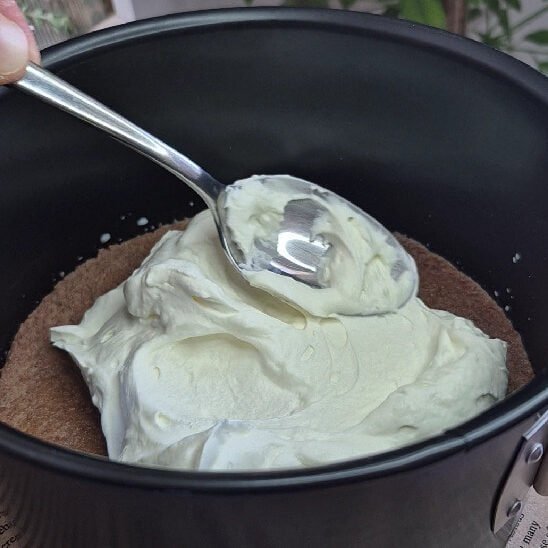
Step 4: Making the Mascarpone Cream
The cream is what gives this Black Forest Cake its soft, luxurious texture.
I whip the heavy cream until it reaches soft peaks. Then I add the mascarpone cheese and powdered sugar, continuing to mix until the cream becomes thick, stable, and silky smooth.
I divide the cream into three equal parts, leaving a little extra for frosting the outside of the cake.
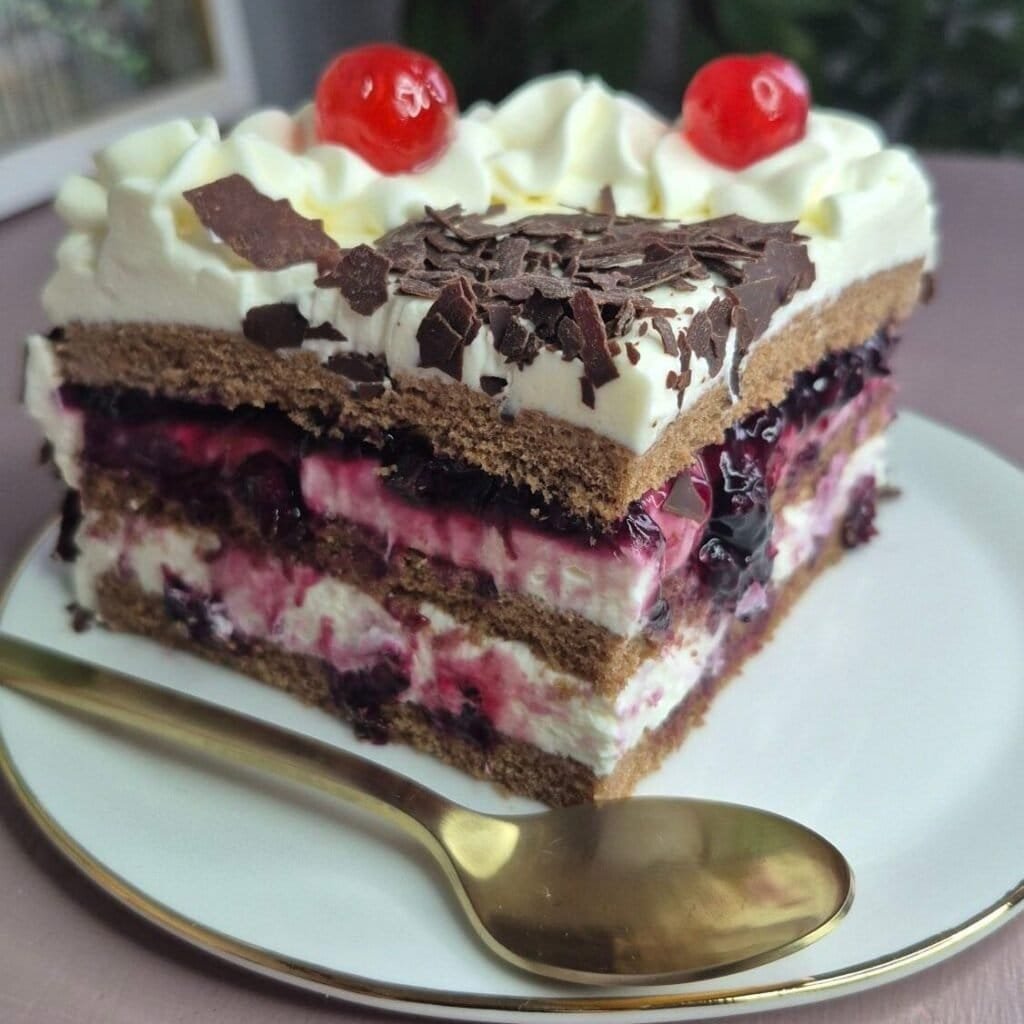
Step 5: Assembling the Black Forest Cake
This is the most satisfying part — watching all the components turn into a real cake.
First Layer:
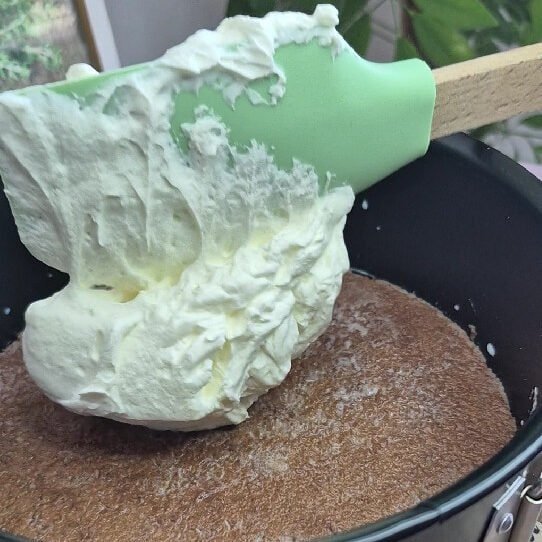
I place the first chocolate sponge layer into the pan and lightly brush it with milk to keep it soft and juicy.
Then I spread a generous layer of mascarpone cream.
Second Layer:
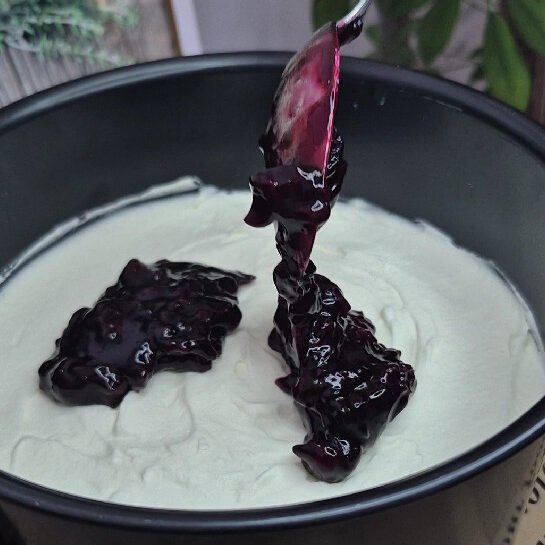
The second sponge goes on top, brushed again with milk, covered with another layer of cream, and topped with the cooled cherry filling.
Third Layer:
The final sponge layer is placed on top, lightly moistened with milk, and covered with the remaining cream.

Step 6: Chilling the Cake
I refrigerate the assembled Black Forest Cake for at least 3 hours.
This step allows the layers to set, the cream to firm up, and the flavors to blend beautifully.
Clean slices depend on proper chilling.
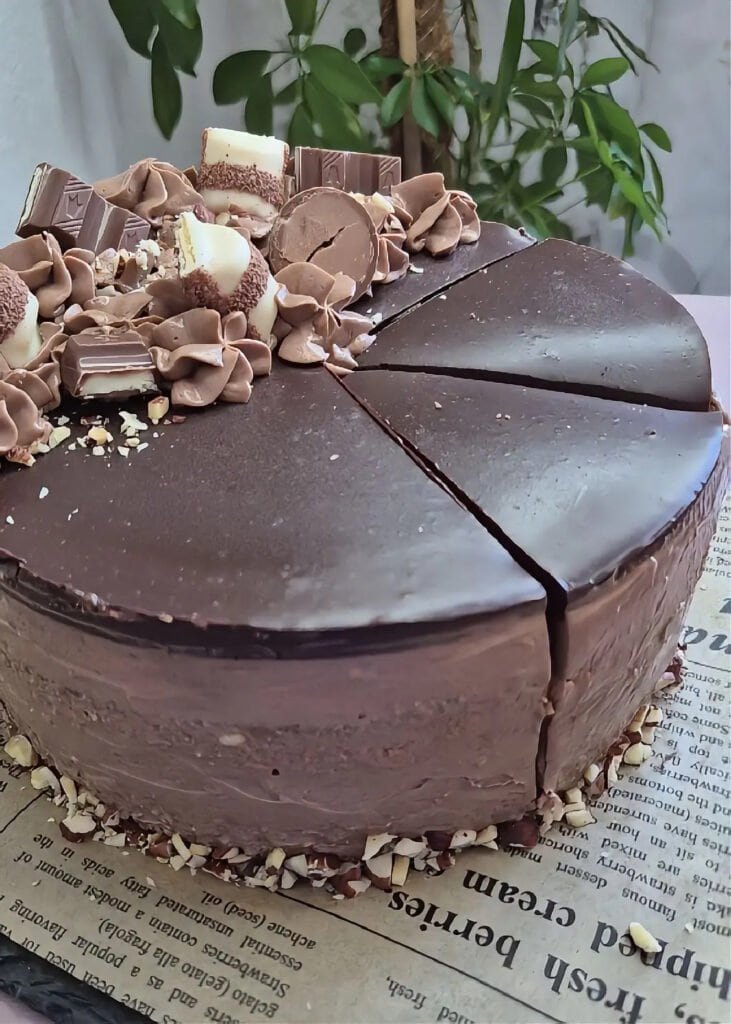
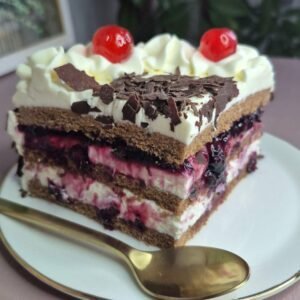
Step 7: Decorating the Black Forest Cake
Once chilled, I frost the sides and top with the extra mascarpone cream.
Then comes the fun part:
- Melted chocolate drizzled on top
- Chocolate shavings or curls
- Candied cherries for a classic Black Forest look
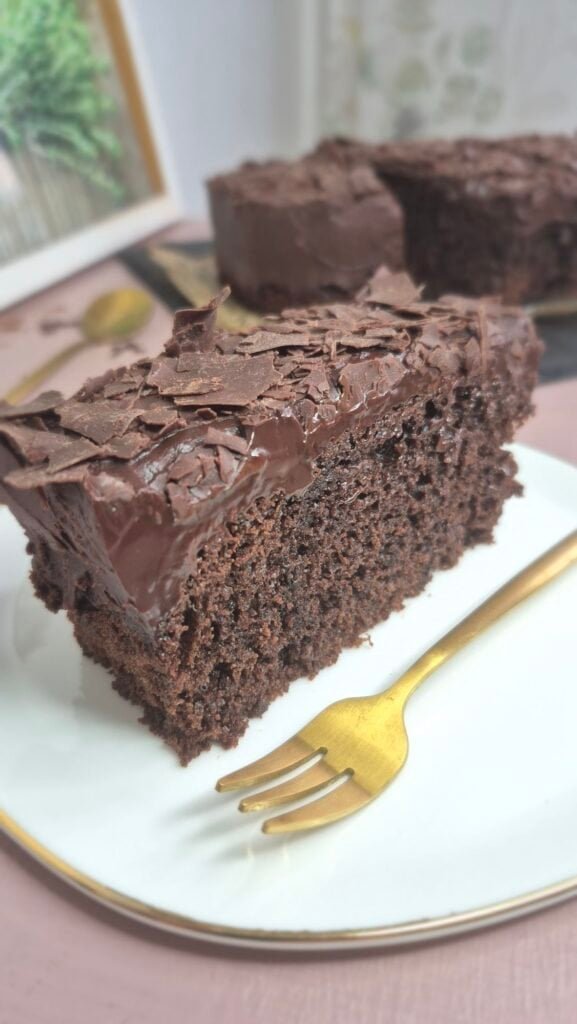
This is the moment when the cake truly looks bakery-perfect.
How This Black Forest Cake Tastes
Each bite is a full experience:
- Deep, rich chocolate flavor
- Light, airy cream
- Juicy cherries with the perfect sweet-tart balance
It’s rich but refreshing, indulgent but not overwhelming.
When to Serve Black Forest Cake
This cake is perfect for:
Birthday parties
Holiday celebrations
Romantic dinners
Family gatherings
Special coffee breaks
It’s a centerpiece cake that brings instant smiles.
Final Thoughts
This Black Forest Cake is pure comfort, beauty, and flavor all in one.
Soft chocolate sponge, silky mascarpone cream, and real cherry filling make this cake unforgettable. Every time I make it, it feels like I’m creating something truly special in the kitchen.
If you’ve never tried baking a classic Black Forest Cake with mascarpone cream, this version will completely win you over.
One slice is simply never enough.
Black Forest Cake
Ingredients
Chocolate Sponge Cake
- 4 large eggs
- 120 g sugar
- 120 g all-purpose flour
- 2 tbsp cocoa powder
- 1 packet baking powder
- 1 packet vanilla sugar or 1 tsp vanilla extract
- 100 ml milk
Cherry Filling
- 300 g cherries fresh or frozen
- 3 tbsp sugar
- 1 tbsp cornstarch
- 1 tbsp water
Mascarpone Cream
- 250 ml heavy whipping cream
- 250 g mascarpone cheese
- 1 tbsp powdered sugar
Decoration
- 50-100 g chocolate
- Candied cherries
Instructions
- Preheat the oven to 180°C (350°F). Line a 20 cm cake pan with parchment paper.
- In a large bowl, beat the eggs and sugar with a mixer until pale, thick, and creamy.
- In a separate bowl, sift together the flour, cocoa powder, and baking powder.
- Gently fold the dry ingredients into the egg mixture. Add the vanilla sugar or vanilla extract and milk, then mix until smooth.
- Pour the batter into the prepared pan and bake for 20 to 30 minutes, or until the cake springs back when lightly touched.
- Let the cake cool completely, then slice it horizontally into 3 even layers.
- To make the cherry filling, place the cherries and sugar in a saucepan and cook over low heat until the fruit softens and releases its juices.
- In a small bowl, mix the cornstarch with the water. Stir it into the cherries and cook for about 1 minute, until the filling thickens. Let it cool completely.
- To make the mascarpone cream, whip the heavy cream until soft peaks form. Add the mascarpone and powdered sugar, then beat until thick, smooth, and stable.
- Divide the cream into 3 portions, reserving a little extra for frosting the outside of the cake.
- Place the first cake layer on a serving plate or in the pan. Lightly brush it with a little milk, then spread with a layer of mascarpone cream.
- Add the second cake layer. Brush lightly with milk, spread with more mascarpone cream, and top with the cooled cherry filling.
- Place the third cake layer on top. Lightly brush with milk and cover the top with the remaining cream.
- Refrigerate the cake for at least 3 hours to set.
- Frost the sides and top with the reserved mascarpone cream.
- Decorate with melted chocolate, chocolate shavings or curls, and candied cherries.
- Slice and serve.
Notes
- Use fresh or frozen cherries for the filling.
- Let the cherry filling cool completely before assembling the cake.
- Chilling is important for clean slices and a stable cake.
- For decoration, you can use melted chocolate, chocolate curls, or chocolate shavings.