If you’ve landed here from TikTok or Instagram — welcome to my kitchen corner!
This is the dessert that has taken over my DMs, the one everyone keeps asking me for, the one I accidentally created one night when I was craving something creamy, fruity, and chocolatey… but didn’t feel like turning on the oven.
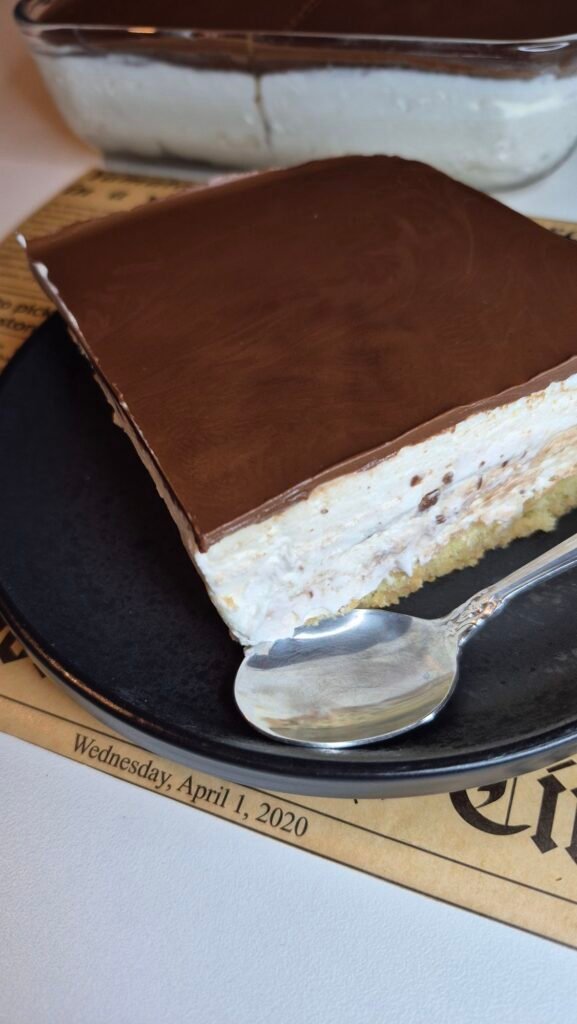
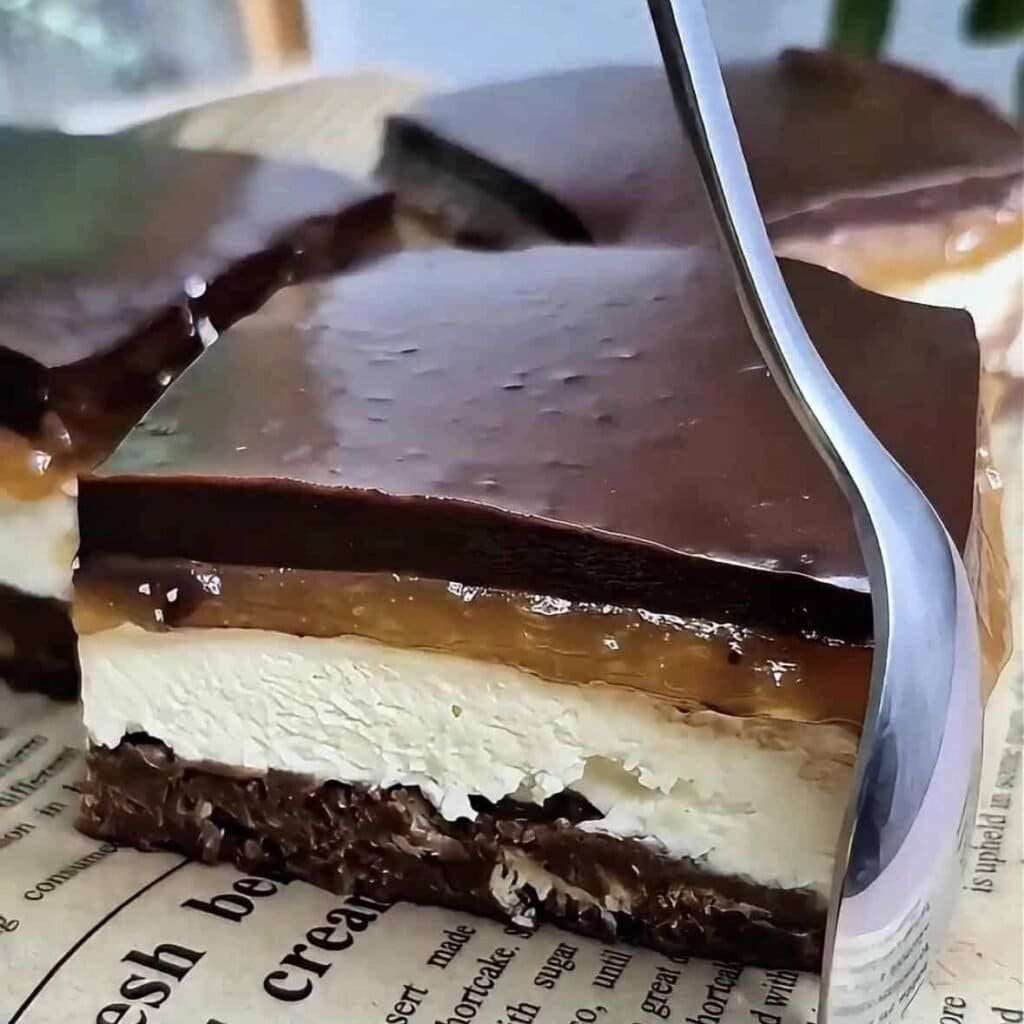
What came out of that late-night experiment is now one of my signature recipes: a silky, airy mascarpone layer, a glossy fruity topping, and the softest chocolate-biscuit base you can imagine. All of this is crowned with a velvety dark chocolate ganache that melts at the first touch of a fork.
And the best part?
It’s completely no-bake.
Takes minimal effort.
Looks like you spent hours making it.
Tastes like something from a patisserie in Italy.
Let me walk you through the whole experience — not just the recipe, but the story behind it, the aroma, the texture, the tiny tricks that make it perfect every time. Grab a cup of coffee, because this is a long, delicious read.
The Night This Cake Was Born
It was one of those evenings when the weather is warm, your playlist is perfect, and you suddenly get hit with a craving for something sweet. I opened my fridge and saw a few things: mascarpone, some leftover apricot jam, and a pack of sweet biscuits hiding in the pantry.
I didn’t want to bake.
I didn’t want anything heavy.
I wanted something refreshing, creamy, and slightly indulgent.
So I started mixing. No plan. No notes. Just vibes and a spoon.
The smell of warm chocolate melting with butter filled the kitchen first — my favorite scent ever. Then the mascarpone started to turn into this cloud-like cream with powdered sugar. I remember dipping my finger in it and thinking, “Oh wow… this is going to be trouble.”
When I poured the warm apricot topping with gelatin over that silky white layer… ufff. Pure magic.
By the time the ganache settled, I knew I’d created something special.
The next day I cut a slice — the cleanest, glossiest slice I’d ever seen — and took my first bite.
That was it. I was done.
This cake became a permanent resident in my dessert rotation.
Ingredients You’ll Need
Here’s the exact list, so you can recreate the same flavor I fell in love with:
Base
- 150 g biscuits (plain or tea biscuits work great)
- 50 g chocolate
- 20 g butter
- 100 ml milk
Filling
- 250 g mascarpone cheese
- 2 tbsp powdered sugar
- 150 ml heavy cream (to whip)
- 200 g apricot or orange jam
- 2 gelatin sheets
- A splash of water
Ganache
- 100 g dark chocolate
- 100 ml heavy cream
- 1 tsp butter
Step-by-Step: How I Make This Cake (And How You Can Too)
You know how some recipes look complicated but are secretly super simple?
This is one of those. Let me break it down exactly how I prepare it.
1. The Soft Chocolate Biscuit Base
This part is like giving your cake a cozy foundation to rest on. It’s rich, slightly chewy, and tastes like childhood chocolate bars melted into biscuit crumbs.
Here’s what you do:
- Crush the biscuits in a bowl into fine crumbs. You can use your hands — it’s therapeutic.
- Melt the chocolate and butter together over steam (or microwave in short bursts, but don’t let it burn!).
- Pour the melted mixture over the biscuits, add the milk, and stir until everything becomes one chocolatey mass.
- Press it into a 20×20 cm pan.
Use the bottom of a glass if you want the surface super neat and flat.
At this point your kitchen already smells warm and chocolatey. I always steal a tiny bite from the mixture — purely for quality control, of course.
2. The Mascarpone Cloud Layer
This is the creamy part that makes everyone go:
“Wait… HOW is this no-bake?!”
Here’s how to make it perfect:
- Mix mascarpone with powdered sugar — just until combined. Do NOT overmix it or it becomes too soft.
- In a separate bowl whip the heavy cream until stiff peaks form.
- Gently fold the whipped cream into the mascarpone using a spatula.
This step is all about lightness.
You don’t want to crush the air bubbles inside the whipped cream. They’re what give this cake its dreamy, cloud-like texture.
Spread this white gold over the base and smooth it out.
It already looks good — but the best is yet to come.
3. The Glossy Apricot (or Orange) Heaven Layer
This is my secret weapon. Everyone expects a classic cream layer—nobody expects this bright, fruity, elegant topping that cuts through the sweetness and gives the cake life.
Do this:
- Warm the jam in a small saucepan.
- Dissolve the soaked gelatin sheets in a tiny bit of hot water.
- Mix the gelatin into the warm jam.
When the jam turns glossy and slightly thinner, pour it over the mascarpone layer.
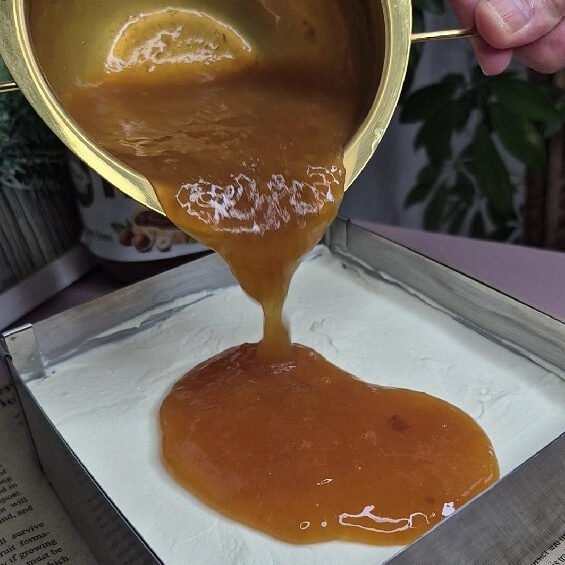
Shake the pan gently so it spreads evenly.
This is the moment when you’ll stare at your cake and think:
“Wow… that looks fancy.”
Chill it for 1–2 hours.
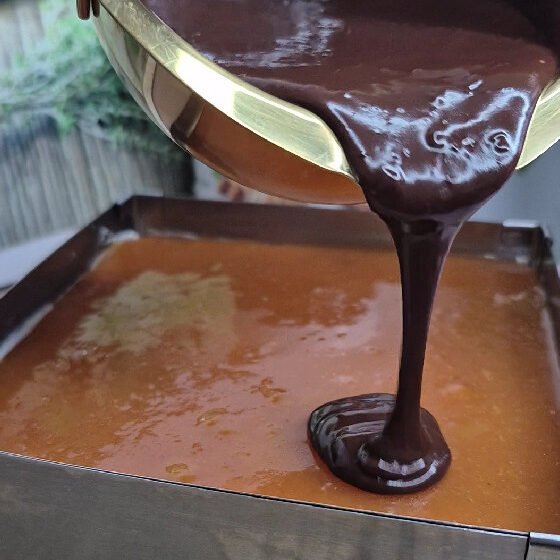
4. The Silkiest Dark Chocolate Ganache
The final touch.
The crown.
The glossy, irresistible, chocolate curtain that ties everything together.
Here’s how to make it flawless:
- Heat heavy cream with butter until just boiling.
- Pour it over chopped dark chocolate.
- Wait a couple minutes, then stir until smooth and shiny.
- Let it cool slightly, then pour it over the chilled cake.
Back to the fridge it goes — give it one more hour so the ganache sets.
Then… it’s slicing time.
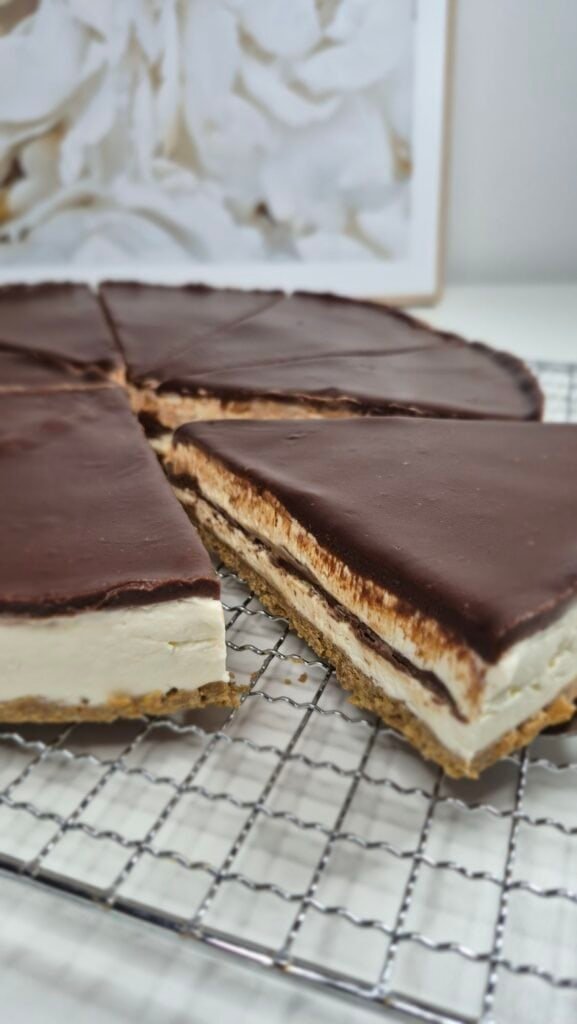
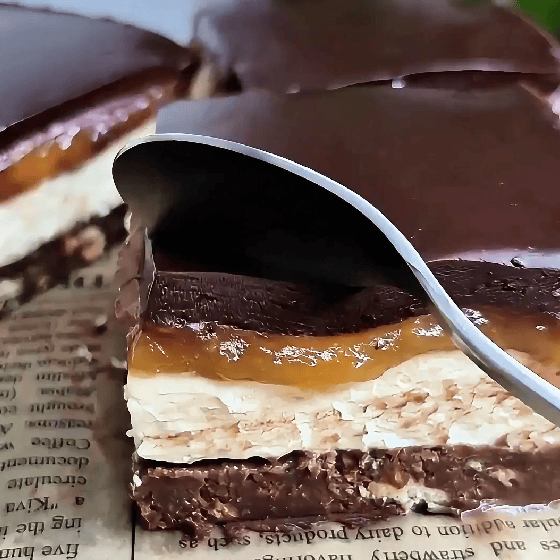
Sharp knife. Clean cut.
That layered cross-section is a whole mood.
What Makes This Cake So Special (Besides Being Delicious)
Let me tell you why this cake went viral on my socials:
Looks expensive — but is incredibly easy
Every layer looks professionally made. People think you spent all day making it. Let them think that.
No oven needed!
Hot day? Broken oven? No problem.
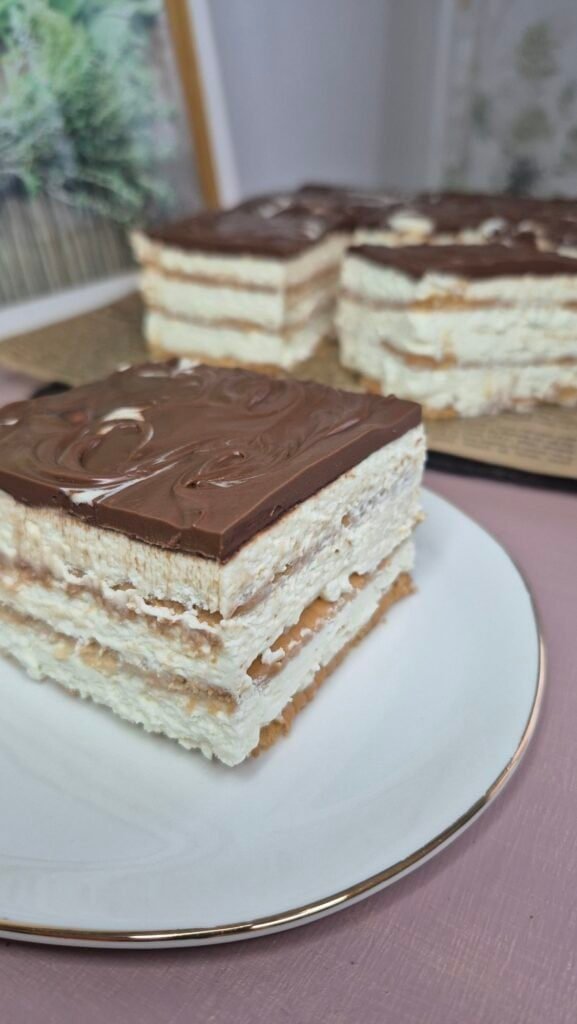
Texture heaven
- Base = soft + chocolatey
- Middle = creamy clouds
- Jam = fruity brightness
- Ganache = smooth, rich, and elegant
The flavor combo is perfection
Apricot + mascarpone + dark chocolate…
Trust me, it hits all your senses at once.
Ideal for birthdays, gatherings, or midnight cravings
Ask me how I know.
Tips & Tricks From My Kitchen
Let me share the tiny details that make a big difference:
1. Don’t overmix the mascarpone
It gets runny fast. Stop as soon as sugar disappears.
2. Whipped cream MUST be stiff
Otherwise your middle layer will be too soft to hold the jam and ganache.
3. Gelatin goes into warm jam — not cold
Cold jam will cause lumps.
4. Cut clean slices by warming your knife
Dip it in hot water, wipe, slice.
Your cake will look like it came from a bakery.
5. Refrigeration is your friend
The more time it rests, the better the layers stabilize and blend.
My Honest Review of My Own Cake
I’ve made many desserts, but this one…
This one hits differently every single time.
There’s something comforting about the biscuit base, nostalgic even. The mascarpone cream is so airy it practically floats. The fruity jelly-like topping gives each bite a sparkle. And the chocolate ganache? It’s the bold, dramatic finishing touch the cake absolutely needs.
Every spoonful has contrast — soft, chewy, creamy, fruity, rich.
It’s like a little symphony of textures.
Whenever I serve it, there’s silence for a few seconds.
People take a bite, process it, and then you hear:
“Can you send me the recipe?”
So here you are.
Want to Share It on TikTok / Instagram?
Please do!
Tag me so I can repost your cake — I love seeing your recreations.
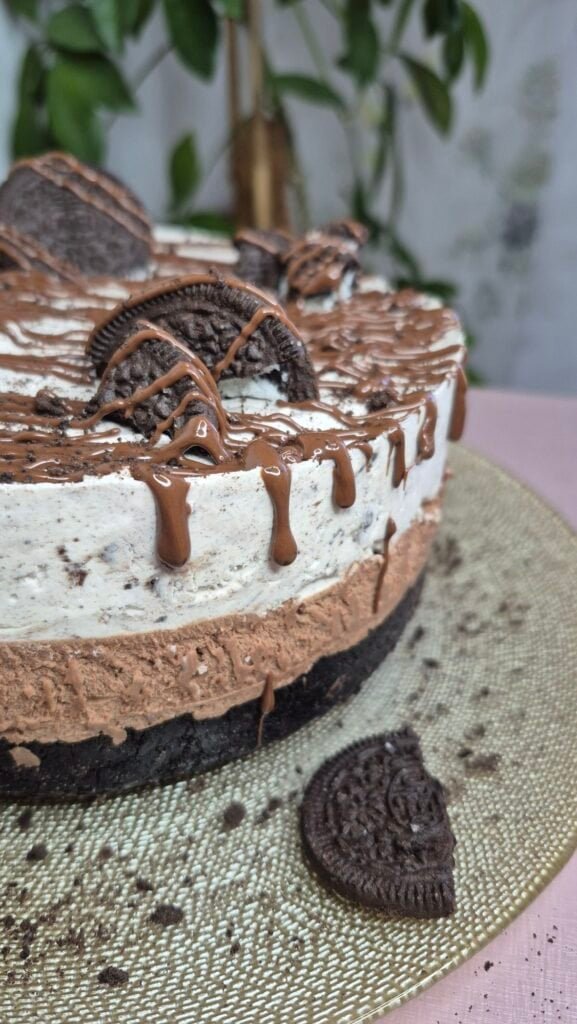
Also, if you add your own twist (strawberry jam, raspberry jam, white chocolate ganache…), I definitely want to see it!
Full Recipe (Quick Version You Can Screenshot)
Ingredients
Base:
- 150 g biscuits
- 50 g chocolate
- 20 g butter
- 100 ml milk
Cream Layer:
- 250 g mascarpone
- 2 tbsp powdered sugar
- 150 ml whipped cream
- 200 g apricot/orange jam
- 2 gelatin sheets
- Splash of water
Ganache:
- 100 g dark chocolate
- 100 ml cream
- 1 tsp butter
Steps
- Crush biscuits. Melt chocolate + butter. Add milk. Press into 20×20 cm pan.
- Mix mascarpone + sugar. Whip cream separately. Fold together. Spread over base.
- Warm jam. Add dissolved gelatin. Pour over cream layer. Chill 1–2 hours.
- Heat cream + butter. Pour over chocolate. Stir. Let cool slightly. Pour over cake.
- Chill 1 more hour. Slice and enjoy.
Final Thoughts
If you’re searching for a dessert that’s easy, elegant, and unforgettable, this is the one.
It never fails.
It never disappoints.
And it always makes people think you’re some kind of pastry genius.
(You are, by the way.)
If you want more of my no-bake magic recipes, just let me know — I have plenty.