There’s something truly comforting about a dessert that feels like a hug — one that’s creamy, chocolatey, and soft, yet simple enough to make in your own kitchen without stress. This layered chocolate and cream cake is exactly that kind of dessert.
It’s made from the most ordinary ingredients — biscuits, milk, chocolate, mascarpone, and Nutella — yet when they come together, they create something that feels luxurious and special.
I’ve made this cake more times than I can count, and every single time, it disappears in minutes. It’s smooth, it’s rich, and every bite melts in your mouth with that perfect mix of chocolate and cream.
The best part? It’s not complicated at all. There’s no long baking time, no tricky steps — just simple mixing, layering, and chilling. It’s the kind of dessert that makes you look like you spent hours making it, but really, it’s as easy as stirring, spreading, and waiting for the magic to happen.
Let me tell you exactly how I make it — and why it’s one of my all-time favorite chocolate desserts.

Ingredients
You’ll need just a few basic ingredients, and chances are, you already have most of them at home.
For the base:
- 200 g plain biscuits (Petit Beurre, digestive, or any simple type you love)
- 50–100 ml milk (enough to soften the biscuits)
- 100 g Nutella (for spreading between biscuit layers)
- 100 g chocolate (dark or milk, your choice)
- 100 ml heavy cream (for melting the chocolate)
For the white cream filling:
- 250 g mascarpone cheese
- 2 tablespoons powdered sugar
- 100 ml heavy cream
For the Nutella cream filling:
- 250 g mascarpone cheese
- 2–3 tablespoons Nutella
- 50 ml heavy cream
For the chocolate topping (ganache):
- 100 ml heavy cream
- 100 g chocolate (milk or dark — whichever you prefer)
Step-by-Step Guide
Now comes the fun part — layering all this goodness together. I promise, it’s so much easier than it looks.
Step 1: Prepare the Base
Start with your biscuits — they’re the foundation of the cake. I usually go for a simple, light biscuit like Petit Beurre because it soaks up the milk beautifully and stays tender but not soggy.
Pour a little milk into a shallow bowl. One by one, dip each biscuit into the milk — not too long, just a quick dip on each side. You want them soft enough to layer easily, but not falling apart.
Line a 20×20 cm square pan with the soaked biscuits. Try to cover the entire bottom — if you need to break a biscuit or two to fit the edges perfectly, go for it.
Now melt your Nutella gently (you can do this in the microwave for about 10 seconds or place the jar in a bowl of warm water). Once it’s soft, spread it evenly over the biscuits. This is the first layer of flavor — rich, nutty, and sweet.
You’ll already smell the hazelnuts and chocolate mixing with the warm, buttery scent of the biscuits. It’s that little moment when you realize how simple ingredients can already start to smell divine.
Step 2: Make the White Cream Filling
In a medium bowl, mix together mascarpone cheese and powdered sugar. Don’t overmix — you just want them to blend into a smooth, silky texture.
In another bowl, whip the heavy cream until it’s thick and holds soft peaks.
Now, take a spatula and gently fold the whipped cream into the mascarpone mixture. The texture should be light, fluffy, and creamy — like soft clouds.
Divide this white cream into two equal parts. You’ll use one half for the middle layer and one for the top later on.
The first time I made this cream, I couldn’t stop tasting it. It’s so simple — just mascarpone, cream, and sugar — but it feels luxurious, like something you’d find in a patisserie window.
Step 3: Make the Nutella Cream Filling
In another bowl, mix the mascarpone cheese with Nutella until smooth. The mixture will turn into a gorgeous light mocha color.
In a separate bowl, whip 50 ml of heavy cream, just as before. Then gently fold the whipped cream into the Nutella mixture using a spatula.
The result is a velvety chocolate-hazelnut filling that’s rich but airy at the same time.
Now you have two perfect creams — one white and light, the other rich and Nutella-infused. They’ll create beautiful contrast when layered in the cake.
Step 4: Start Layering
Here comes the fun part — assembling the cake.
You already have the first biscuit layer covered with Nutella. Now it’s time for cream.
Take half of the white mascarpone cream and spread it gently over the Nutella-coated biscuits. Use the back of a spoon or a spatula to make the layer smooth and even.
Next, add another layer of biscuits dipped in milk, just like before.
Now spread the Nutella cream on top of that second biscuit layer. Smooth it out, taking your time — there’s something so satisfying about spreading creamy filling over soft biscuits.
Then, add your third layer of biscuits, again dipped quickly in milk.
Finally, spread the remaining white cream on top. This will be your finishing layer before the chocolate topping.
At this point, your cake should already look beautiful — neat layers of biscuit, cream, and chocolate peeking through the sides.
Step 5: Chill
Place the cake in the refrigerator for 2–3 hours. This resting time allows the biscuits to absorb the cream and soften into a perfect cake-like texture.
When you check it later, you’ll notice the layers have come together, and the cake feels firm yet creamy to the touch.
Step 6: Make the Chocolate Topping
This final step gives the cake its glossy, decadent finish.
In a small saucepan, heat 100 ml of heavy cream until it just begins to boil. Remove it from the heat and pour it over the chopped chocolate in a bowl.
Let it sit for a few minutes, then stir gently until it becomes smooth, shiny, and silky. This is your ganache — pure chocolate luxury.
Let the ganache cool slightly before pouring it over the chilled cake. You don’t want it to be too hot or it will melt the cream layers.
Pour it slowly over the top, letting it spread naturally to the edges. You can tilt the pan a little to help it coat evenly.
The glossy surface looks absolutely stunning — like liquid chocolate glass.
Step 7: Final Chill & Serve
Place the cake back into the fridge for another hour (or overnight if you can wait — the flavor and texture only get better).
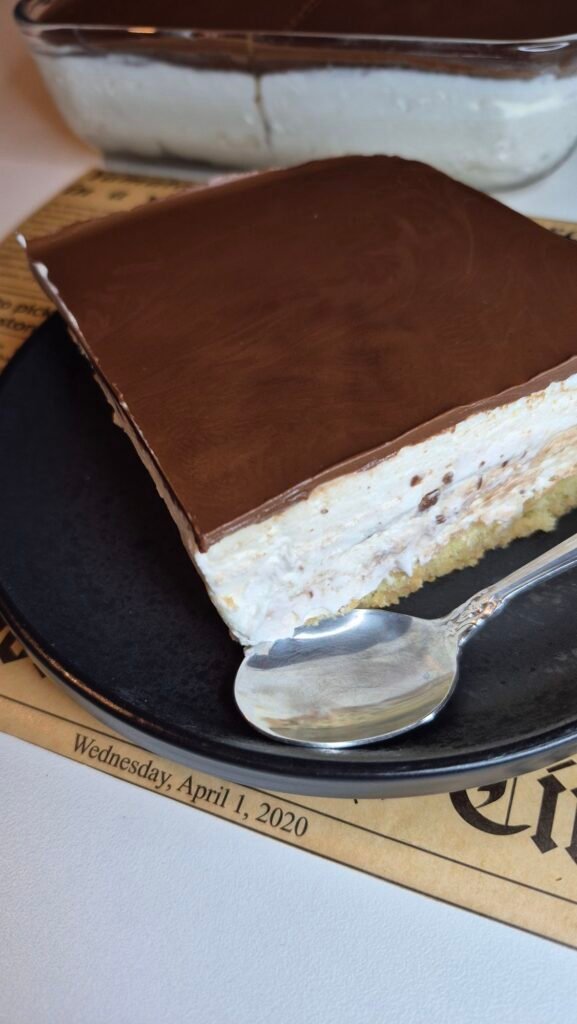
When it’s ready, slice it into neat squares or rectangles. You’ll see the beautiful layers — the soft biscuits, the two-tone creams, and that smooth chocolate top.
Each bite is perfection: creamy, chocolatey, slightly nutty from the Nutella, and with that soft biscuit base that ties it all together.
The Taste
It’s hard to describe how heavenly this dessert tastes, but let me try.
The first flavor that hits you is the chocolate ganache — smooth, rich, and bittersweet. Then comes the light mascarpone cream that balances everything out. The biscuits add just enough structure to keep it all together, and the Nutella filling brings that warm, cozy hazelnut sweetness that makes every bite addictive.
It’s soft but not mushy, creamy but not heavy. It feels elegant yet comforting — the kind of dessert you could serve at a dinner party or enjoy with coffee on a quiet Sunday afternoon.
Sometimes I like to add a few shaved chocolate curls or chopped hazelnuts on top for decoration, but honestly, it’s beautiful even plain — that shiny, dark chocolate top says it all.
When to Serve It
This cake fits every mood and moment:
- After dinner, when you want something sweet but not overwhelming.
- At birthdays, especially if you want a no-fuss dessert that still looks fancy.
- During holidays, when everyone’s around the table, and you want to bring something that makes people go “wow.”
- With coffee or tea, in the afternoon — because chocolate and coffee are simply made for each other.
It’s also the perfect make-ahead dessert. You can prepare it a day early, let it chill overnight, and serve it the next day — the texture only gets creamier.
Personal Touch
Every time I make this cake, I’m reminded why I love desserts like this — they’re proof that you don’t need fancy equipment, expensive ingredients, or complicated steps to make something special.
There’s something intimate and satisfying about layering biscuits and cream by hand, about melting chocolate slowly, about smoothing the final layer and knowing that in a few hours, you’ll cut into something beautiful you made yourself.
And maybe that’s what makes this cake so special. It’s not just about taste — it’s about the process. It’s about the small rituals of dessert-making that feel comforting and rewarding.
Variations You Can Try
If you want to experiment a little, here are a few lovely twists:
- Add a layer of sliced bananas or strawberries between the cream layers for a fruity touch.
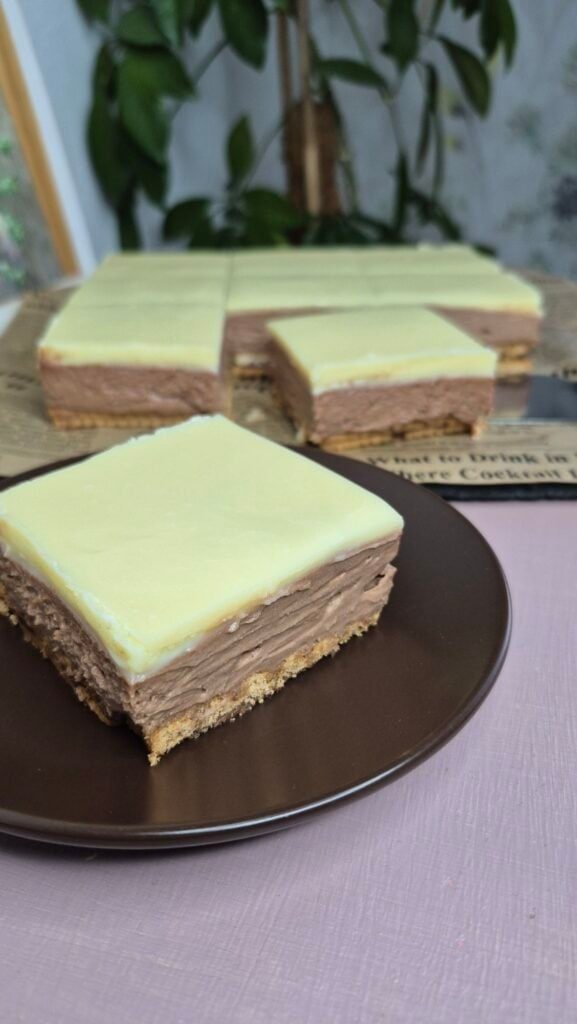
- Use white chocolate ganache instead of dark for a sweeter, creamier topping.
- Add chopped hazelnuts or toasted almonds on top for a little crunch.
- Mix a teaspoon of coffee or espresso powder into the Nutella cream for a mocha twist.
Every version feels slightly different but equally delicious.
Storage
This cake keeps beautifully in the fridge for up to 3 days. Just cover it with plastic wrap or store it in an airtight container.
It’s best served cold — that way, the layers hold together perfectly, and the ganache keeps its smooth texture.
The Feeling of Sharing
The best part of this cake isn’t just eating it — it’s seeing the look on people’s faces when they take that first bite. That quiet, happy silence when everyone just closes their eyes for a second — that’s the magic moment.
It’s rich but not heavy, sweet but balanced, and so satisfying. You can serve it in neat squares on pretty plates, drizzle a little melted Nutella on top, or even dust it with cocoa powder.
No matter how you present it, it always looks beautiful — because desserts made with love always do.
Final Thoughts
If I had to describe this cake in one sentence, I’d say: it’s the taste of comfort dressed in elegance.
Every layer tells a story — the soft biscuits holding everything together, the smooth creams that melt like clouds, and the glossy chocolate top that adds that final, irresistible touch.
It’s one of those recipes you’ll find yourself coming back to, over and over again. Because once you’ve tasted it, it becomes more than just a dessert — it becomes a ritual, a little piece of homemade happiness.
So next time you need something sweet, something beautiful, something that feels like love on a plate — make this. It’ll never disappoint.